
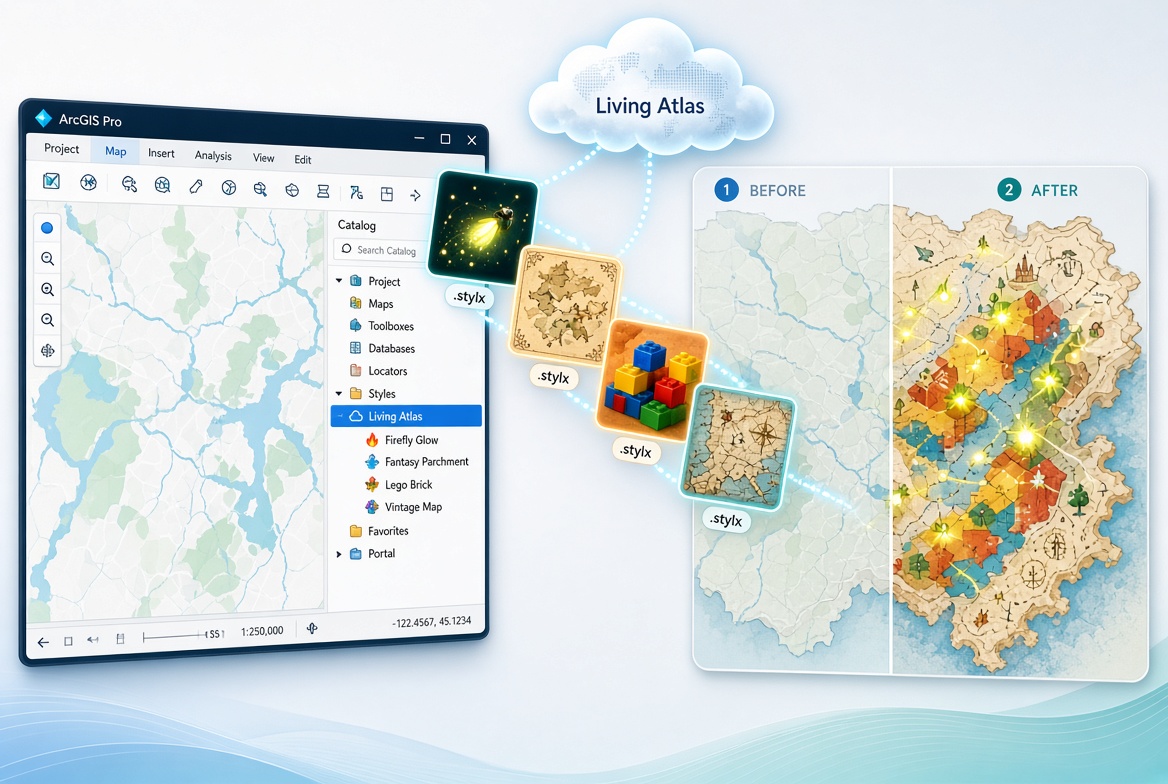
Styles are one of the most underused productivity and design tools in ArcGIS Pro. They package symbols, colors, color schemes, text styles, and layout elements so you can apply consistent, high-quality cartography across projects without reinventing the wheel every time. While ArcGIS Pro ships with a solid set of system styles, the real treasure trove lives in ArcGIS Living Atlas and ArcGIS Online: creative, industry-specific, and community-authored styles that can instantly elevate your maps.
This article walks you through finding, adding, and managing styles from Living Atlas so you can start using them right away.
Why Bother with Living Atlas Styles?
Living Atlas (and the broader ArcGIS Online ecosystem) hosts hundreds of .stylx files. Many come from Esri cartographers and external creators such as John Nelson, whose styles—Firefly, Plastic Brick (Lego-style), “One Style to Rule Them All” (Tolkien-inspired fantasy), vintage paper textures, and more—have become popular for turning ordinary data into visually distinctive maps.
Instead of building complex multi-layer symbols from scratch, you can drop a ready-made style into your project and start applying professional or creative symbology in seconds.
Method 1: Add Styles Directly from Living Atlas in ArcGIS Pro (Recommended)
- Sign in to ArcGIS Online (or your ArcGIS Enterprise portal) inside ArcGIS Pro.
- Open the Catalog pane (View → Catalog Pane if it’s not already open).
- Click the Portal tab, then select the Living Atlas icon (the green book-and-cloud symbol).
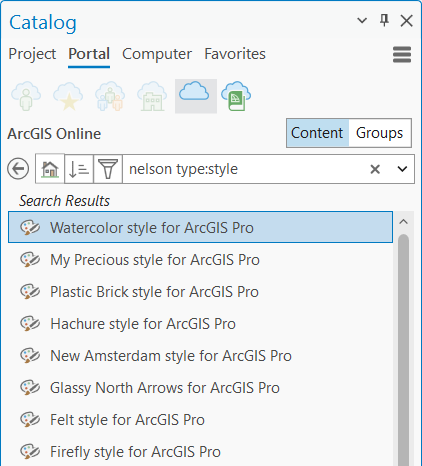
- In the search box, type a keyword followed by type:style.
Examples:- firefly type:style
- fantasy type:style
- vintage type:style
- nelson type:style
- Browse the results. Hover over an item to see a short description and a link to its item page.
- Right-click the style you want and choose Add Style.
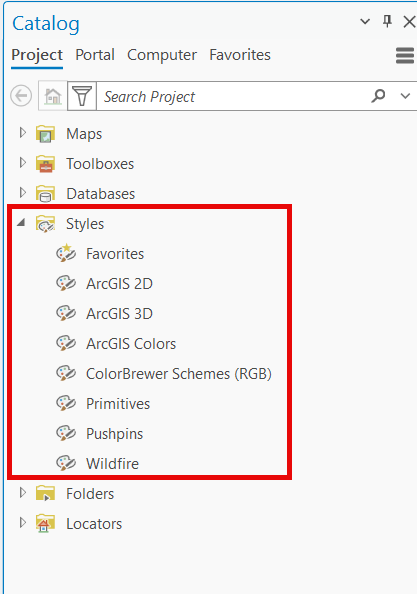
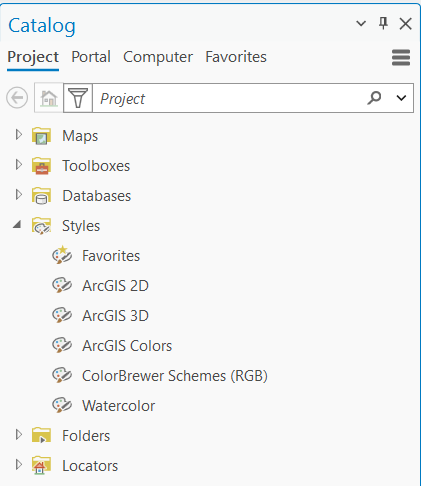
The style is added to your current project and appears under the Styles folder in the Catalog pane. Its contents now show up in the symbol galleries when you symbolize layers or work with layouts.
Tip: If you don’t see many results while signed into an Enterprise portal, switch to an ArcGIS Online account. Some styles are more discoverable (or only available) through the public Living Atlas connection.
Method 2: Use the Insert Tab Browse Dialog
- On the ribbon, go to the Insert tab.
- In the Styles group, click Add → Add Style.
- In the dialog that opens, expand Portal on the left and choose Living Atlas (or ArcGIS Online).
- Search for stylx or a specific style name.
- Select the style and click OK.
This method is especially useful when you already know the exact name of a style.
Method 3: Discover and Download First (Often the Cleanest Workflow)
Sometimes it’s easier to explore styles in a web browser:
- Go to esri-styles.maps.arcgis.com or search ArcGIS Online with the Styles filter applied.
- Find a style you like and download the .stylx file.
- In ArcGIS Pro, use Insert → Add Style and browse to the downloaded file on your computer.
Downloaded styles are stored locally, so you always have offline access. Styles added directly from Living Atlas are typically cached under:
C:\Users\[YourName]\Documents\ArcGIS\OnlineStyles
You can reuse that local copy in other projects without searching Living Atlas again.
Managing Styles Once They’re in Your Project
- Explore the contents
Open a Catalog view (View → Catalog View), expand the Styles container, and double-click a style. You’ll see the different style classes (Point symbols, Line symbols, Polygon symbols, Colors, Color schemes, Text symbols, etc.). You can review names, tags, and (for editable styles) properties.

- Copy items between styles
Drag symbols or other items from a Living Atlas style into your Favorites style or a custom style you created. This is the best way to keep only the symbols you actually use. - Remove a style you no longer need
Right-click it under the Styles container and choose Delete. This only removes it from the current project; the file itself remains available elsewhere. - Make a style available in every new project
- Connect to the folder that contains the style (or use the OnlineStyles folder).
- Select the style in a Catalog view.
- On the Catalog tab, click Add To New Projects.
The style is pinned under My Favorites and will automatically appear in future projects.
- Upgrade older styles
If ArcGIS Pro warns that a style is from an older version, right-click it and choose Upgrade. Pro creates an editable copy compatible with the current version.
Quick Tips for Better Results
- System styles that ship with ArcGIS Pro are read-only. Living Atlas and custom styles are usually editable, so you can tweak symbols after adding them.
- Search with type:style is the most reliable way to surface styles inside the Living Atlas pane.
- Combine Living Atlas styles with Living Atlas texture tiles (watercolor paper, parchment, etc.) and blend modes for even richer map designs.
- If you create your own style, you can share it back to ArcGIS Online by right-clicking it in the Catalog pane and choosing Share As Web Style.
Getting Started Ideas
Try adding one of these popular styles and applying it to a simple dataset:
- Firefly style – glowing, luminous symbols
- Plastic Brick / Lego style – fun, blocky cartography
- Fantasy / “One Style to Rule Them All” – hand-drawn Tolkien-inspired look
- Vintage or paper-texture styles – classic map aesthetics
Once the style is in your project, open the Symbology pane for any point, line, or polygon layer and browse the new galleries. You’ll immediately see the difference.
Living Atlas styles turn cartography from a time-consuming chore into a fast, creative process. Spend a few minutes adding a couple of your favorites today, and you’ll have a ready-made design toolkit for every future project.
Happy mapping!
