
In this tutorial, you’ll learn how to append new data to existing data in Pro using the Append tool.
The Append Tool in ArcGIS Pro is used to add new features or other data from multiple datasets into an existing dataset. It adds new data to an existing dataset of the same data type: for example, you can add new raster data to an existing raster dataset, or one or multiple tables to an existing table. Because you are adding new data to an existing dataset, the existing dataset will be changed. If you want to combine multiple existing datasets to a new dataset, the Merge tool is recommended. This tool will not change your source data.
When appending new data to existing data, attribute data is added to an existing dataset and not just map features. If the field values (column names) of both attribute datasets are the same, there is no problem in combining one dataset with anotoher. But if there are differences between the source and target data, you need to give Pro some additional information how to append data to your existing dataset. We’ll see how this works below.
STEP 1: Download the data and create a new, empty project in Pro
Open Pro and create a new project using a map template. We’ll be using the Natural Earth quick start kit dataset, that can be downloaded here. Add a folder connection by clicking on the folder icon in the Catalog pane and choose the data folder with the downloaded dataset. You are now able to add data directly from this dataset to the map window, which is what we’ll do next.
STEP 2: Load and inspect the data
We’ll be using two different shapefiles that both contain lake polygon features. Add the following two shapefiles to the table of contents by dragging each file from the Catalog pane to the map window: ne_50m_lakes.shp (found in the 50m_physical subfolder) and ne_110m_lakes.shp (found in the 110m_physical subfolder). Next, open up both associated attribute tables and notice the total amount of features (rows) for each shapefile: ne_50m_lakes.shp has a total of 275 features, while ne_110m_lakes.shp has only 25 features.
We could choose to append the two files one way or another, but that doesn’t make a lot of sense as ne_110m_lakes.shp is a subset of ne_50m_lakes.shp: the 25 features of ne_110m_lakes.shp are also found in the other file. It would make more sense to append new features to an existing dataset without the possibility of adding duplicates. For example, we could make a selection of one or more features from the ne_50m_lakes.shp that are not found in the other file and append these. This is what we’ll do next, but first have a look at the field names of both files in the attribute table. You’ll notice that these are similar, but not identical: ne_50m_lakes.shp has a “note” and “namepar” field that are not present in the other file. This is important to know when using the Append tool.
STEP 3: Select a single feature to be appended to the target dataset
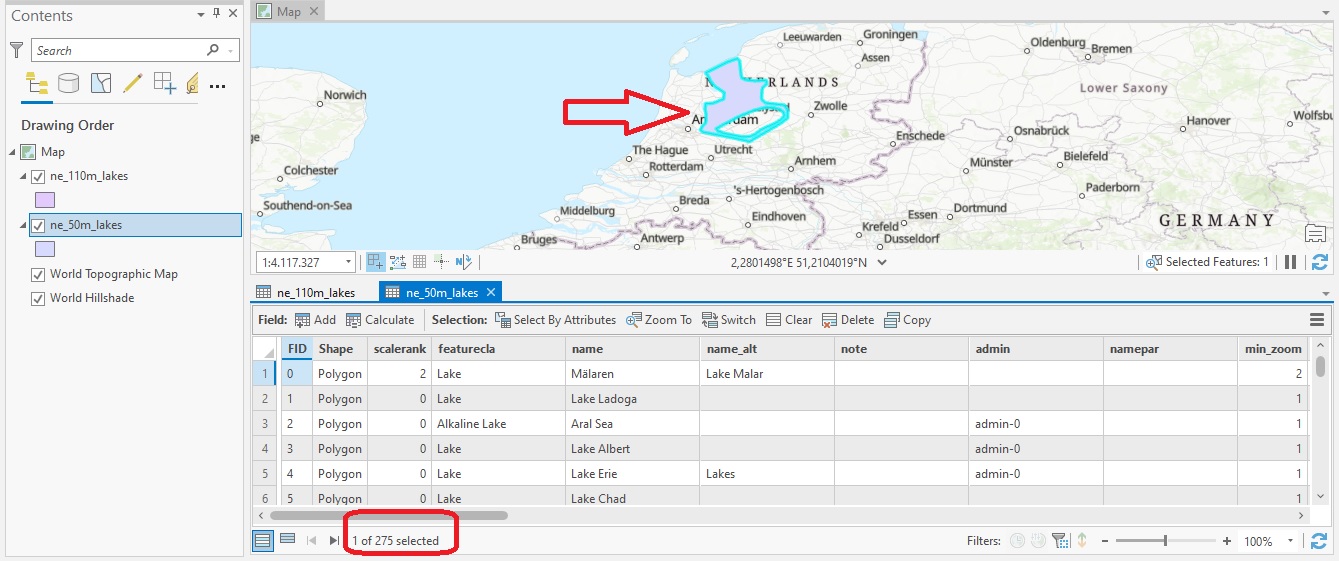
Make sure that the ne_110m_lakes.shp file is placed on top of the other file by dragging it to the top of the layer list in the table of contents. Because both shapefiles are now overlaid on top of each other on the map, you can easily see which features are only present in the ne_50m_lakes.shp by deselecting it in the table of contents (make sure you’re using the Drawing Order pane). We will select one such feature from this layer and append it to the ne_110m_lakes.shp with only 25 features, which should have 26 features as a result of using the Append tool. You can zoom to a feature of your choice, but for this tutorial, I will use a lake polygon feature in The Netherlands. To select a feature directly from the map, zoom in on the map and click “select” on the map window from the ribbon interface. You can select “rectangle” or any other shape of your choice and make sure you draw the shape around the feature of your choice on the map. Now that you have selected a single feature, you can see in the image below that is now selected in the associated attribute table:
STEP 4: Use the Append Tool and inspect the target dataset to see if the data has been appended correctly
We can now use the Append Tool to append the single feature from ne_50m_lakes.shp to the ne_110m_lakes.shp (this last file will be our target dataset). Select the Geoprocessing tab by clicking the Analysis tab on the ribbon interface and click “Analysis”. Search for the Append tool (Data Management tools) and double-click the tool icon. Use the following settings to append the feature to the target dataset:
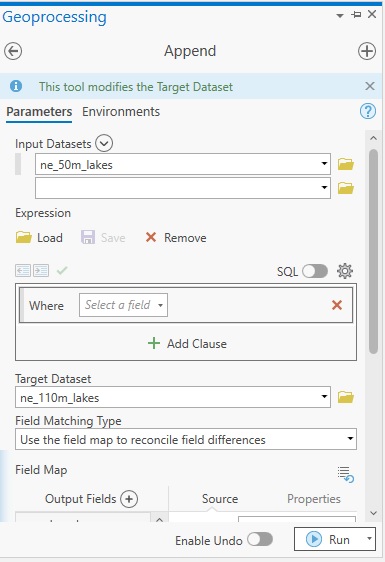
Only the selected feature of the input dataset will be appended to the target dataset. Because the field list of both datasets are not exactly identical, you will have to choose the option “use the field map to reconcile field differences” under Field Matching Type. Leave all other settings as they are and click “Run” to run the tool. Now, select the attribute table of the ne_110m_lakes.shp and notice there are now 26 features: this means the Append tool worked correctly. The last feature (row 26) is the appended feature, which is named “IJsselmeer”. It matches the target dataset fields.
Learn more about ArcGIS Pro:
Learning ArcGIS Pro 1: Maps and Projects
