

ArcGIS Online’s Experience Builder provides great flexibility for data-editing mechanisms. The edit widget is progressing in its editing capabilities and is important if your users need to create new features. However, many users only need to modify or update already-existing data. Because of this, the ability for users to edit directly in the attribute table of a feature service is in high demand.
In this tutorial, you will learn how to configure the table widget for easy selection and editing. This will include various ways of selecting the correct feature for editing, whether from a map or within the table, itself. For the purposes of this tutorial, we will be editing a field in our US States boundaries hosted feature service to show where Geospatial Training Services has been this year for training events. This tutorial assumes you are using ArcGIS Online and that a map widget has already been configured. Remember to save your work frequently.
Enable Editing on Hosted Feature Service
The first thing you need to do is make sure editing is enabled on your hosted feature service. From the Settings tab of your hosted feature service, scroll down to the Feature layer options. At minimum, you must check the box next to “Enable editing”. Once you check the box next to “Enable editing”, you will see options appear to select the kind of editing you want to allow. In this case, you don’t want users to add, delete, or make changes to the geometry of features. To ensure users can only update attributes in the table, make sure the boxes next to “Add” and “Delete” are unchecked and the “Attributes only” option is selected from the “Update” options.
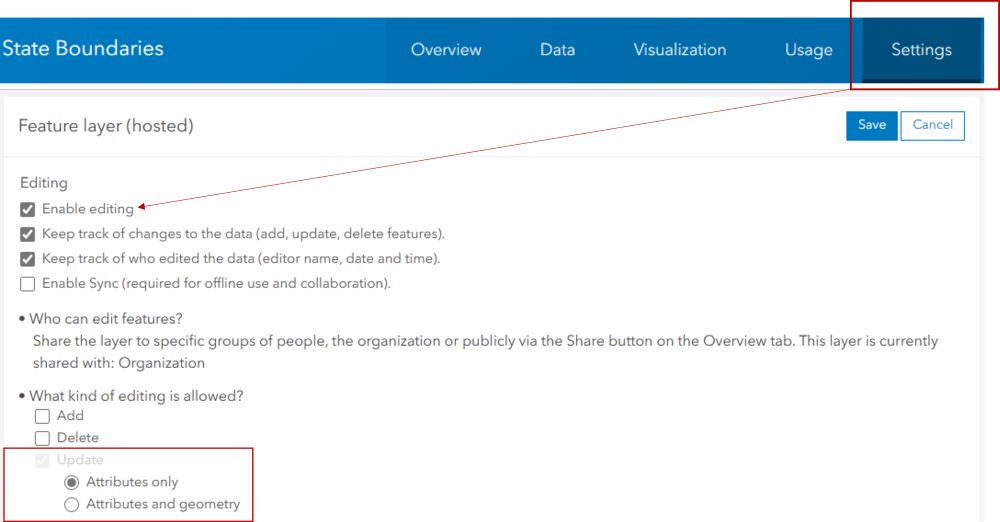
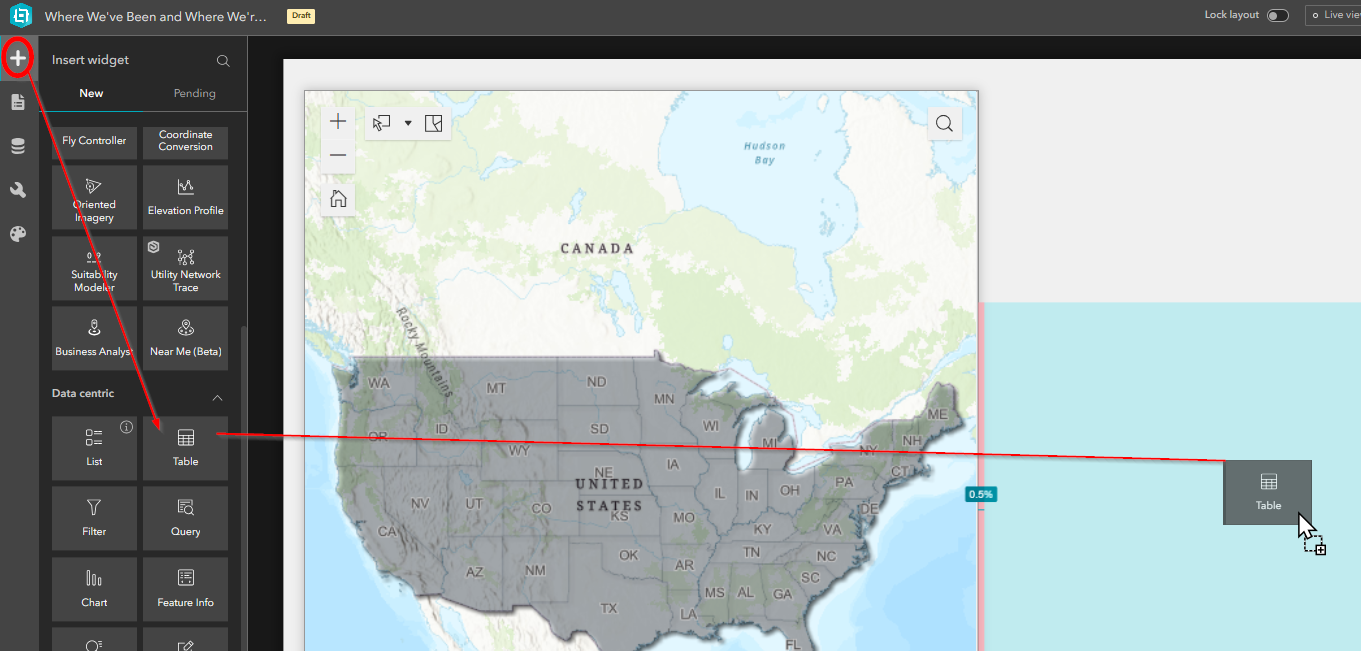
Table Widget Sheet-Configurations
Make sure you are viewing the Insert Widget panel on the left side of the builder. You navigate to this menu by clicking on the Plus symbol in the upper-left of the screen. Scroll down the list of widgets in the left panel until you find the Data-Centric section. Click on “Table” and drag the widget into your canvas.
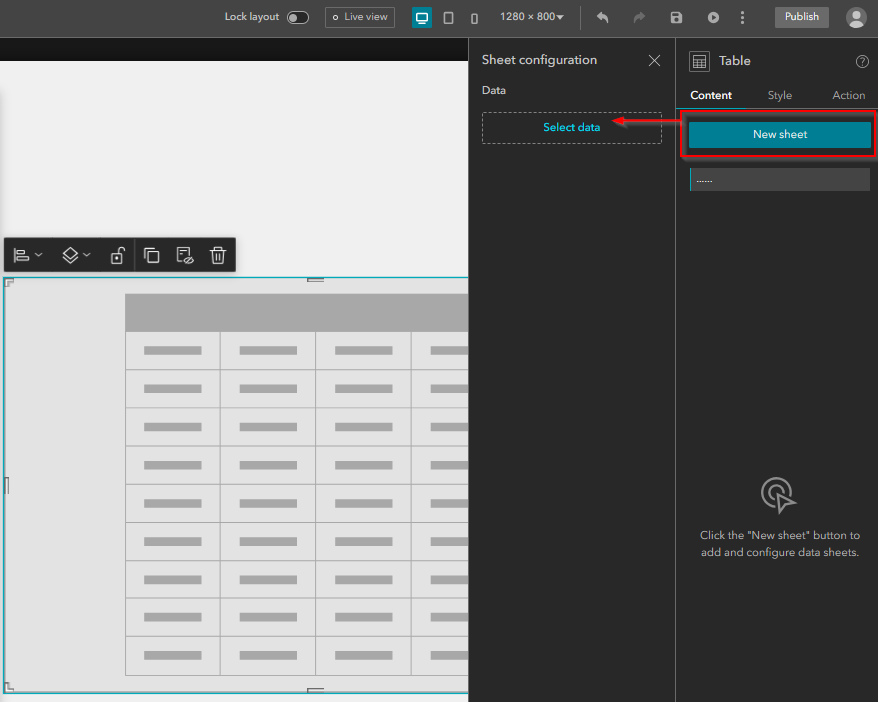
When the table widget is placed on the canvas, it will automatically be selected, allowing for the Table configuration panel to appear on the right side of the builder. From the configuration panel, click on the “New sheet” button and then click on “Select data”.
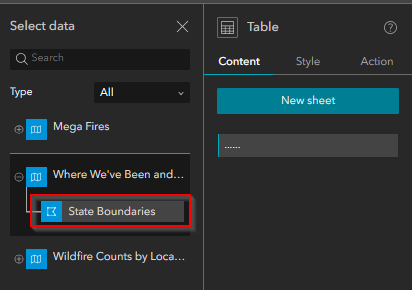
Because we want the map to easily interact with the table and vice versa, we are going to select a layer from our map. In this case, we click on the title of our map, which is “Where We’ve Been and Where We’re Going” and when the list of layers expands below the map title, we select our “State Boundaries” layer.
When you connect your map layer to the table widget, you will see the table populate in the canvas and the Sheet Configuration panel appear on the right. You can connect multiple tables to your table widget and have them appear tabbed across the top of the widget or selected from a drop-down menu, but we are just going to work with a single table for this tutorial.
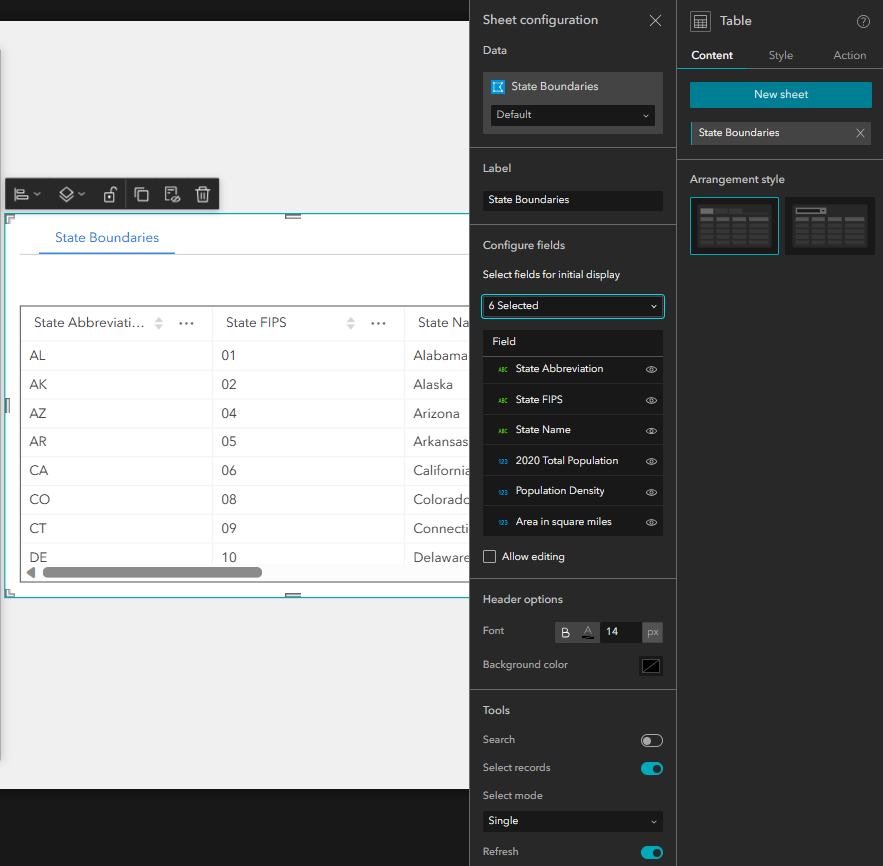
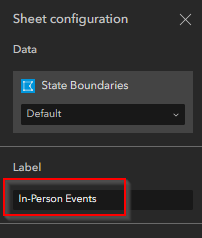
The first thing we want to do is give this table a meaningful name. In the label field, change the name to “In-Person Events”.
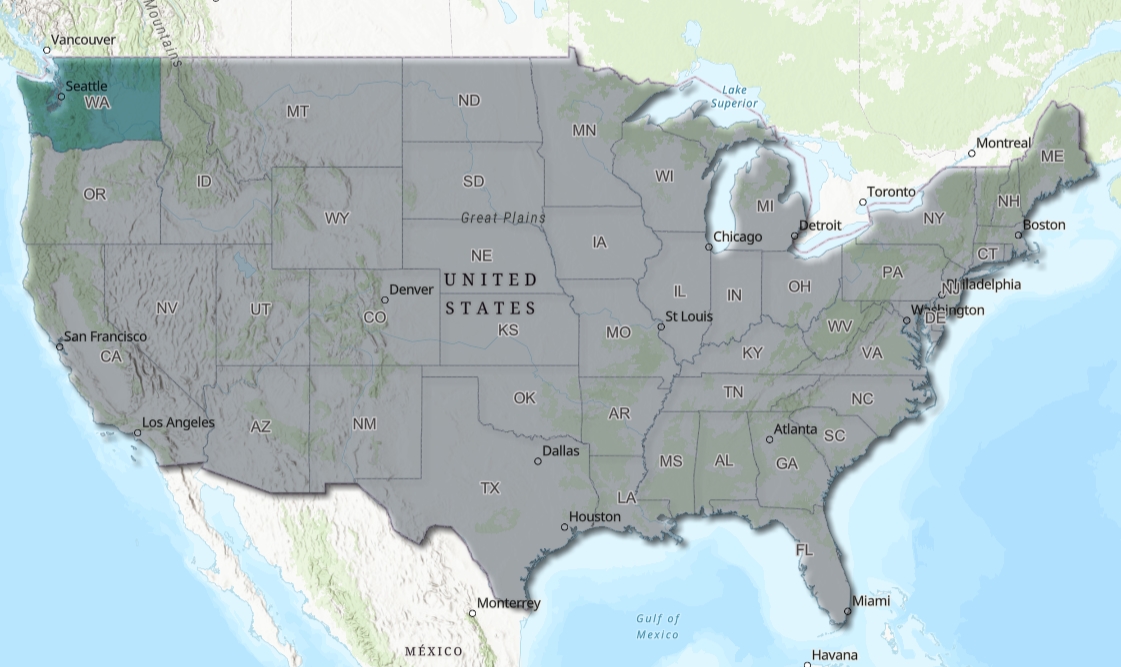
The next thing we need to do is make sure only important fields are showing in the table. By taking out unnecessary fields, we will help streamline the user’s ability to find the field they need to update more quickly. Click on the drop-down menu in the Configure Fields section and make sure the only fields selected for display are State Abbreviation, State Name, and InPerson. The InPerson field contains the values, “Yes” or “No” and represents whether an in-person training event has occurred in that state. The value of “No” will show a state in a grey color in the map while the value of “Yes” will show a state in a teal color.
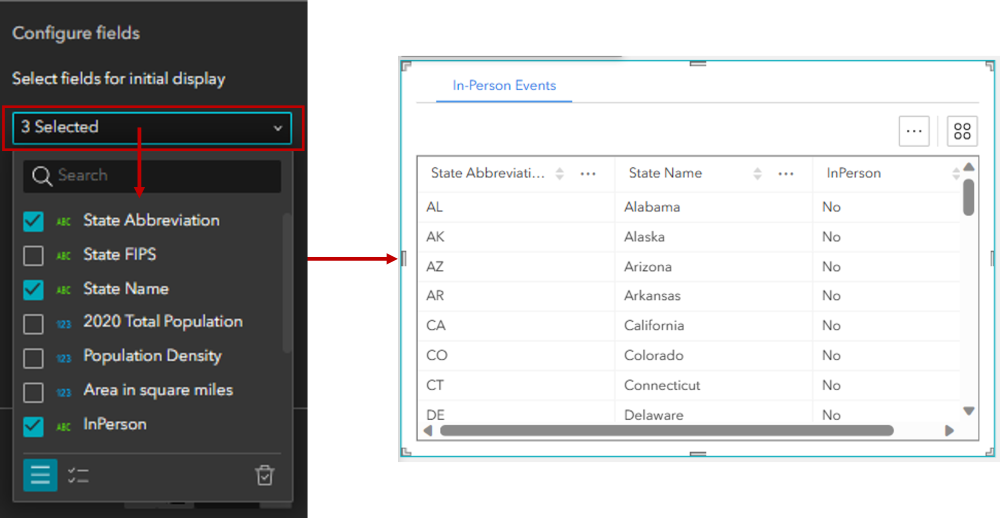
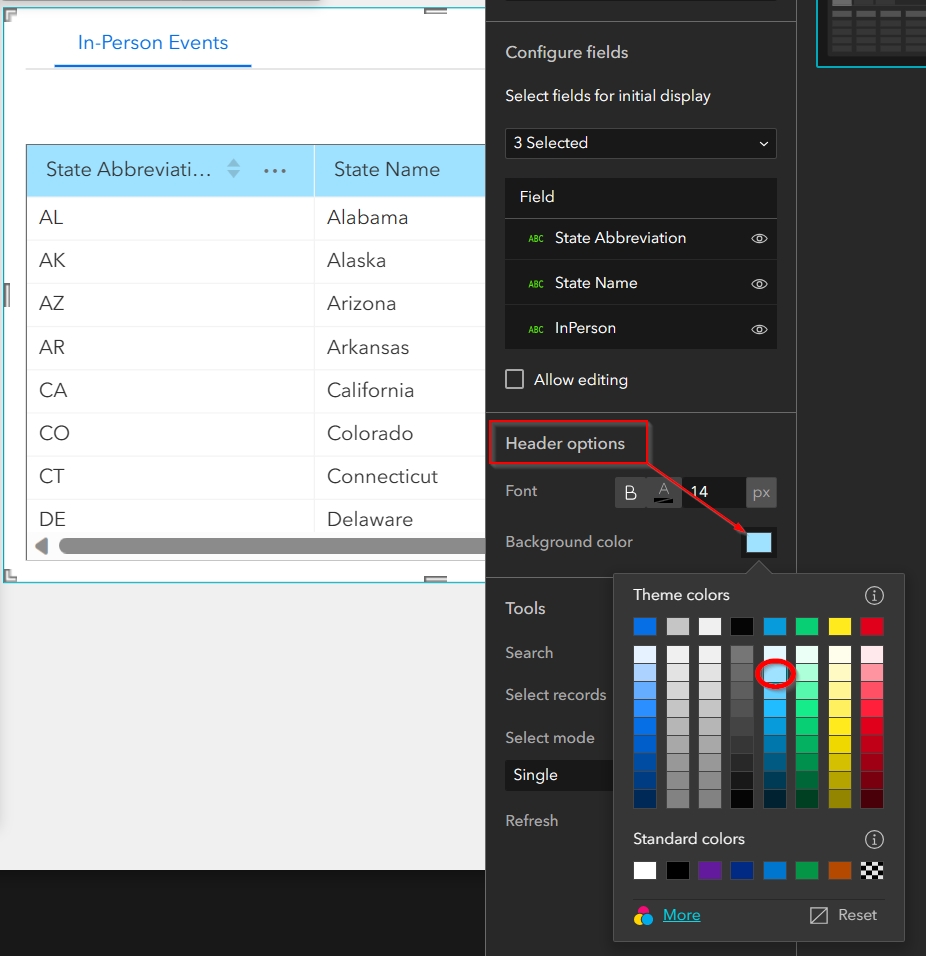
After your display fields are chosen, you will see the list of fields appear (left side of below image). Underneath the list of fields, you will need to check the box next to “Allow Editing”. When you do this, you will see the list of fields change to allow you to choose which of the display fields can be edited (right side of below image). Make sure only the “InPerson” field is checked.

To help our users better distinguish between the table header and data records, we are going to choose light blue for the header background color under the “Header Options”. To do this, simply click on the background color patch and choose from the color panel that appears.
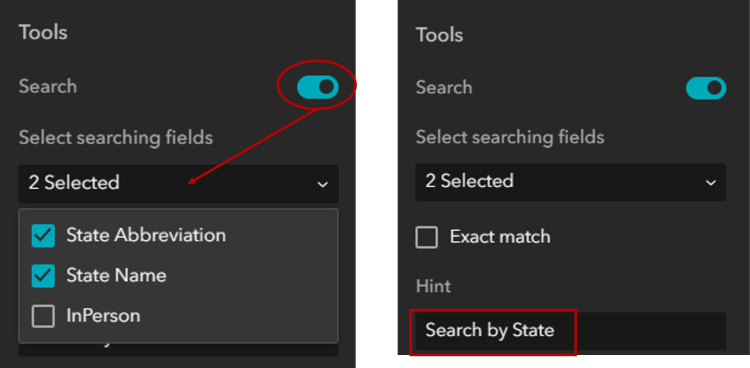
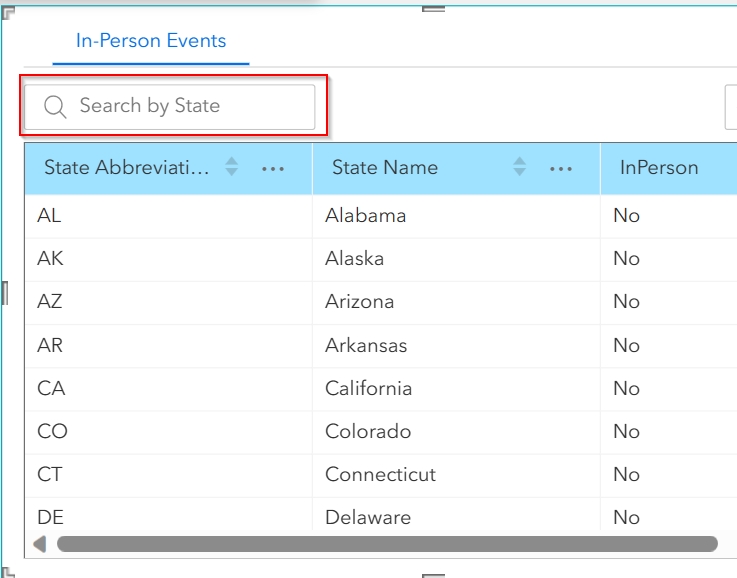
We want to give our users easy search options, so we need to enable Search under the Tools section. Once enabled, the option to select search fields will appear. From the drop-down, choose “State Abbreviation” and “State Name”. The setting will now show that there are TWO fields selected for search. Change the Hint label to “Search by State”. When you click out of the Hint field, you will see the Hint text appear in the search bar in your table.
The next parameter to configure gives our users the ability to Select Records manually from the table. First, ensure “Select Records” is enabled. Next, use the “Select Mode” drop-down menu to change the option to “Multiple”. This will allow users to select multiple records instead of just one.
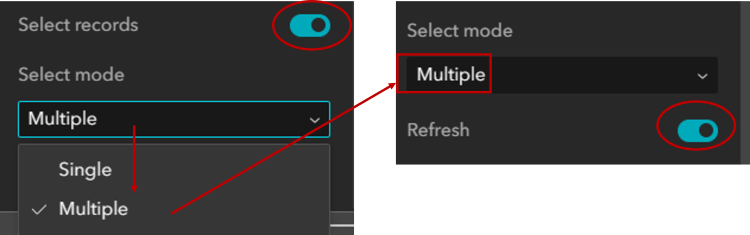
The last Sheet Configuration setting we will check is the option to Refresh (above-right image). We want to have this option enabled, which means our users will be able to refresh the table whenever necessary.
Configure Actions in the Table Widget
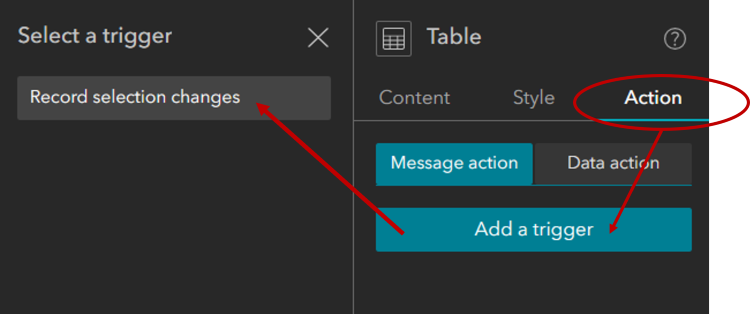
We now want to configure actions for our table that will allow the users to select records from the table (trigger) and see them emphasized (action) in the map (target). To do these we first need to make sure we have our table widget selected and that we can see our Table configuration panel on the far right. In the map configuration panel, click onto the “Action” tab. From here, you will click on the “Add a Trigger” button and then select the trigger option that represents when the “Record selection changes”.
When the target options appear, you will want to choose the “Map” widget. Once chosen, you will see the action options. For our purposes, we want to configure 2 actions. The first is for the map to zoom to the feature we select in the table, and the second is for the features in the map to filter by the record we select in the table. For the first action, we will select “Zoom to” as our action and leave the default Zoom scale.
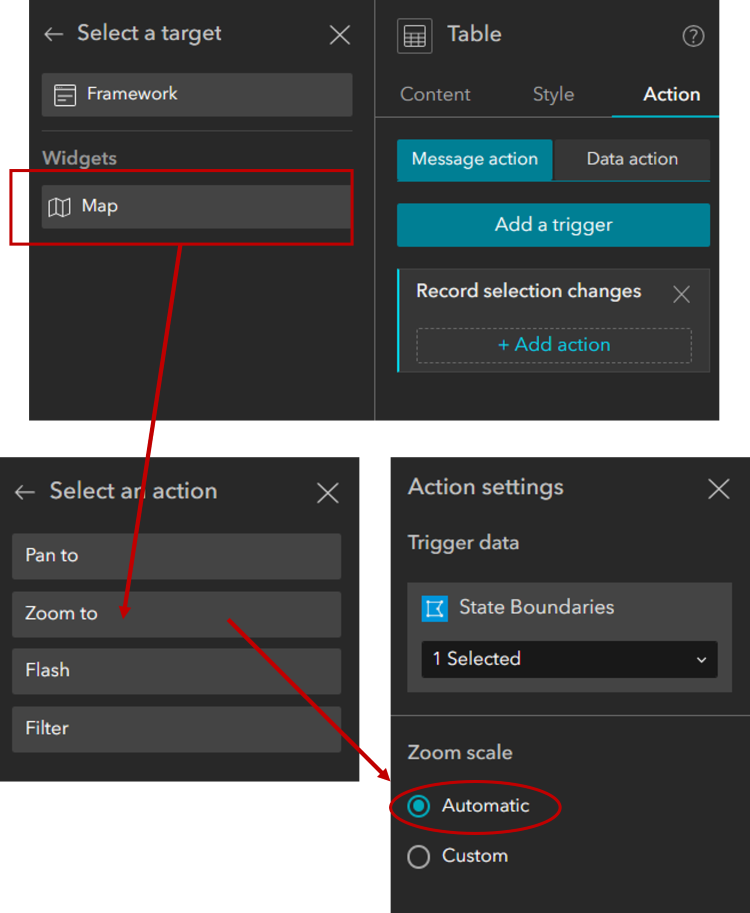
The “Zoom to” action will appear under the Action tab on the right. Underneath the “Zoom to” action, there is an option to “+Add action”. Click this to add another action. Once again, choose the Map as the target and this time choose “Filter” as the action. You will see the State Boundaries are automatically added as the trigger data, and in this instance the State Boundaries will also be the Action data.
Click on the “Select data” button under “Action data” and then choose the “State Boundaries” layer from your map. If you don’t see the layer, click on your map title and the list of map layers will appear beneath it. You will see that the layers will be “Auto bound”. What this means is that the features in the Trigger data are already related to the features in the Action data because they are the same layer. If you had chosen a different layer for the action data, you would have needed to field map a field that can relate the two tables.

Configure Actions in the Map Widget
To provide a high level of flexibility in our map application, we also want to give our users the ability to select a feature from the map and have that record filtered in the table automatically. To do this, we will need to configure another Action but this time it will be in the Map widget.
Make sure your map widget is selected and that you can see the Map configuration panel on the far right. Click into the Action tab, click on Add a trigger and again choose “Record selection changes” as the trigger.
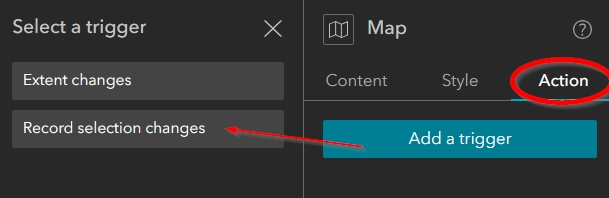
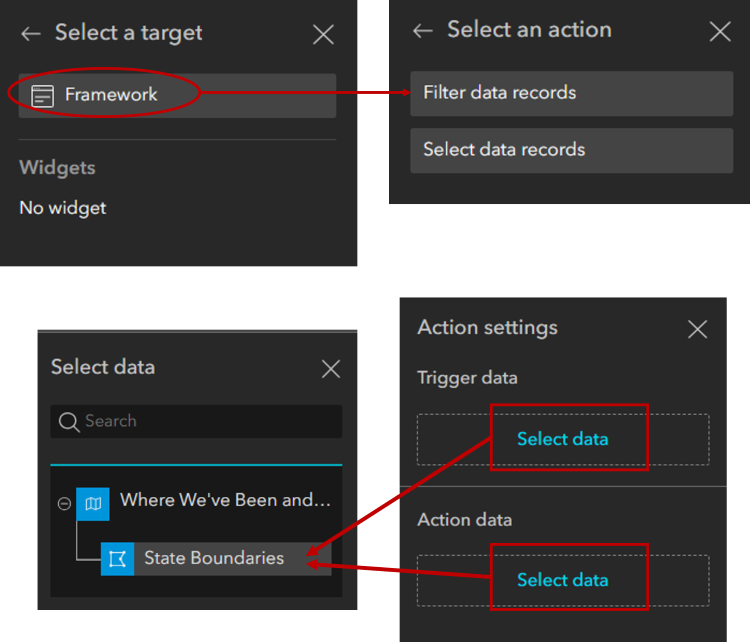
Our target for this interaction will be the “Framework”. What this means is any widget configured with the State Boundaries layer from the map will be acted upon. Click on “Framework” and then choose “Filter data records” as the action.
Next, set the State Boundaries layer from the map as both the trigger and action datasets. Again, the Action settings will be Auto-bound because the trigger and action datasets are the same. Make sure your configurations are saved.
Preview your Map Application
When you preview your map application, test out the following:
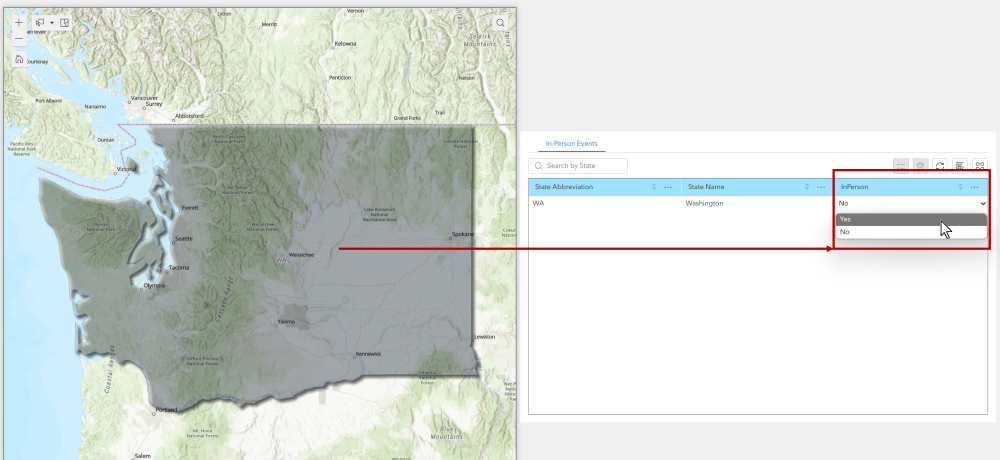
- Click on Washington State in the Map and see your table select and filter down to only show the associated record.
- Double-click into the InPerson field and change the value from “No” to “Yes”. The data update is immediate, and you will see the color of the state change to teal in the map to represent the new value.
Refresh your browser; you will see the changes to the data were maintained without having to do any additional saves or clicks.
Make sure nothing is selected in either the map or the table and that all of your records are showing in the table. Now, test out the following:
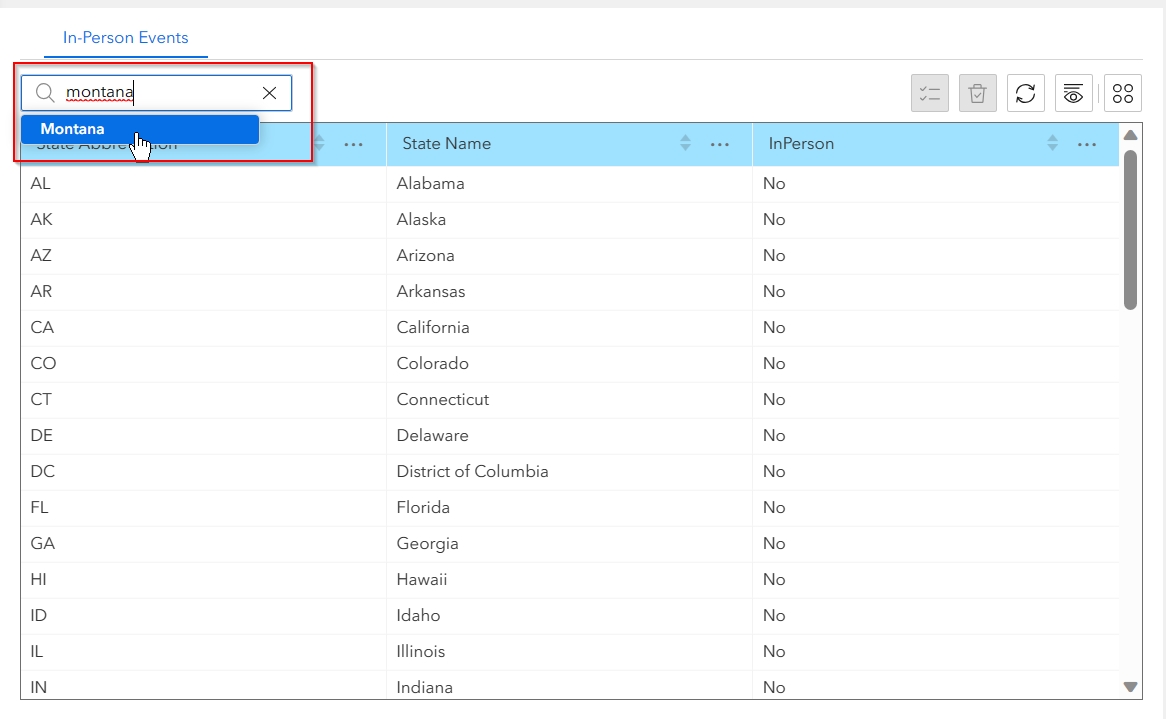
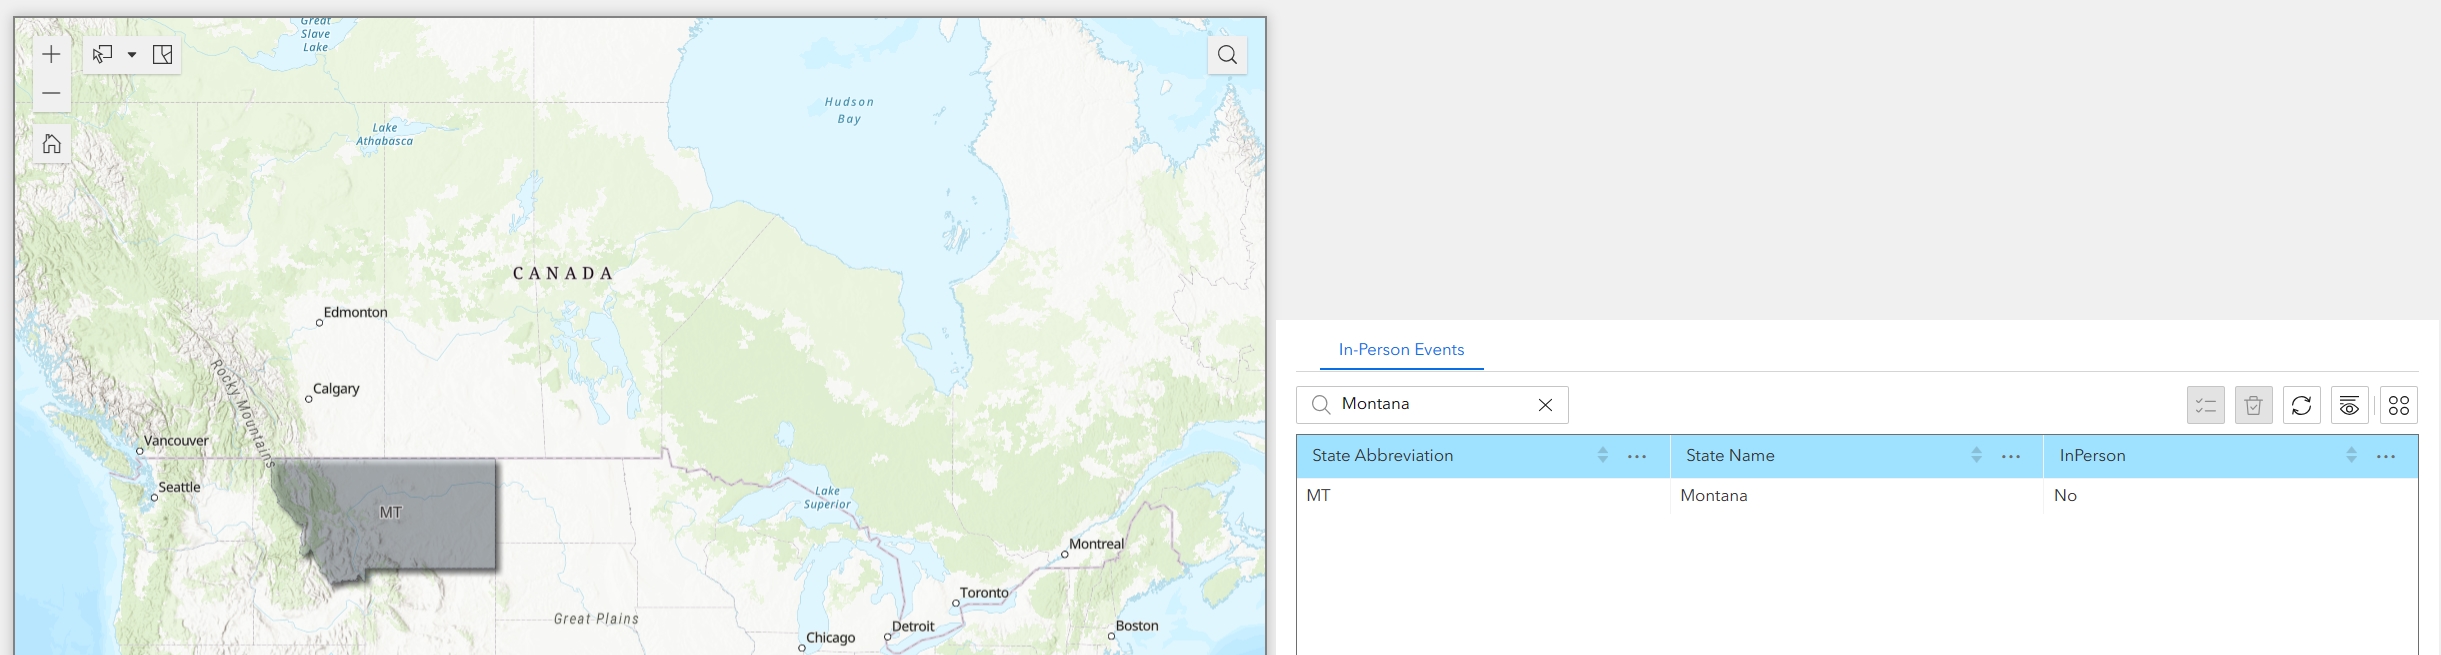
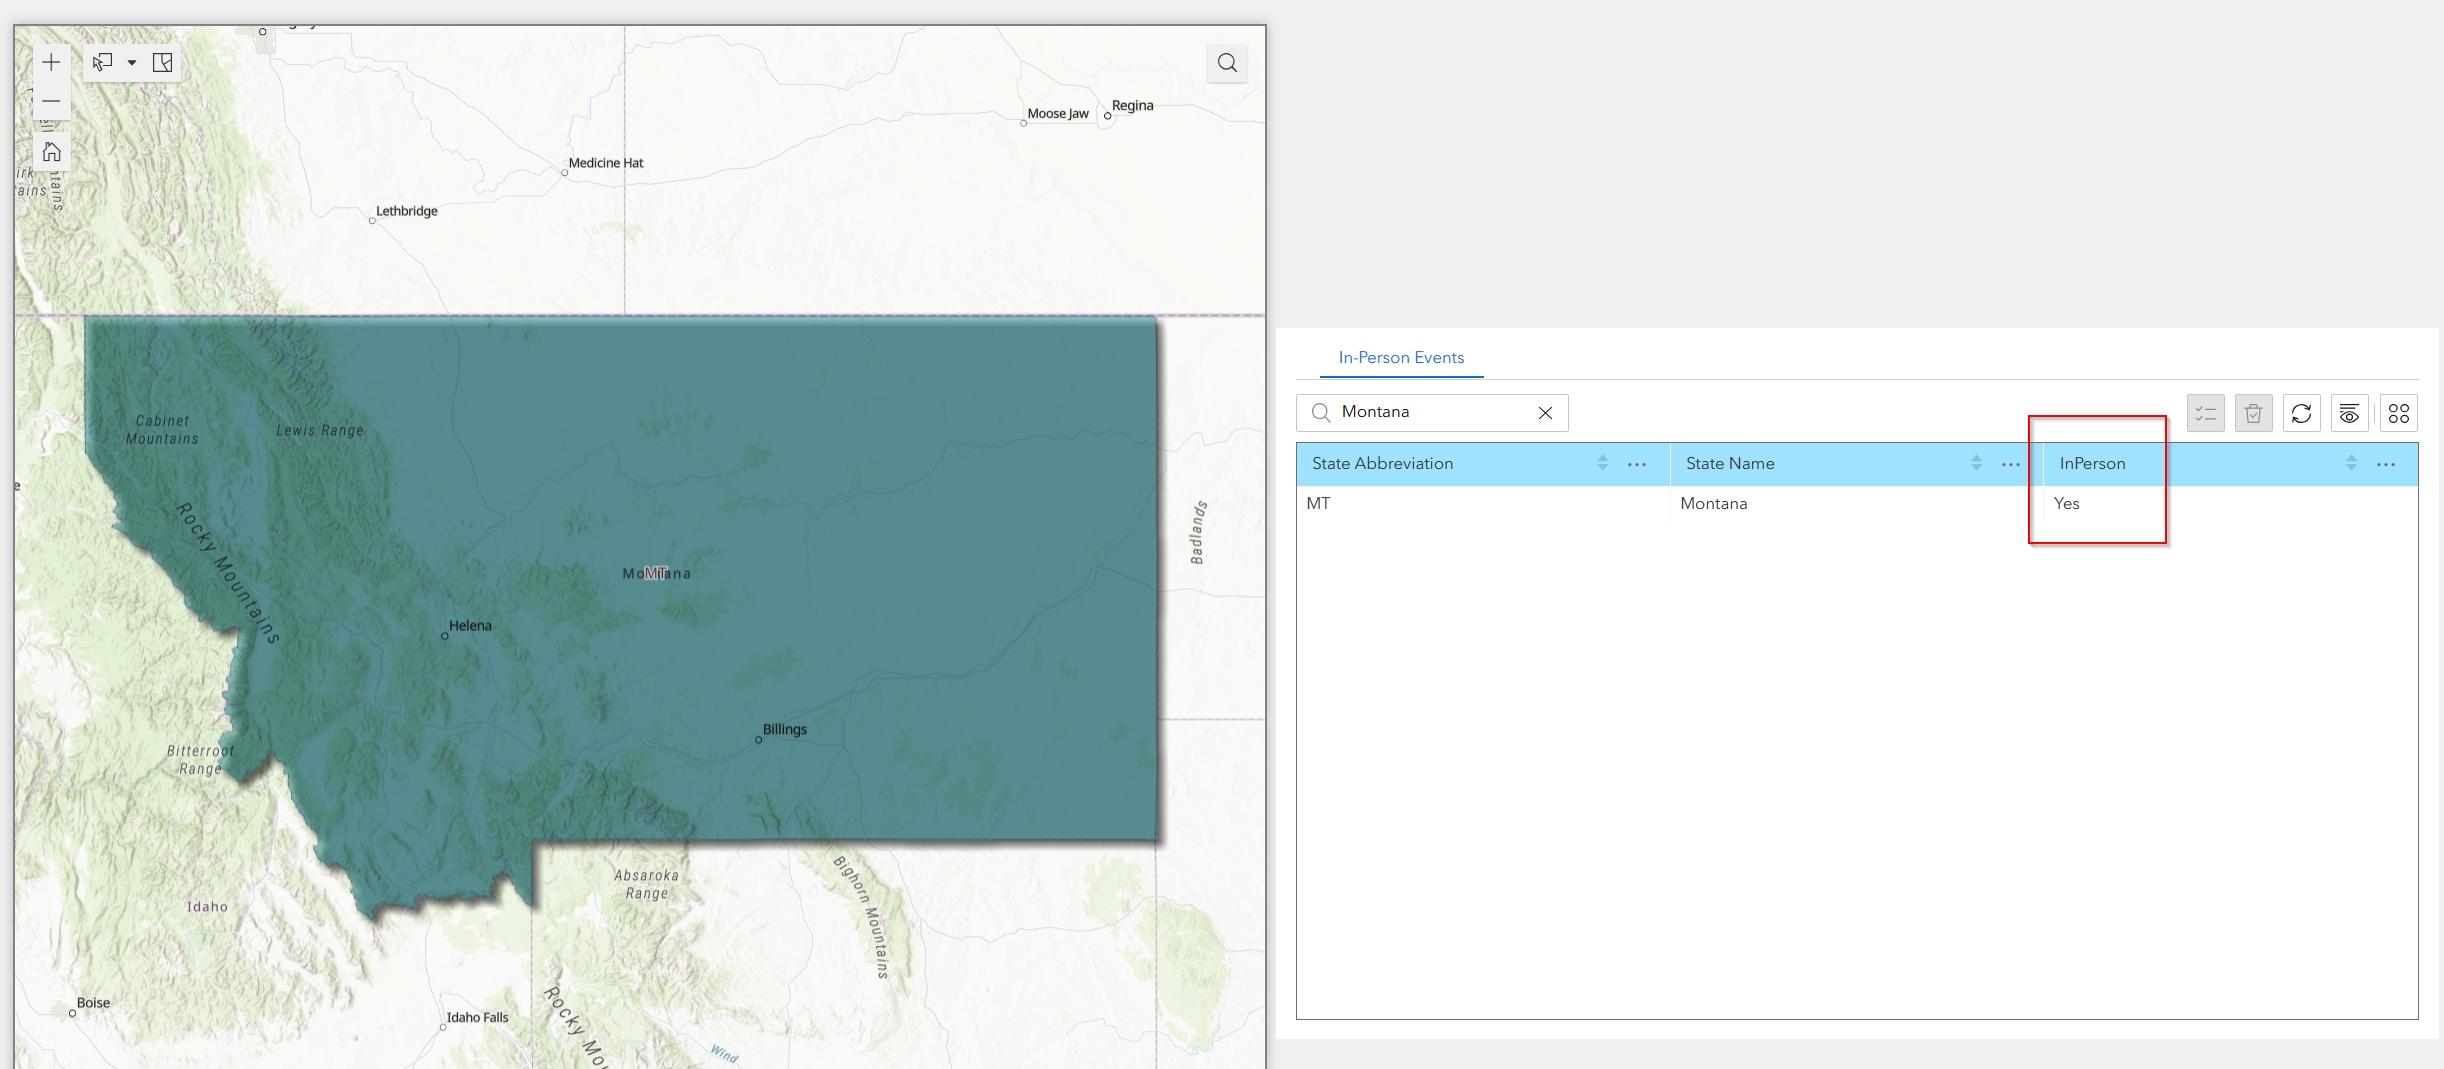
- Search for Montana in the table. When the option for “Montana” appears in the search drop-down, select it. You will see both the table and the map filter to only show Montana.
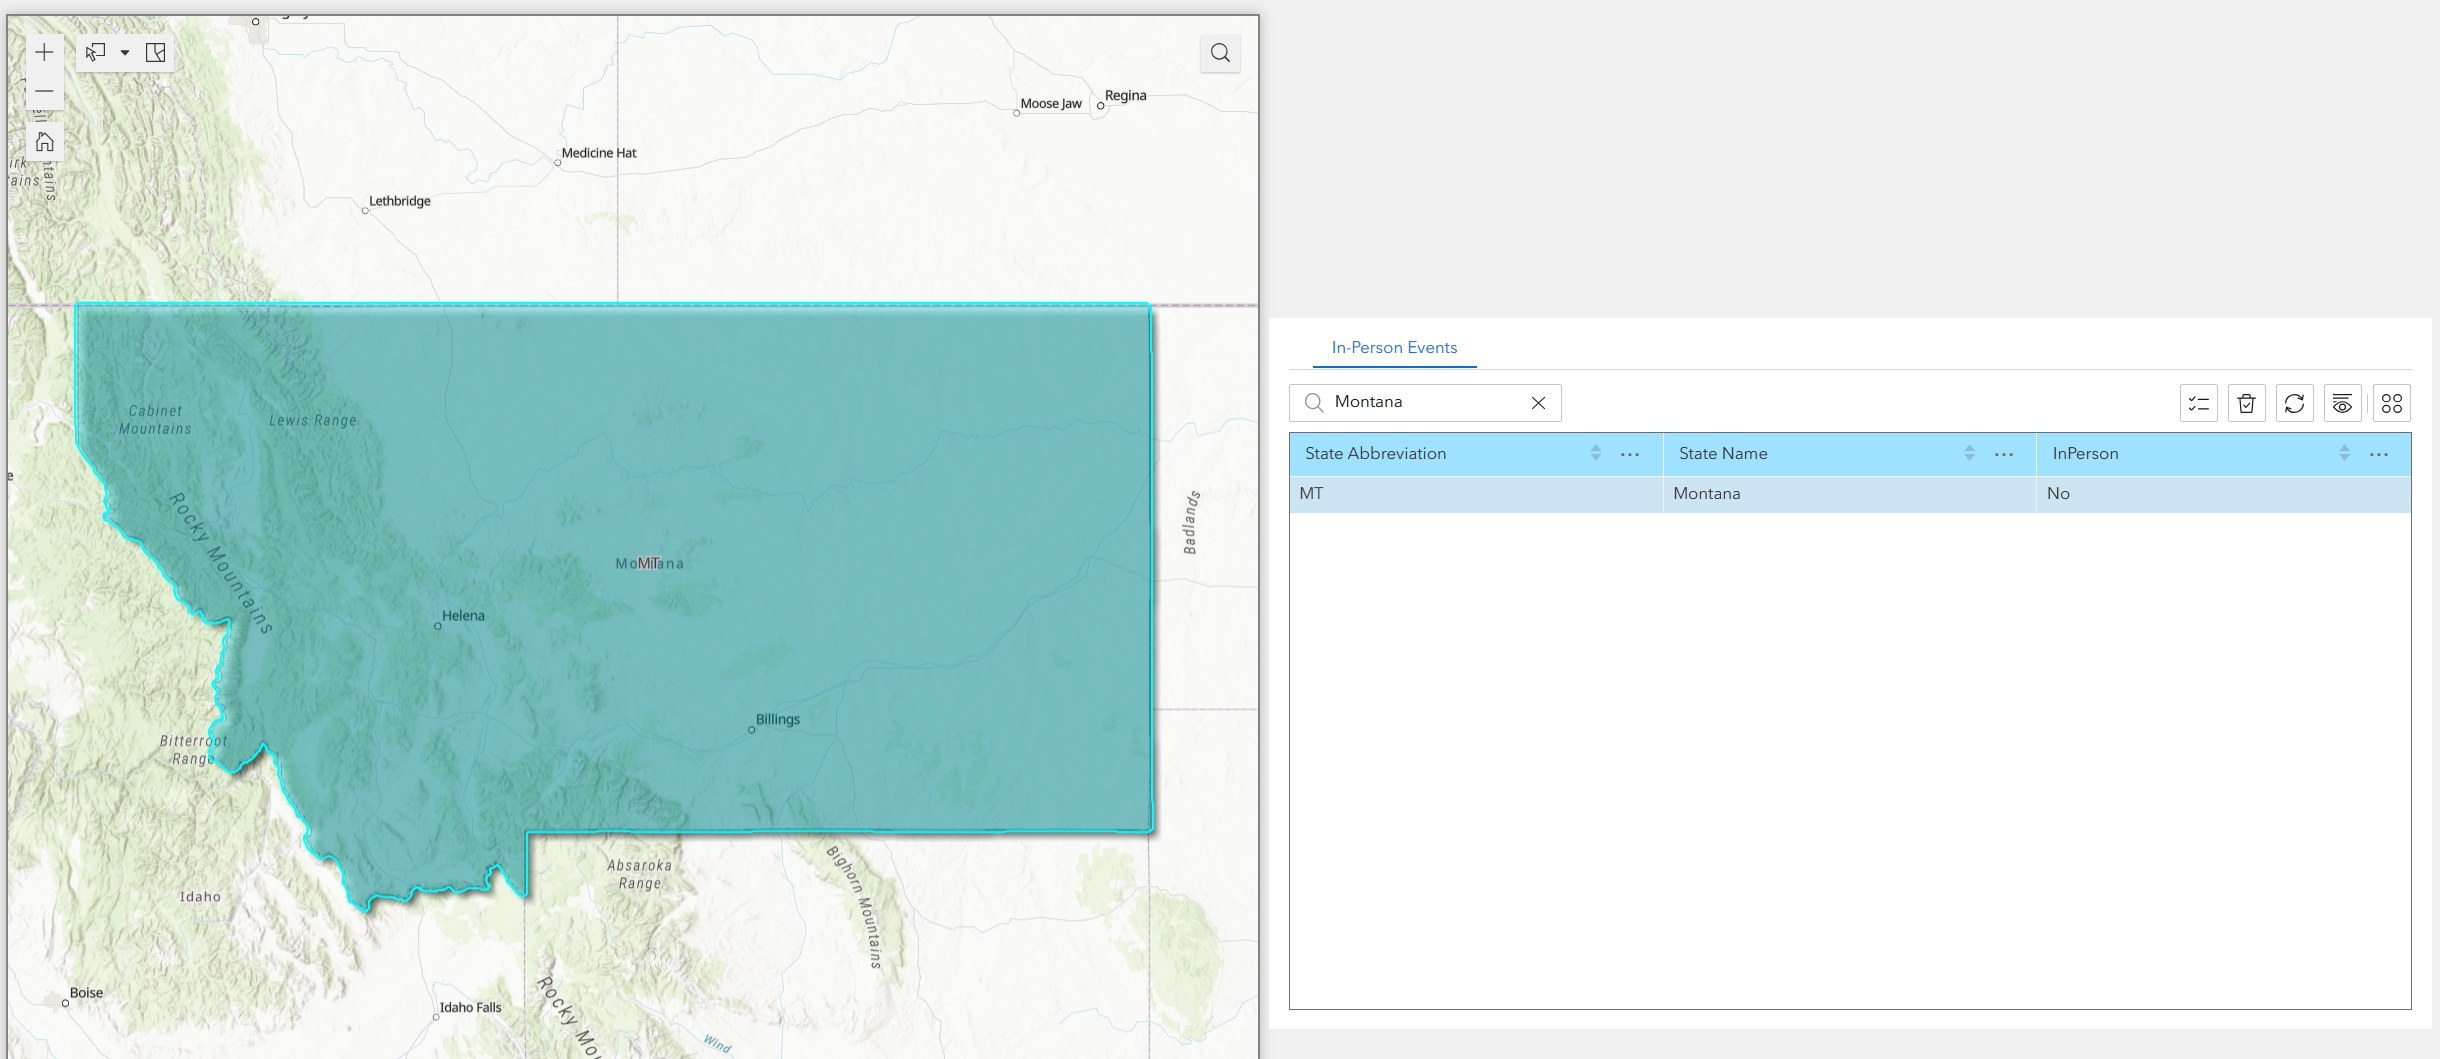
- Next, click on the record in the table to select it. You will see the map select and zoom to the state of Montana.
- Double-click into the InPerson field and change the value from “No” to “Yes”. The color of Montana will immediately change from grey to teal.
To watch a tutorial video and demonstration on this topic, please visit our YouTube Channel. We hope you have enjoyed the information provided in this tutorial. For more tutorials, visit our Free Articles and Tutorials page at Free Articles & Tutorials | (geospatialtraining.com).
