

Editing is much easier in ArcGIS Pro than it was in ArcMap. Now that I am accustomed to ArcGIS Pro’s streamlined editing workflow, going back into ArcMap to edit something feels clunky and outdated. In this short article, I will highlight a few simple editing settings that I find extremely beneficial. Hopefully you will find one or more of these helpful in your own GIS programs.
1. Enable and Disable Editing Manually
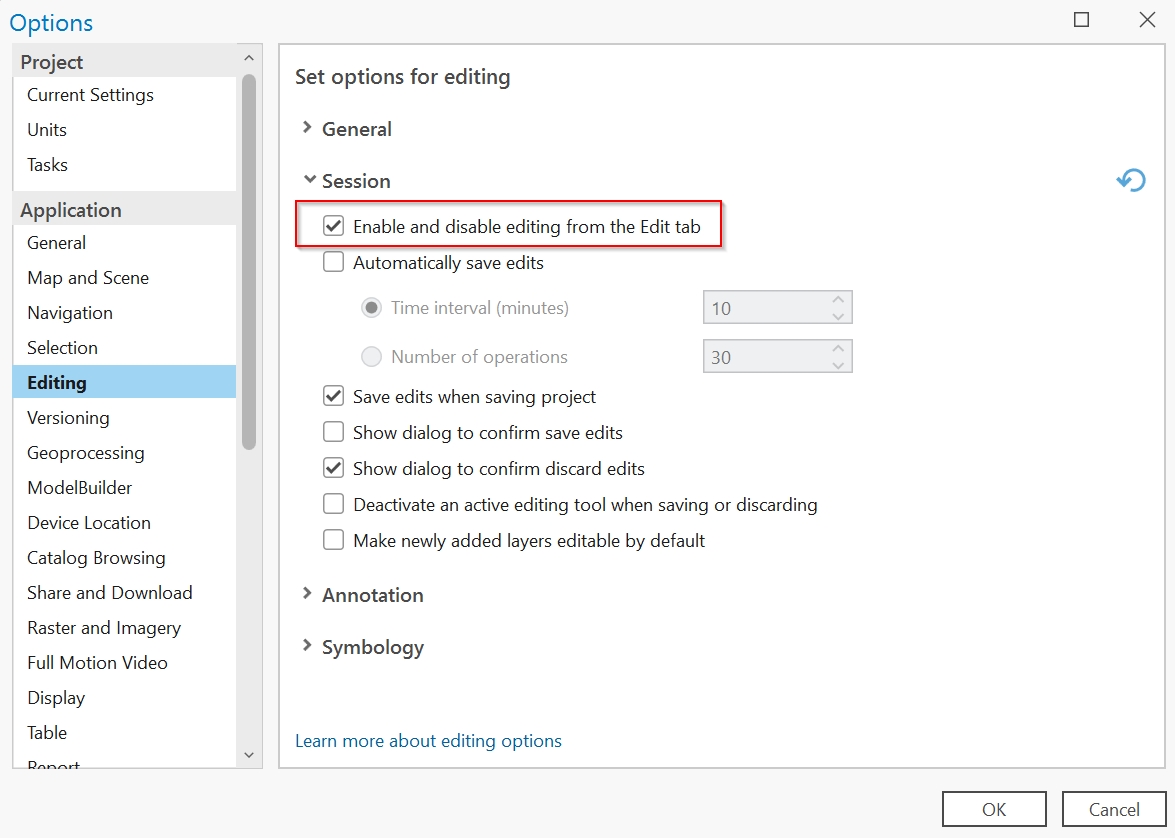
When ArcGIS Pro first hit the scene, the rumor on the street was that Editing was always on. This didn’t sit well with me because that would make my data vulnerable to accidental changes. Agreed? Well, the good news is that you can configure a global application setting that will allow you to turn editing on and off at the click of a button. Just follow these steps:
- Open the Project menu from the upper left of the application window
- Click on Options
- Click on Editing
- Expand the Session options
- Check the box titled, “Enable and disable editing from the Edit tab”
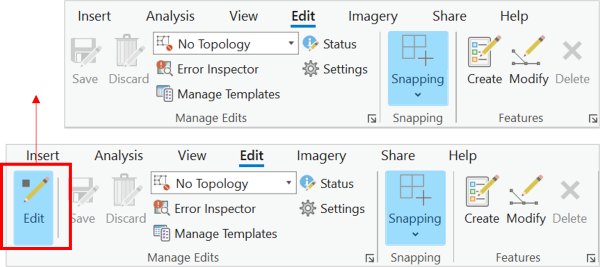
Once you complete the above steps, you will see an Edit button appear on the Edit tab (see below image). Now, you can click on Edit to turn on and off editing as necessary.
2. Save Edits when Saving Project
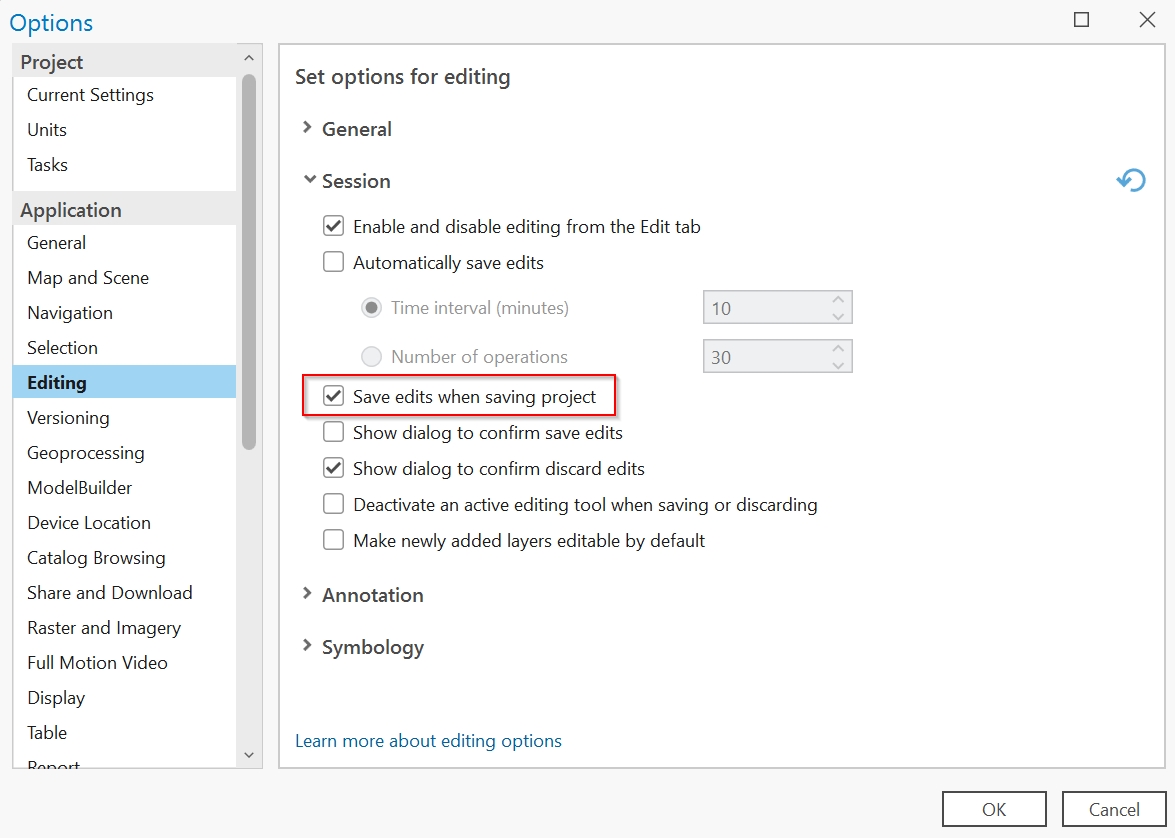
Whether you have been editing your data in ArcMap or ArcGIS Pro, the default for either software is to save edits separately from the map or project. This adds additional clicks to your process. One way to simplify this process in ArcGIS Pro is to configure a global setting for the application that will always save edits when you save the project. To configure this setting, follow the steps below:
- Open the Project menu from the upper left of the application window
- Click on Options
- Click on Editing
- Expand the Session options
- Check the box titled, “Save edits when saving a project”
As a word of caution, be aware that you can no longer undo your edits after they are saved, unless you are working in a versioned environment. If editing is enabled and you haven’t saved yet, then you can undo edits based on sketch operations and editing sessions. For more information on undo and redo, click the following link: Filter undo and redo for editing—ArcGIS Pro | Documentation
3. Customize Favorite Tools Gallery
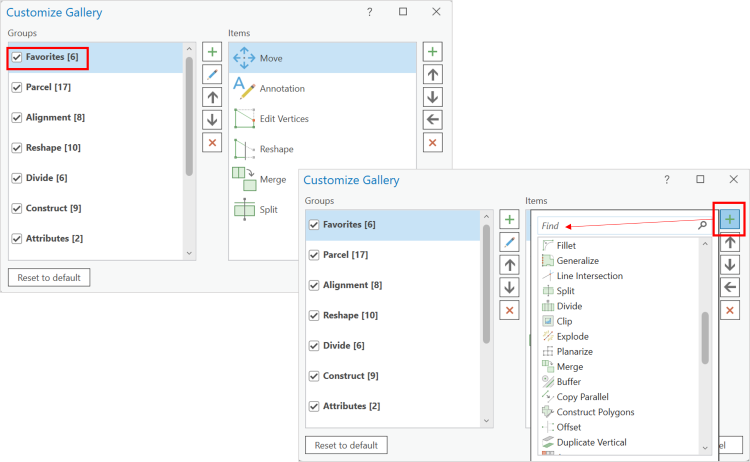
Customizing your favorite-tools gallery is a must, especially if you are someone who processes using the same tools day after day. Your favorites are the first options you will see in the Tools section of the Edit tab. To customize these, you can expand the tools list as shown in the image below, and then choose “Customize” at the bottom of the pane that appears.
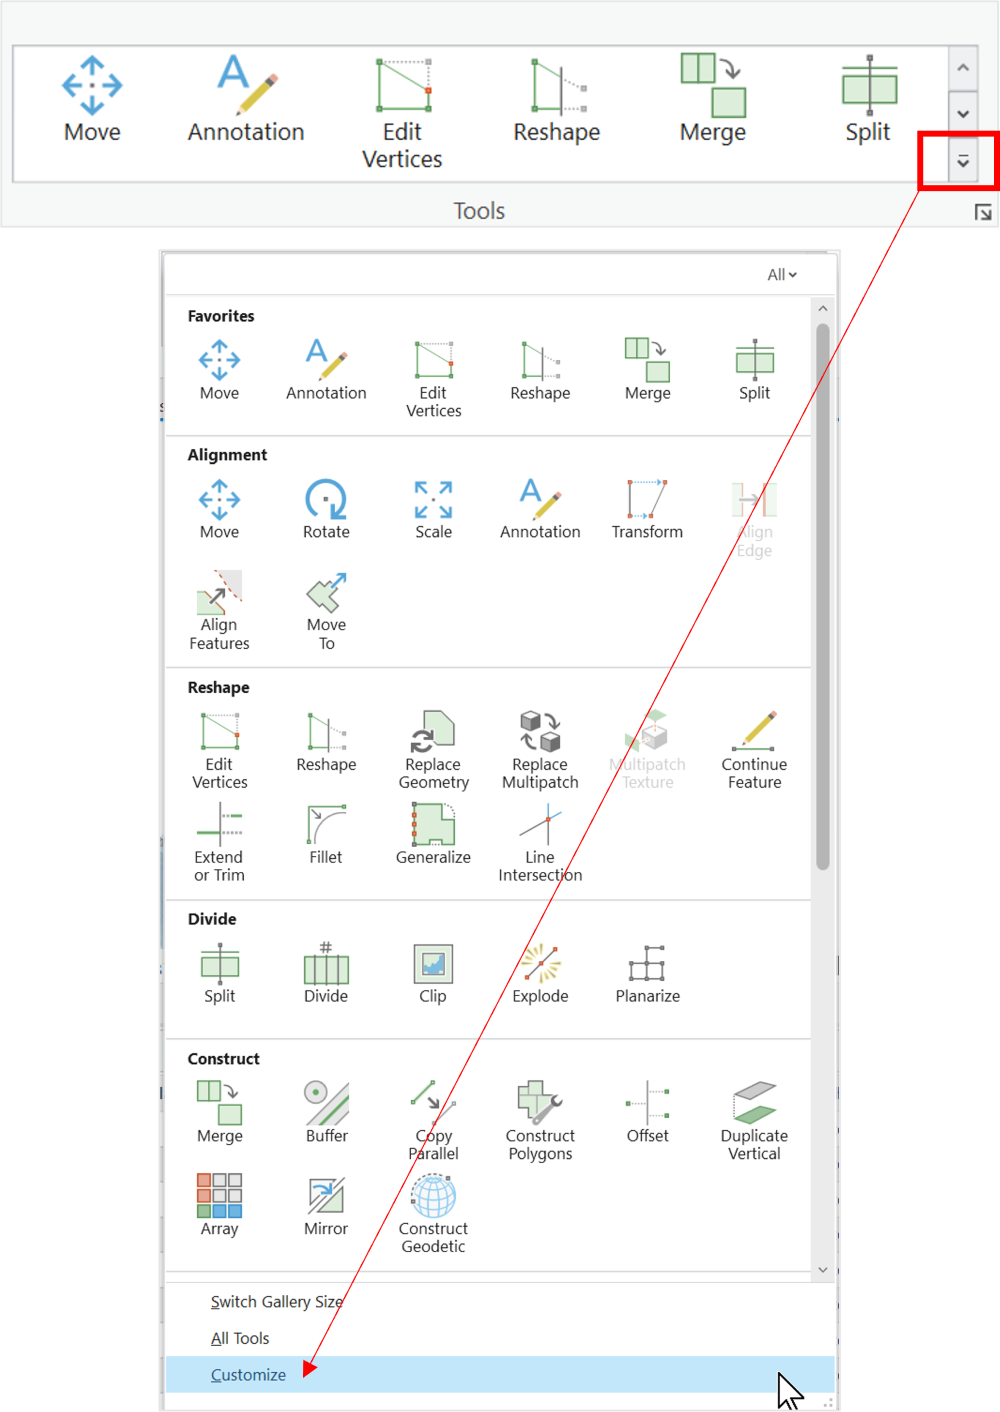
When the Customize Gallery box appears, you will see the list of all your default galleries. You have the option of changing these galleries, deleting them, and adding any others that make sense for your workflow. To add a tool to your favorites, first click on the green plus sign on the far right under the “Items” section and then search for and double-click on the tool you would like to add.
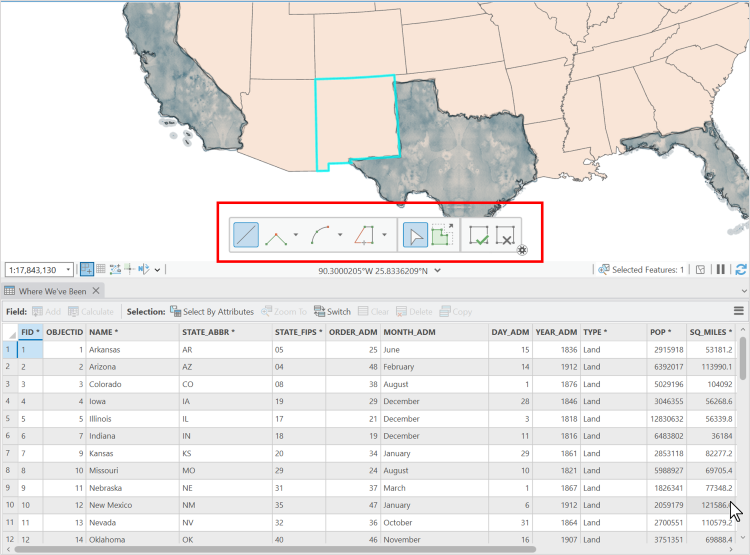
4. Turn off the Editing Toolbar in the Map
By default, there is a small editing toolbar that will appear at the bottom of your map view when you activate certain tools. This small toolbar provides quick access to settings associated with the tool you have activated or may show you different tools commonly used in conjunction with that tool. Either way, it’s appearance isn’t for everyone, as it can crowd the screen. This is especially true if you are working the features in the map at the same time you are working with the attribute table, as shown in the below image.
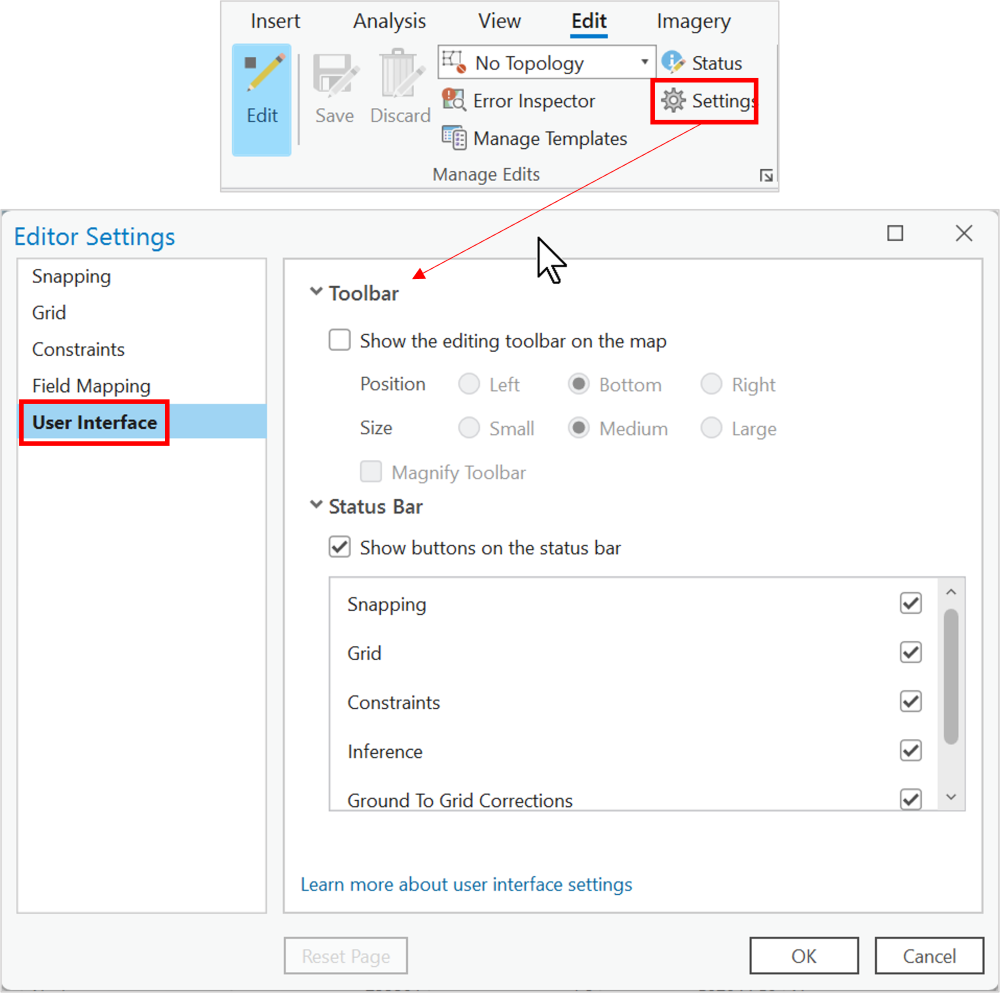
If you are like me and you want to declutter your screen as much as possible, then you can turn this extra toolbar off. There are multiple ways to do this. You can either click the settings icon in the lower right of the toolbar when it appears and then uncheck the box that says, “Show the editing toolbar on the map”, or you can follow the below steps:
- From the Edit tab, click on “Settings” under the Manage Edits section
- When the Editor Settings appear, click into the “User Interface” tab
- Under Toolbar options, uncheck the box that says, “Show the editing toolbar on the map”
5. Temporarily Turn Off Snapping while Editing
Snapping is an important feature when adding or modifying features, especially when those features need to align with neighboring features or sketches. This is also true for creating layouts with multiple elements. But sometimes, snapping can get in the way when you are trying to place a vertex in a location close to another feature, but do not want it to snap to that feature. Or when you want to place a layout element close to, but not exactly aligned with another element in the layout. How do you get around this without having to turn off snapping completely, or alter the pixel sensitivity of the snapping? Use the space bar! By holding down the space bar as you are placing a vertex, feature, or element, snapping will be temporarily disabled, giving you complete control over the placement location.
We hope these tips will help you streamline your ArcGIS Pro editing workflows. Happy Editing!
