

Learn more about ArcGIS Pro in one of our upcoming ArcGIS Pro Bootcamps at various locations around the country as well as live-online.
If you find yourself starting every new ArcGIS Pro project the same way — adding the same folder connections, configuring the same coordinate system, setting up the same default geodatabase structure, creating the same layout design — you’re wasting time on work that should happen exactly once.
Most GIS professionals spend the first 10-15 minutes of every new project recreating a structure they’ve built dozens of times before. Those minutes add up quickly across a month, a quarter, or a year. More importantly, starting from scratch every time introduces inconsistency. Your layouts look slightly different, your folder structures vary, and your team doesn’t have a shared starting point.
ArcGIS Pro’s project template system solves this problem. A template is a pre-configured .aptx file that captures your project structure — maps with coordinate systems already set, layouts formatted and ready to go, folder connections pointing to your organizational data, default geodatabases configured, and even custom styles loaded. Templates can also include symbolized layers and, in some cases, data copied into the template for fully self-contained starting points. When you create a new project from a template, that setup is already done. You start working immediately instead of configuring infrastructure.
This guide will show you how to build templates for common scenarios, how to share them across your team, and how to maintain a template library that scales with your organization.
What’s Actually Saved in a Project Template
Before you build templates, it helps to understand exactly what gets captured in an .aptx file. The answer is more flexible than you might expect.
A project template captures a project’s starting structure and can preserve selected content depending on how the template is created. Templates may include maps and scenes with symbolized layers, layouts, toolboxes, connections to folders, databases, servers, and styles. In some cases, required data can even be copied into the template’s default geodatabase so the template works even when users don’t share access to the same source locations.
What templates typically preserve:
- Map and scene configurations — Coordinate systems, basemap references, symbolized layers (if data is accessible or copied in), and map extent settings
- Layout designs — Page size, orientation, map frames, static elements like logos, north arrows, scale bars, and text boxes
- Connections — Folder connections, database connections, and server connections
- Default settings — Default geodatabase, default toolbox, geoprocessing environment settings
- Styles — Custom style files you’ve added to the project
- Tasks — Workflow automation and standardized procedures
- Project metadata — Credits, summary, tags
What depends on how you create and share the template:
- Data and layers — Templates can include symbolized layers with data copied into the template’s geodatabase, or they can simply preserve layer definitions and connections to shared data sources. If data paths point to locations that don’t exist for other users, those layers won’t draw correctly.
- Resource accessibility — If paths reference network locations via UNC paths (\\server\share), multiple users can access the same resources. If paths are local to your machine and unavailable to others, those connections will break.
The key principle: templates are flexible. They can be lightweight structure-only blueprints, or they can package in data and resources for fully self-contained starting points. How you build and share them determines what users get.
When to Use Templates (And When Not To)
Not every project benefits from a template. Understanding when templates add value versus when they’re overkill will help you use them strategically.
Good candidates for templates:
- Recurring project types — If you produce monthly status reports, quarterly assessments, or annual deliverables with similar structure, build a template
- Standardized outputs — Projects that always deliver the same layout format (letter-size PDF, 11×17 map series, web map with specific layers)
- Team environments — When multiple people need to start from the same foundation to ensure consistency
- Training scenarios — Templates give every student or new hire an identical, properly configured starting point
- Complex setup — Projects that require significant configuration before productive work can begin
When templates don’t add much value:
- Exploratory one-offs — Ad-hoc analysis where the structure is unknown at the start
- Highly variable projects — Work where data sources, coordinate systems, and outputs change drastically each time
Think of it this way: if you’re repeating the same setup steps more than three or four times, the ten minutes you invest building a template pays dividends immediately.
Building Your First Template: A Simple Example
The best way to understand templates is to build one. We’ll create a “Standard Analysis Project” template — a general-purpose starting point that works for most analytical tasks.
Step 1: Create a New Project with the Structure You Want
Start ArcGIS Pro and create an empty project using the built in Map template. Name it something that clearly indicates it’s a template in progress — for example, “Template_Standard_Analysis.” This helps you remember it’s a work-in-progress and not a production project.
Choose a location where you’ll build the template. This can be temporary; you’ll save the final .aptx file to a different location later.
Step 2: Set Up Your Maps
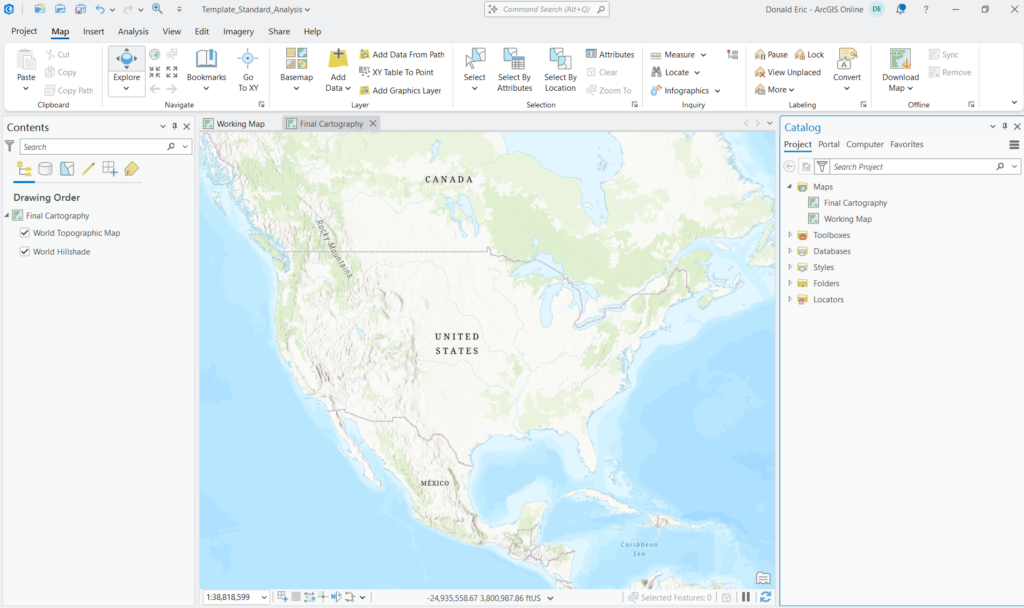
Most projects benefit from at least two maps: one for working and exploration, and one for final cartography.
Create two maps and name them descriptively:
- Working Map — Set the coordinate system to Web Mercator Auxiliary Sphere (this matches most web basemaps and is good for general exploration)
- Final Cartography — Set the coordinate system to whatever is appropriate for your region (State Plane, UTM, or a local projection)
The default basemap for any new map created in ArcGIS Pro is World Topographic. Change this if you’d like for Working Map (Imagery works well). Do the same for the Final Cartography map.
Why two maps? The Working Map gives you a quick-start environment for data exploration with familiar basemaps. The Final Cartography map is where you build your deliverable in the correct projection, keeping your analysis layers separate from your final output layers.
Step 3: Configure Folder and Database Connections
Add folder connections that point to your standard data locations. For example:
- A connection to your organization’s shared data drive
- A connection to reference datasets (imagery, parcels, streets)
- A connection to a common output folder
These connections will appear in the Catalog pane for anyone who creates a project from this template, saving them from manually adding connections every time.
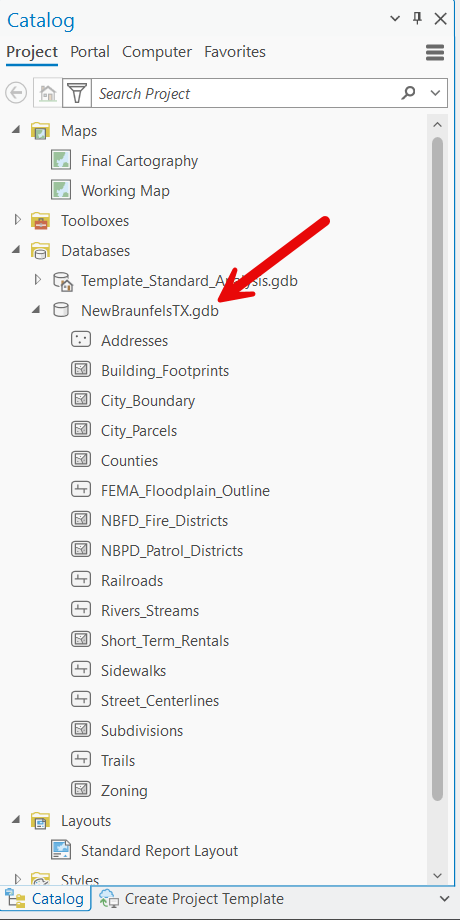
Verify that the default geodatabase is set to the geodatabase in the project home folder. This ensures geoprocessing outputs land in a predictable location.
If you have a custom toolbox with frequently-used models or scripts, add it to the project. If appropriate, you can set it as the project’s default toolbox so new models are automatically saved there.
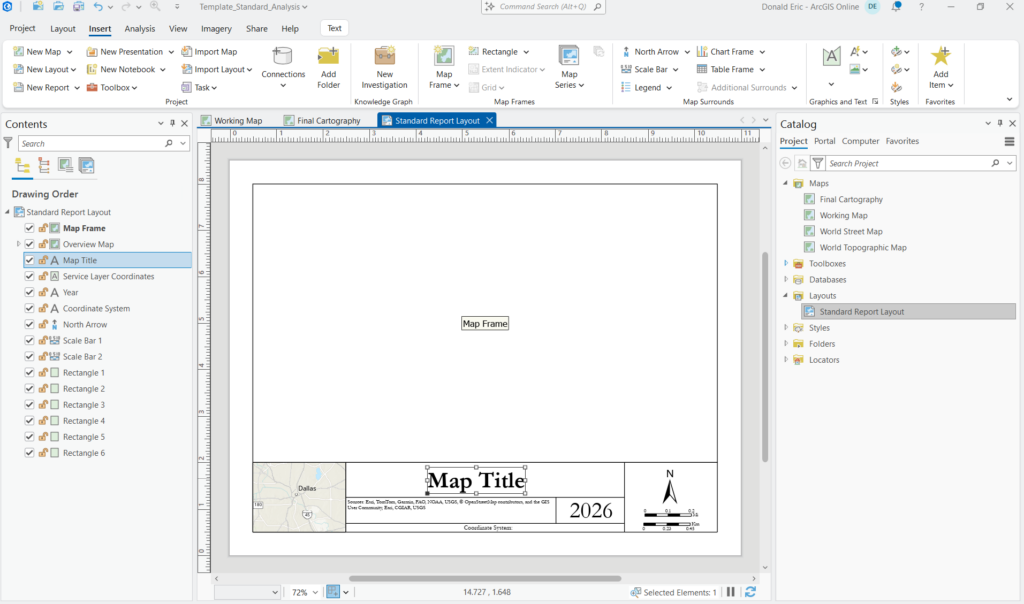
Step 4: Create a Basic Layout
Insert a new layout — 8.5×11 landscape is a safe default for reports.
Add the following elements:
- Map frame — Insert a map frame and point it to the “Final Cartography” map. For this basic template, we’ll keep it empty and let users populate it with their own data. If you’re building a template for users who will all access the same shared data sources, you could include pre-symbolized layers here.
- Title — Add a text box with placeholder text like “[PROJECT TITLE]” so users know where the title goes
- North arrow — Choose a style that matches your organizational standards
- Scale bar — Set the units appropriately for your region
- Logo — If your organization has a standard logo, add it now
- Disclaimer text — Any required legal language, data source credits, or standard disclaimers
Name this layout “Standard Report Layout” so it’s clear what it’s for.
Step 5: Save As Template
Now that your project structure is complete, save it as a template.
On the ribbon, click the Share tab. In the Save As group, click Project Template. This opens the Create Project Template pane.
In the Create Project Template pane, click Save template to file.
The default save location for project templates is C:\Users<username>\Documents\ArcGIS\ProjectTemplates. You can accept this default location, or browse to a different location where your team can access the template. Options include:
- The default location — Good for personal templates you’ll use yourself
- A shared network drive — Best for team templates that multiple users need to access
- A specific Templates folder — If your organization maintains a central template library
Name the file clearly: Standard_Analysis_Template.aptx
The .aptx extension indicates this is a template, not a regular project file. When you save, ArcGIS Pro packages your project structure into this file. The original project folder and .aprx remain unchanged — you’ve just created a reusable snapshot of its structure.

Creating a New Project from a Template
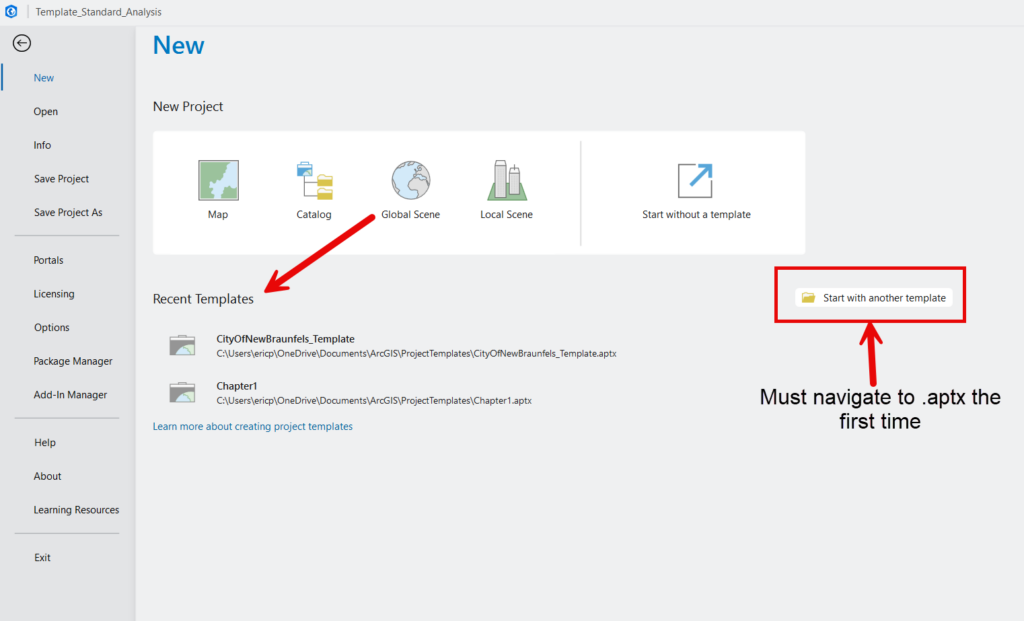
Once you’ve built a template, using it is straightforward. The first time a template is used you must browse to the location where the .aptx file is stored. Thereafter, the template will automatically be loaded into the Recent Templates section.
Method 1: From the ArcGIS Pro Start Page
- Open ArcGIS Pro (or click the Project tab if Pro is already open)
- Click New to begin the process of creating a new project
- In the Recent Templates section, click Start with another template and navigate to your .aptx file
- Select the template and click OK
- Provide a name and location for your new project
- Pro creates a new project with all the template structure intact
What happens behind the scenes:
- A new project folder is created at the location you specified
- A new .aprx file is created with the template’s structure
- A new default geodatabase and toolbox are created in the project home folder
- All maps, layouts, folder connections, and settings are copied from the template
- You start working immediately with everything pre-configured
Method 2: Using Recent Templates
After you’ve used a custom template once, ArcGIS Pro adds it to your Recent Templates list on the start page. This makes it easy to reuse your most common templates without browsing to the .aptx file location each time.
From the start page, your recently-used templates appear in the template section, giving you one-click access to your standard project structures.
Advanced Template Strategies
Once you understand the basics, you can leverage templates more strategically.
Strategy 1: Build a Template Library
Instead of one catch-all template, create multiple templates for different project types. For example:
- Analysis_Template.aptx — Two maps (working and final), basic analysis tools, standard report layout
- Field_Mapping_Template.aptx — Mobile-friendly coordinate system, offline basemap references, data collection layout
- Report_Production_Template.aptx — Multiple pre-designed layouts for different page sizes, branded elements, map series configuration
- Client_Deliverable_Template.aptx — Polished layout, external-facing disclaimer language, export-ready settings
Store these in a shared network location and document which template to use for which scenario. A simple README file or internal wiki page can guide team members to the right template.
Strategy 2: Include Pre-Configured Tasks
If your team follows standard workflows, build those workflows into templates using ArcGIS Pro’s Tasks feature.
Tasks are step-by-step procedures that guide users through complex processes. Examples:
- Data QA/QC checklist
- Standard site assessment workflow
- Map production sequence (symbolize, label, layout, export)
- Analysis procedure (buffer, intersect, summarize, visualize)
When tasks are embedded in a template, new users or infrequent users get guided through established procedures without needing to remember every step. This is particularly valuable in training environments or for seasonal staff. Learn more about the ArcGIS Pro Task Automation framework.
Strategy 3: Set Organizational Defaults
Templates are an opportunity to enforce standards without writing policy documents that nobody reads.
Add organizational defaults directly into the template:
- Custom styles — Load your organization’s style file with approved colors, symbols, and fonts
- Metadata settings — Pre-configure metadata templates with organizational contact information
- Geoprocessing environments — Set default output coordinate systems, extent handling, and output naming conventions
- Map projections — Use the coordinate systems your organization has standardized on
When these settings are baked into the template, compliance becomes automatic.
Strategy 4: Design for Portability
If your template includes folder connections, make sure they work across different user environments.
Use UNC paths for network resources:
Instead of mapped drive letters (G:\SharedData), use UNC paths (\\server\SharedData\). Mapped drives vary between users; UNC paths are consistent.
Document required folder structures:
If your template assumes certain folders exist or references data from shared network locations, document those requirements. For example, if the template expects access to \\YourServer\ReferenceData\ or includes layers that point to shared datasets, include that information in the template documentation or a README file.
Test on another machine:
Before deploying a template to your team, test it on a colleague’s computer or a different machine. This reveals path dependencies and assumptions that only work in your environment.
Sharing Templates with Your Team
Once you’ve built a template, distribution is the next consideration.
Option 1: Network Share
The simplest approach for small to medium teams:
- Save all .aptx files to a shared network drive (e.g., \\YourServer\GIS\Templates\)
- Communicate the location to your team
- Everyone browses to that location when creating new projects
Pros: Simple, requires no IT support, easy to update
Cons: Requires consistent network access, no version control, relies on users knowing where to look
Option 2: Organizational Deployment
Larger organizations can deploy templates via enterprise configurations:
- IT can push templates to standard locations on all user machines (e.g., C:\GISTemplates\)
- Templates appear automatically in the ArcGIS Pro template picker
- Ensures consistency across departments and regional offices
Pros: Centralized management, guaranteed availability, can enforce standards
Cons: Requires IT coordination, updates are slower
Option 3: Portal or ArcGIS Online Distribution
For distributed teams or organizations with portal infrastructure:
- Upload the project template itself to ArcGIS Online or ArcGIS Enterprise
- The template is stored in My Content and can be shared with groups
- Users can browse to it from their active portal when creating new projects
Pros: Works for remote teams, integrates with existing portal workflows, centralized access control
Cons: Requires portal/AGOL setup, not all users are comfortable with portal-based workflows
Governance Tips
Templates need light governance to remain useful:
- Version your templates — Use filenames like Standard_Analysis_v2.aptx so users know which is current
- Document what each template is for — A simple README file or internal wiki page prevents confusion
- Assign an owner — One person or team should be responsible for template updates and maintenance
- Retire outdated templates — Move old templates to an archive folder rather than deleting them, but don’t let the active template library accumulate clutter
Updating Existing Templates
Templates aren’t set-it-and-forget-it. As organizational standards evolve, your templates should too.
When to Update a Template
Common triggers for template updates:
- Organizational branding changes (new logo, new color scheme)
- New standard workflows emerge
- Better layout designs are developed
- Coordinate system standards change (e.g., shift from State Plane NAD83 to NAD83(2011))
- Feedback from users reveals missing elements or friction points
How to Update a Template
The process is straightforward:
- Create a new project from the existing template (or open a recent project built from it)
- Make your changes — update layouts, add new maps, modify connections, etc.
- Save As Template with the same filename (or version it as v2, v3, etc.)
- Replace the old template file or archive it
- Communicate the changes to your team
Migration Strategy
Important: Existing projects created from old templates don’t automatically update when you modify the template. The template is a one-time snapshot applied at project creation.
If a template change is critical (e.g., new legal disclaimer text, updated logo), you have two options:
- Manually update active projects — For small numbers of projects, open each one and apply the change
- Provide update guidance — For larger deployments, document the change and let project owners decide whether to incorporate it
Most template updates are forward-looking — they improve new projects without requiring retrofits of existing work.
The Template Mindset
Project templates are one of the highest-leverage productivity improvements you can make in ArcGIS Pro. The ten minutes you spend building a template saves hours across every project that follows. More importantly, templates shift you from reactive to proactive — instead of rebuilding structure every time, you’re building it once and deploying it consistently.
Templates also enforce organizational standards without heavy-handed policy documents. When your team creates projects from the same template, outputs naturally look consistent. Layouts use the same design. Maps use the same coordinate systems. Folder structures are predictable. Quality becomes structural, not aspirational.
Start small. Build one template for your most common project type. Use it for a month. Refine it based on what you learn. Then build templates for your second and third most common scenarios. Over time, you’ll accumulate a library of templates that covers most of your work.
If you want to dive deeper into ArcGIS Pro productivity workflows, project management best practices, and automation strategies that compound with templates — ModelBuilder, Python scripting, Tasks, and more — check out our ArcGIS Pro training courses. We cover the full workflow from project setup through delivery.
