In this tutorial, you’ll learn how to create a script tool in ArcGIS Pro from a standalone Python script.
A script tool is a Python script file that can be run as a geoprocessing tool. This means you only have to worry about setting the right parameters of the tool and run it: output and messages are displayed within Pro, whereas Python scripts are run from an editor, and output may be shown in a terminal or separate output files. After creating a script tool, the tool is now part of Pro, whereas standalone Python scripts can be saved and stored anywhere. Creating a script tool from a Python is nice way to let others work with your Python scripts if they don’t know Python or prefer to run tools from Pro as a working environment.
Creating a script tool involves the following tasks:
- Writing a Python script
- Editing it so that Pro can convert it to a script tool
- Using the wizard to create a script tool
- Testing and running the tool
Step 1: Write a Python script
We’ll use a simple Python script that describes multiple properties of a shapefile feature class. It also prints all table field names and their data types. The script is the following:
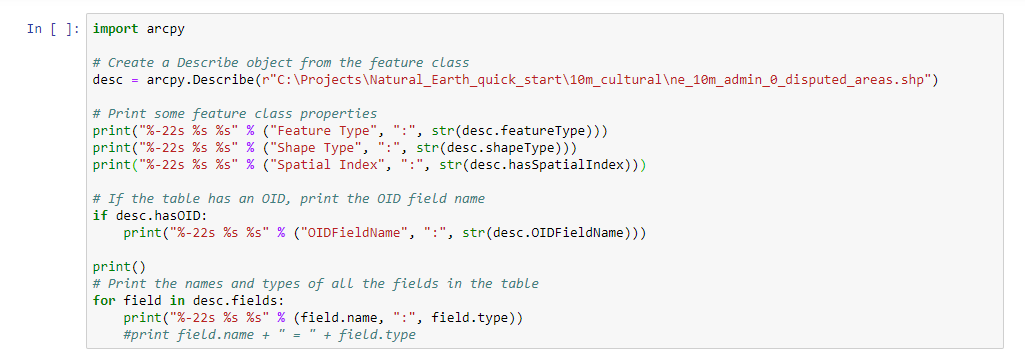
As you can see, it uses a shapefile feature class as input that forms part of the Natural Earth quickstart kit that you can download if you want to test the code and follow along (you can also use your own data). This code can be run directly from a Python notebook or as a standalone Python file. To be able to run this code as a script tool, we’ll have to edit it a little bit. We’ll do this next.
Step 2: Edit the code
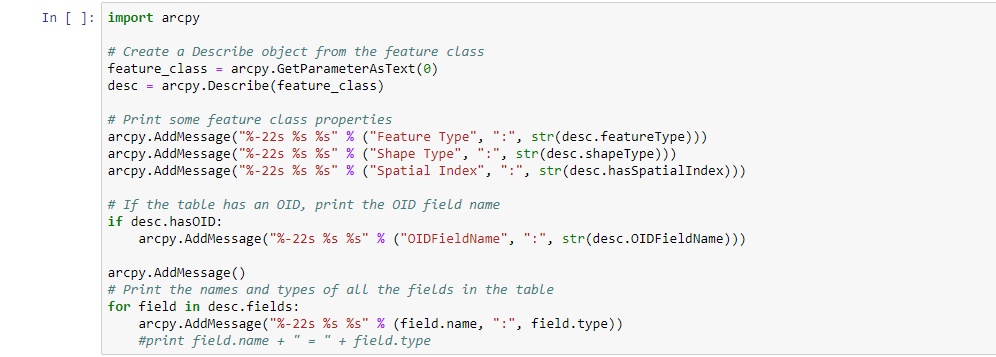
If you use a geoprocessing tool such as Buffer, you probably know you have to specify an input and output dataset location before you can run the tool. The same goes for any script tool, which means that input/output datasets and file locations need to be set as parameters using arcpy.GetParameterAsText(), so that you can choose your own input and output file locations before running the script tool. Similarly, print statements from a Python script need to be replaced with arcpy.AddMessage() in order to be displayed as custom messages. If we apply this to our script, it will look like this:
Save the new code as a Python script file, so with a .py extension. This file will form the basis for the script tool.
Step 3: Create the script tool
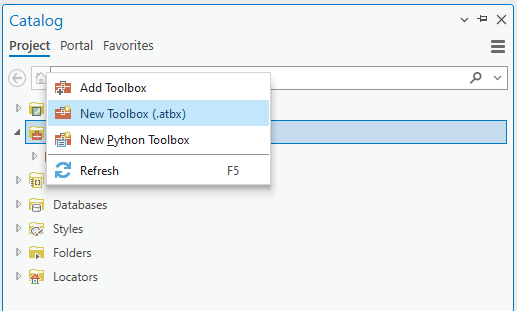
Open Pro and create a new project. In the Catalog pane, click “Toolboxes”, next “new toolbox.atbx”. Give the toolbox a name and see it appear in the Catalog pane.
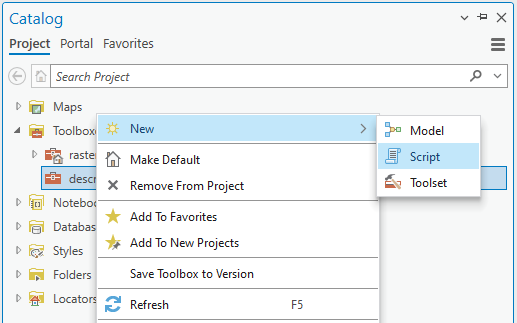
Next, right-click the new toolbox and select “New” and “Script”:
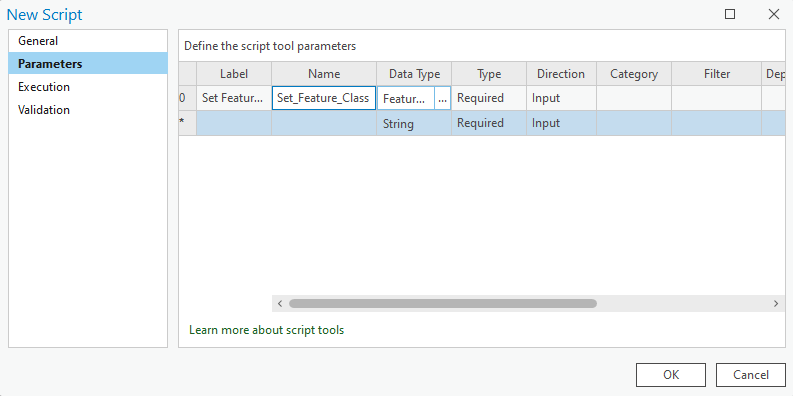
First, set the “Name” field to “DescribeFCdata” and set the “Label” field to “Describe properties of a shapefile feature class and table field names”. Next, click the Execution tab and click the folder icon to the far right of the Script File field to browse for an external script. Add the python file (.py) you’ve created under Step 2 and make sure the code gets updated with your own Python code from the referenced Python file. Make sure the code gets updated so that you can see your own Python code on the screen. Next, do not click “OK”, but instead click “parameters” from the left tab. Here, you will set what input file you want to select before running the script tool. Select “label”, type “Set Feature Class”, click the field under “Name”, accept the default and select “Feature Class” under Data Type. Select “Table of Values”. The parameter tool should look like this:
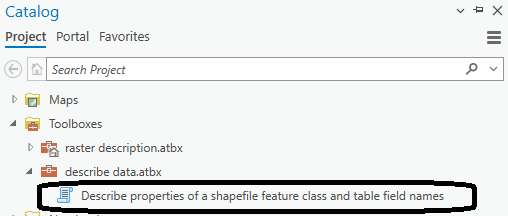
Click “OK”. The script tool should now be added in the Catalog pane.
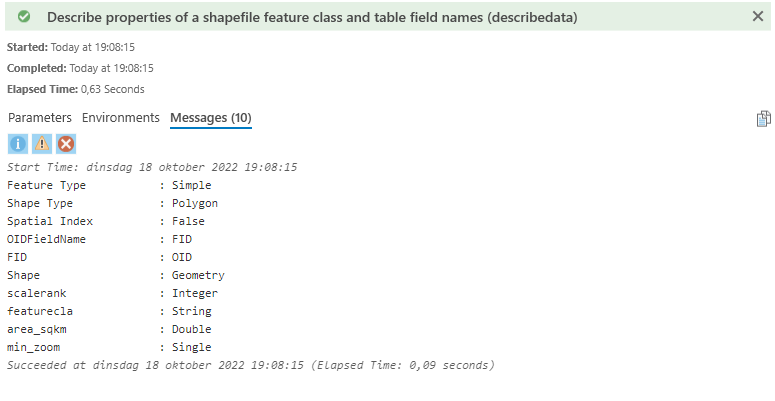
Double-click it, set a feature class of your choice, run the script tool and see the print statements from the Python script under “Open History” and then look up the “Messages” tab: