Save 20% on our GIS classes during our annual holiday sale through December 31st. Simply enter the discount code 20for20 when checking out online. Discount already applied to the Annual GIS Training License. View our full catalog of classes and bundles.
When it comes to effectively communicating geographic data, few tools are as impactful as thematic maps. They help tell a story, uncover patterns, and make your data truly come to life. But what if you need to create a series of thematic maps, each showcasing different themes or subsets of data? ArcGIS Pro makes this process seamless, thanks to its robust symbology and layout tools. Let’s dive into how you can create a thematic map series in ArcGIS Pro and save time while doing it.
What Is a Thematic Map Series?
Thematic map series are available starting with ArcGIS Pro 3.2. A thematic series is a collection of pages built from a single layout in which the map frame is updated to show a different layer from a group of layers. The map series is built by iterating through all the features in a radio group layer, creating a page for each layer. Thematic map series are typically used when you have a collection of maps that share the same geographic extent but highlight different themes, datasets, or attributes. For example:
- A demographic series could include maps of population density, income levels, and educational attainment.
- A land use series might display zoning categories, green space distribution, and urban growth.
ArcGIS Pro’s intuitive interface allows you to set up these map series efficiently, maintaining consistency across layouts while highlighting unique themes for each map.
How To: Create a Thematic Map Series
Let’s get started with the tutorial. To follow along you’ll need to have at least ArcGIS Pro 3.2 installed with any license level. In this tutorial you are going to create a thematic map series that displays California wildfire perimeters for a series of years.
Before creating your thematic maps, ensure your ArcGIS Pro project is well-organized:
- Create a New Project:
- Open ArcGIS Pro and create a new project using the Map template. Name the project ThematicMapSeries. You can store the project wherever you’d like on your computer.
- If necessary, login to your ArcGIS Online or Portal account.
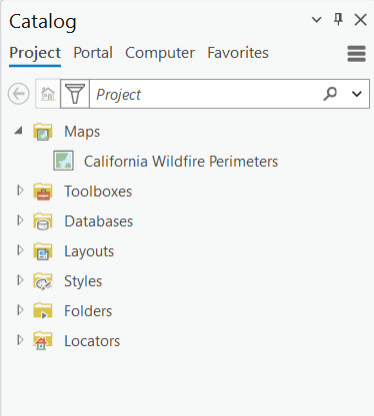
- Rename Map to California Wildfire Perimeters.
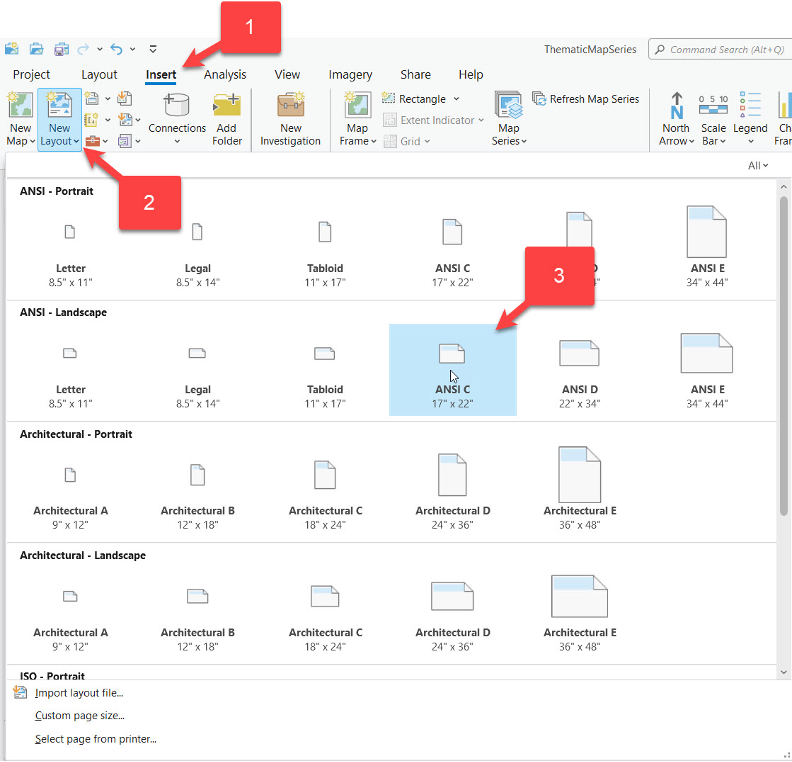
- From the ArcGIS Pro Insert tab select New Layout –> ANSI C to create a new layout.
- Set Up a Basemap:
- Open the California Wildfire Perimeters map and change the basemap to Enhanced Contrast Dark Map.
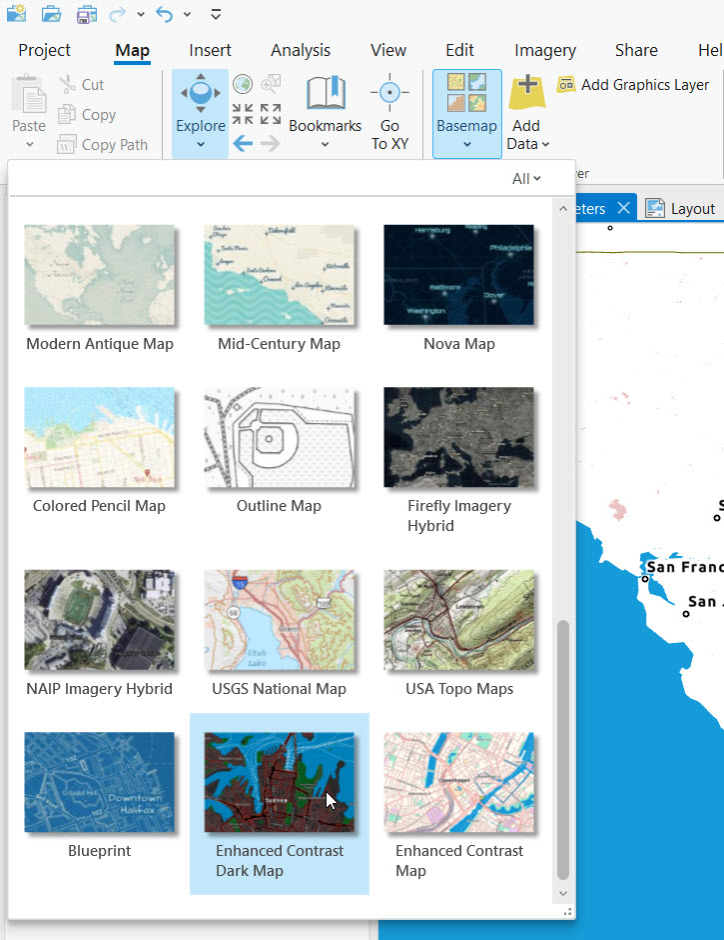
- Open the California Wildfire Perimeters map and change the basemap to Enhanced Contrast Dark Map.
- Add Data:
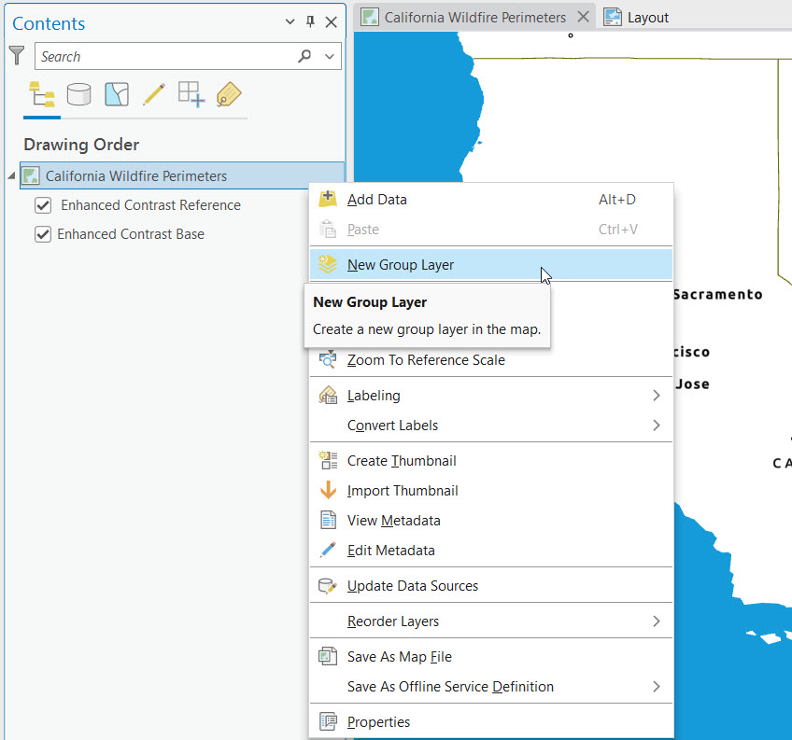
- From the Contents pane right click California Wildfire Perimeters and select New Group Layer. Rename the layer to California Wildfire Layers.
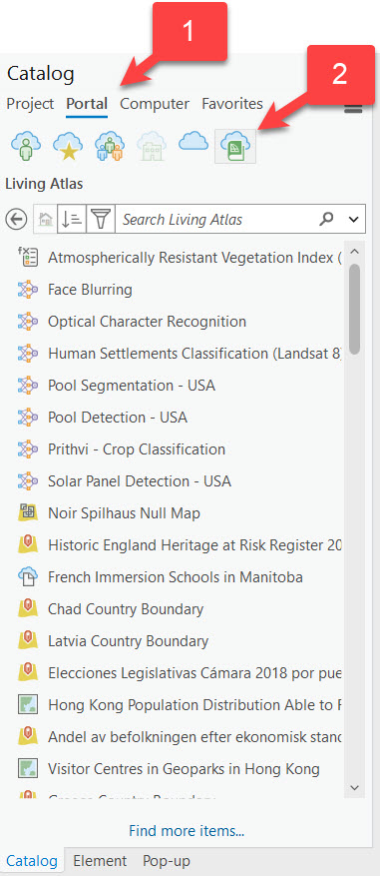
- On the Catalog pane click Portal and then the Living Atlas button.
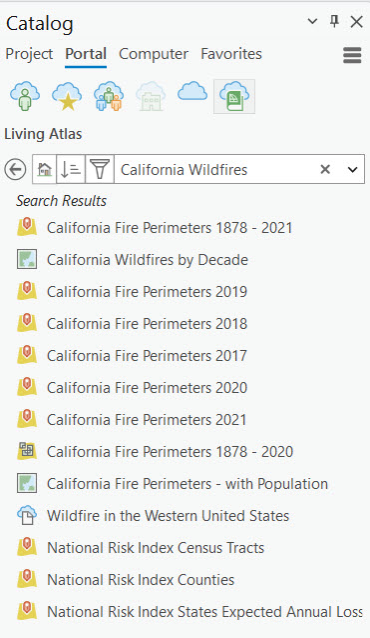
- In the Search bar enter California Wildfires and click enter. You should see a listing like that in the screenshot below.
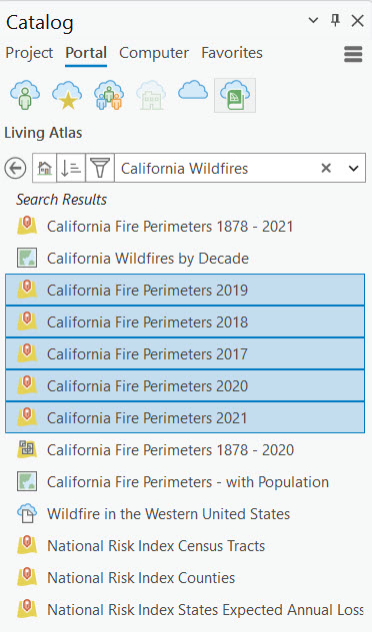
- For this thematic map series, we’re interested in the fire perimeter layers from 2017 to 2021. Using your mouse and the shift key on your keyboard, select the layers as seen below.
- Drag the layers to the California Wildfire Layers group layer in the Contents pane.
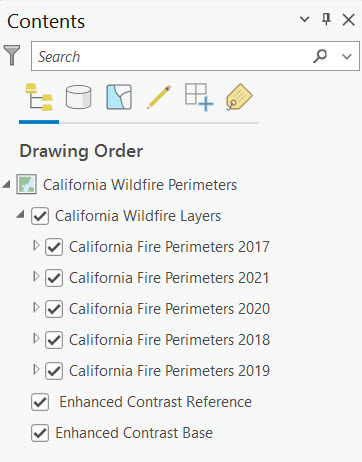
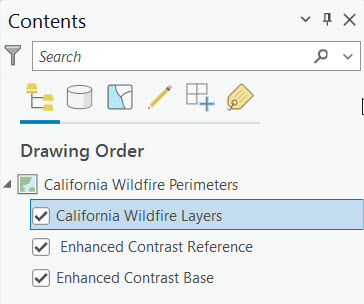
- The layers inside the group layer can be ordered by dragging them to a different location. Order the layers so that 2017 is at the bottom and 2021 at the top with the others layer ordered sequentially by year.Note: Be careful not to accidentally create new group layers inside the existing California Wildfire Layers group layer. It’s easy to do so by dragging a layer inside another layer.The final result should be as seen in the screenshot below.Import the datasets you’ll use for your thematic maps.
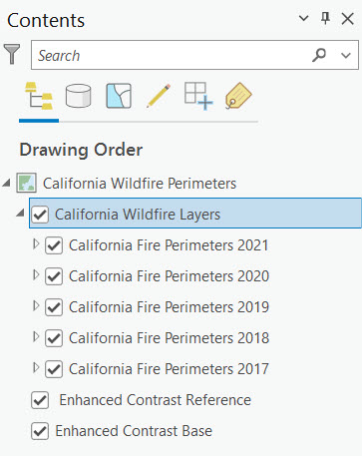
- You may have noticed that each of the layers inside the California Wildfire Layers group layer have check boxes next to the layer name. This will need to be changed to radio buttons for creating a thematic map series. Right click California Wildfire Layers in the Contents pane and select Group Type –> Radio.
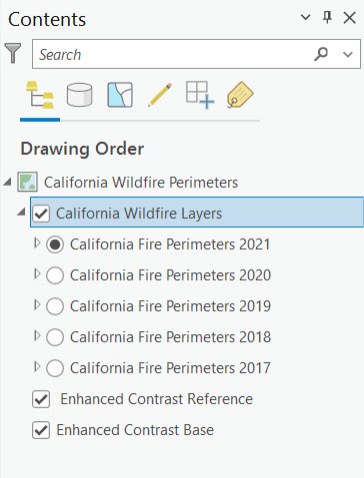
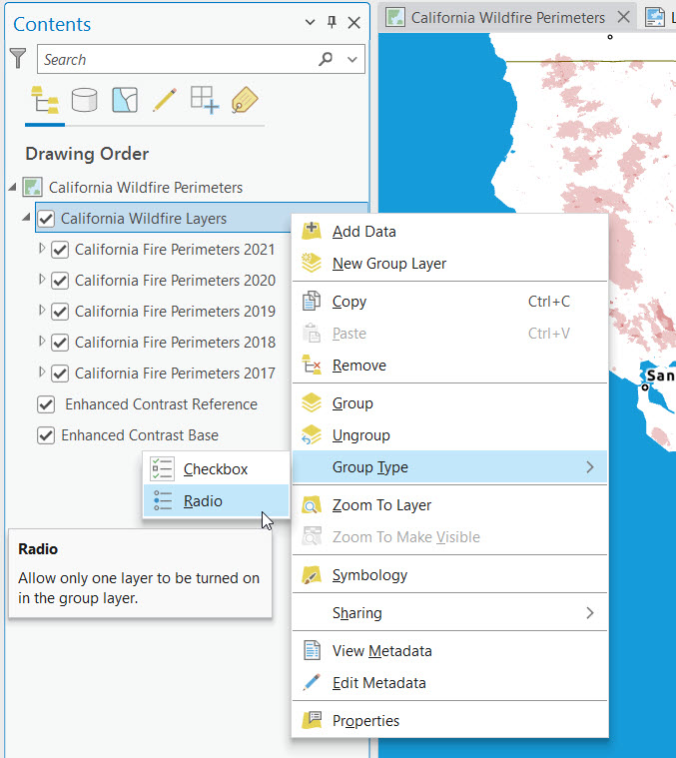 This will change the check boxes to radio buttons ensuring that only one of the layers in the group can be active at any given time. This is a requirement for thematic map series creation.
- In the Contents pane right click California Wildfire Perimeters and select Properties to display the Map Properties window seen below.
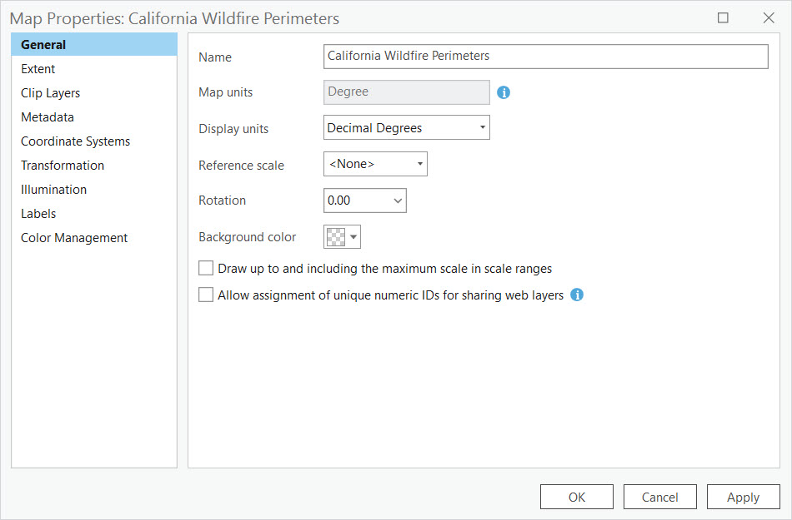
- Click Extent and then Use a custom extent.
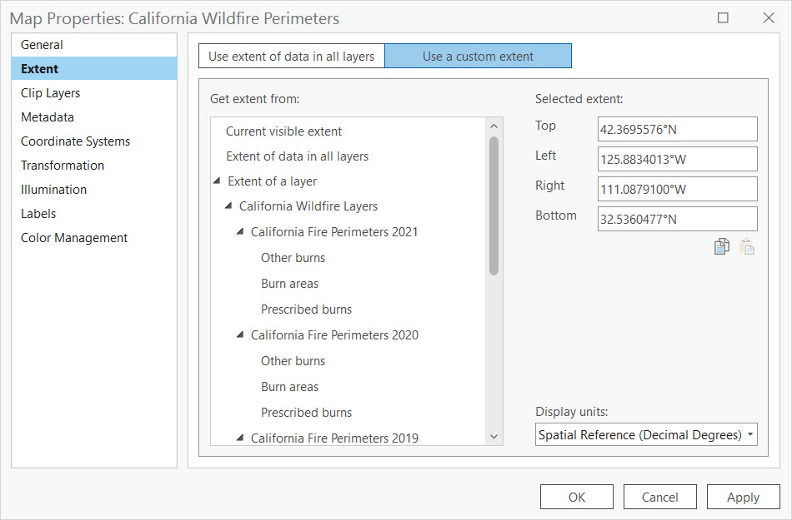
- Under Extent of a layer select California Wildfire Layers –> Fire Perimeters 2021. You could select any of the layers in the group layer because they all have the same extent.
- Click the Ok button to dismiss the Map Properties dialog.
- From the Contents pane right click California Wildfire Perimeters and select New Group Layer. Rename the layer to California Wildfire Layers.
- Create the Layout for the Map Series
- From the Catalog pane open the Layout you created in a previous step.
- From the Insert tab select the Map Frame button and then Default Extent under California Wildfire Perimeters.
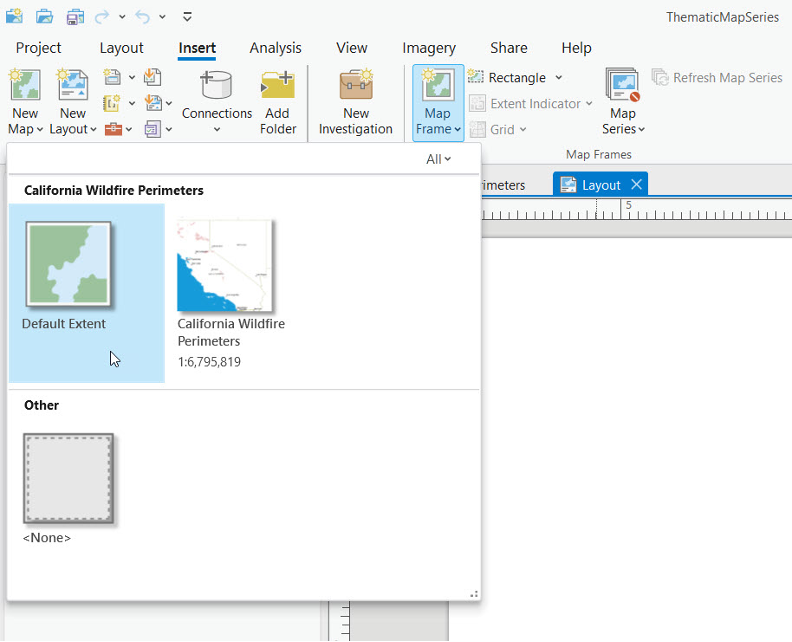
- On the Layout draw a rectangle so that it fills most of the layout view as seen below.
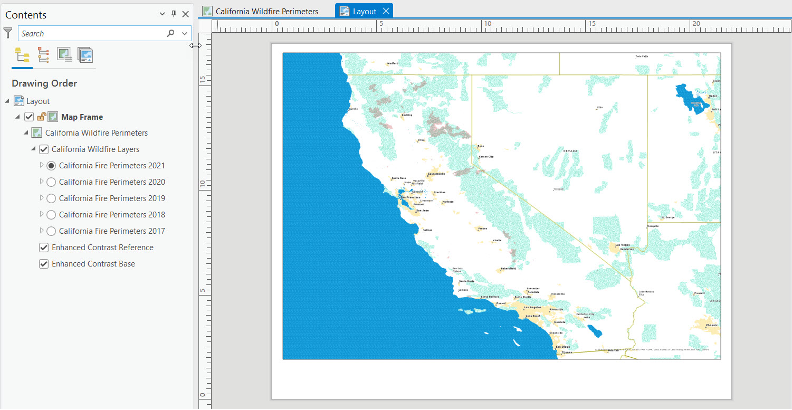
- From the Insert tab, under Graphics and Text, select Rectangle under the Polygon section.
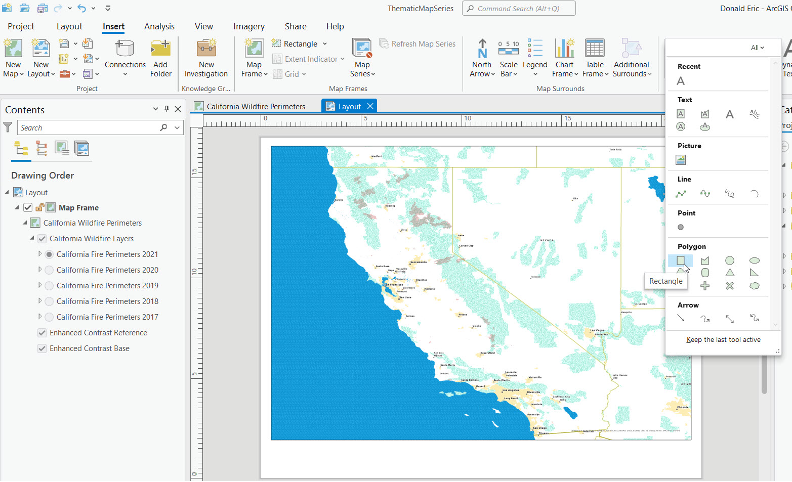
- Draw a rectangle below the map a seen below.
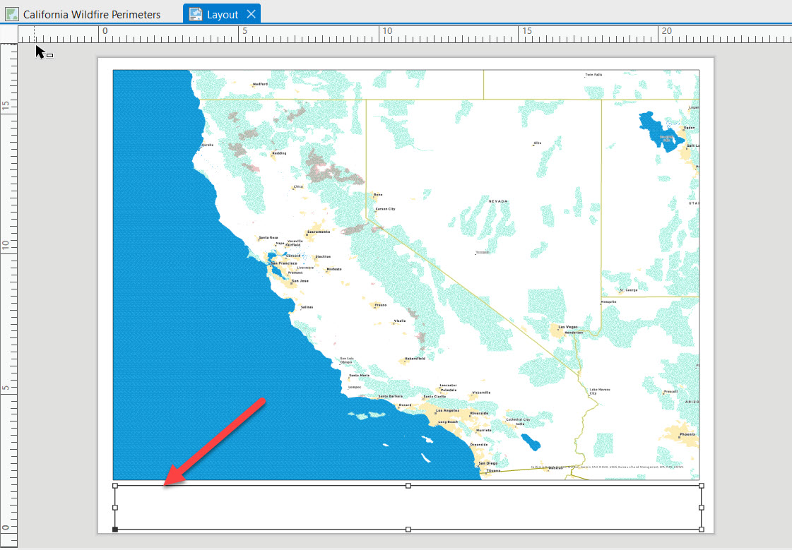
- Double click the new rectangle to display the element pane seen below.
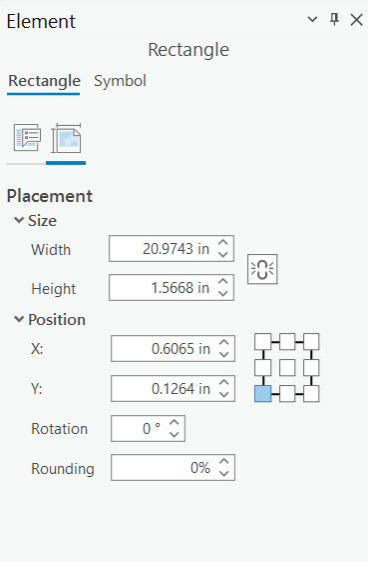
- Click the Symbol tab on the element pane.
- Change the color to Gray 40% (or something similar) and apply the change.
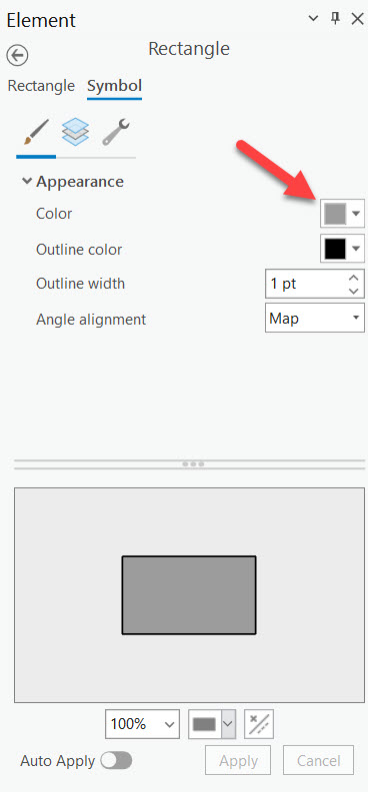
- Dismiss the element pane.
- From the Insert tab select Map Series –> Thematic. Note: You will need to be using at least version 3.2 of ArcGIS Pro to able to create a Thematic Map Series.
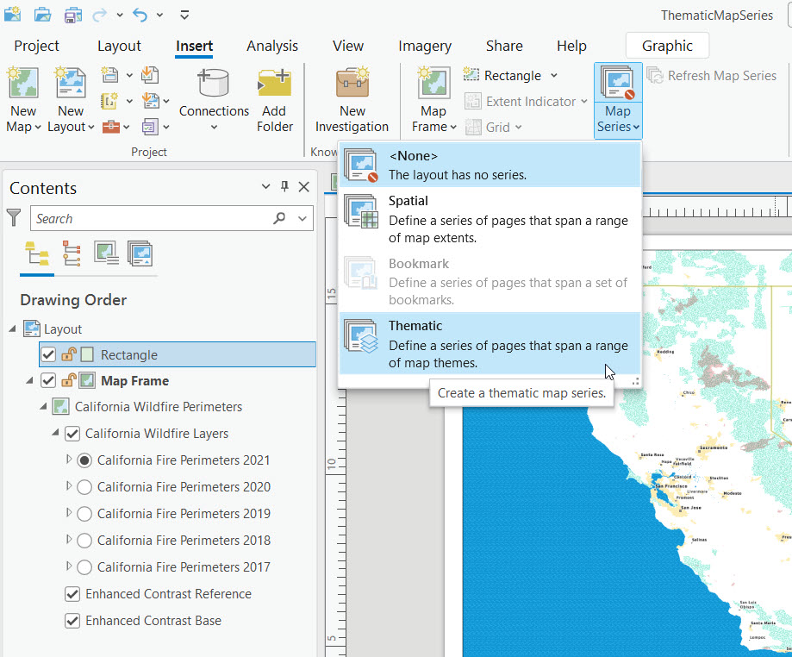
- Make sure your parameters are the same as seen in the screenshot below.
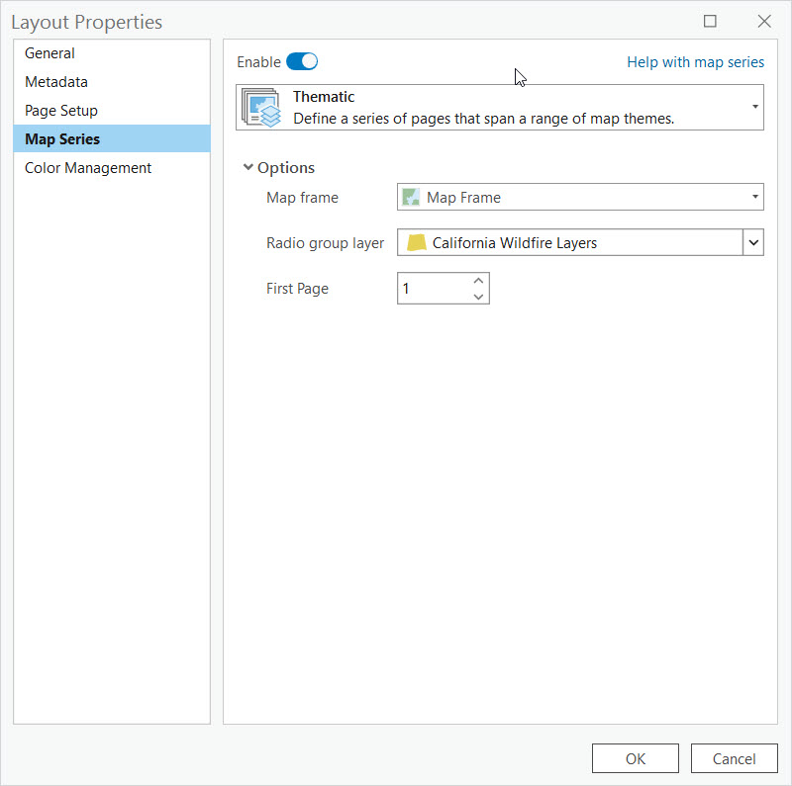
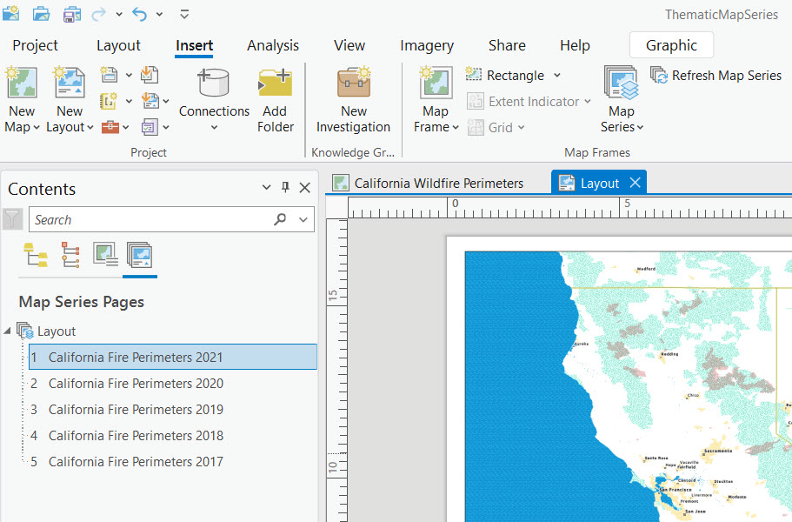
- Click Ok to create the map series pages as seen below.
- Finally, let’s add a piece of dynamic text for the title of each map. From the Insert tab select Dynamic Text –> Map Series –> Page Name. Draw a box where the text will be placed inside the gray rectangle.
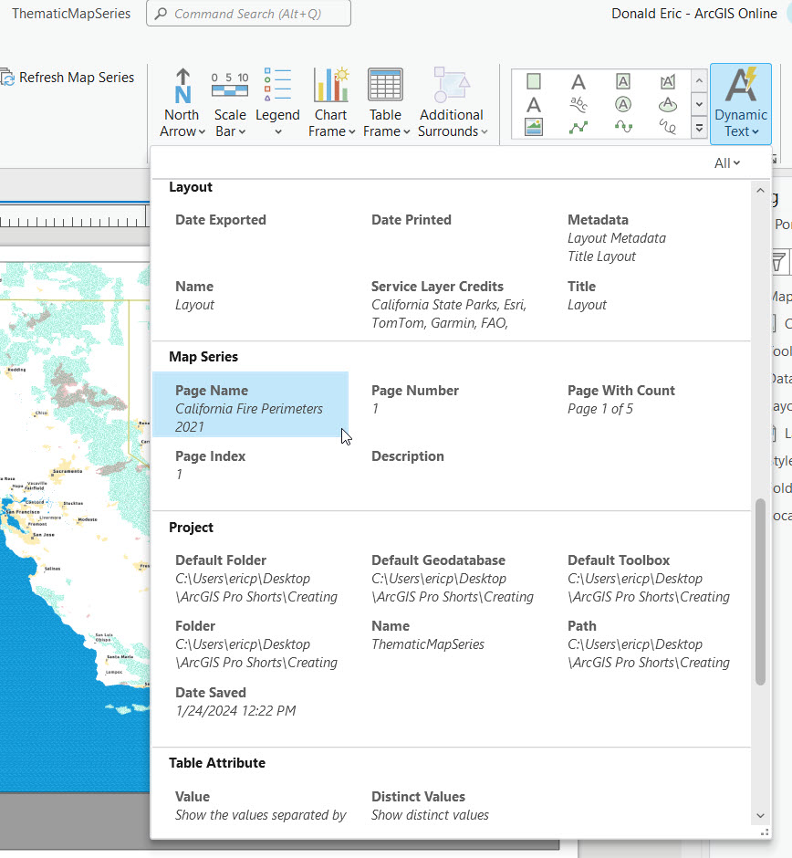
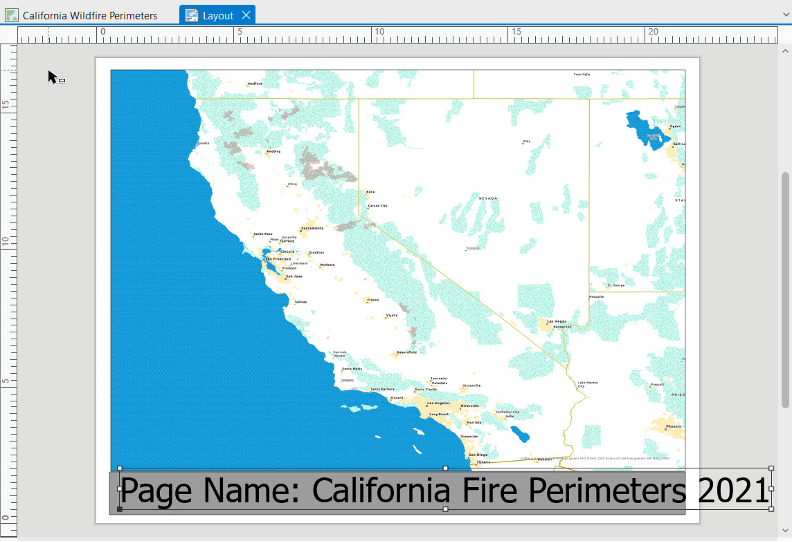
- Let’s take out the “Page Name:” section of the dynamic text. Double click inside the piece of dynamic text.
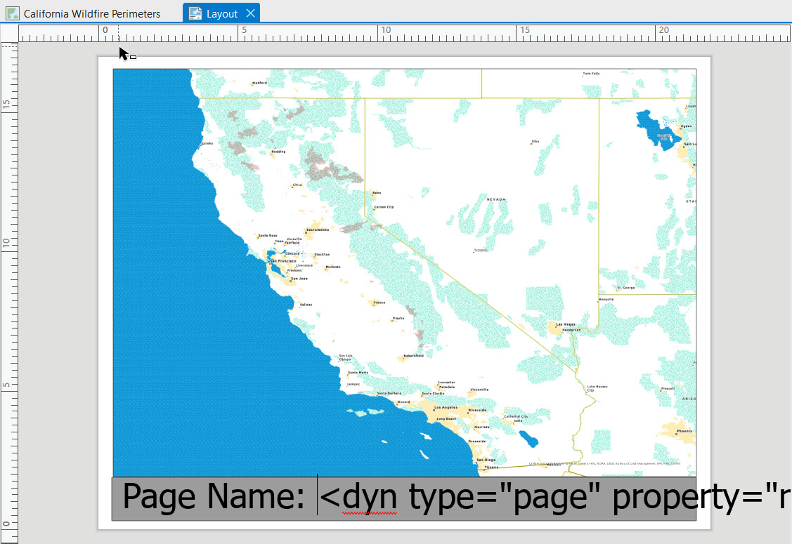
- Backspace out the “Page Name:” text and click anywhere outside the text element. Your text should now display as seen below.
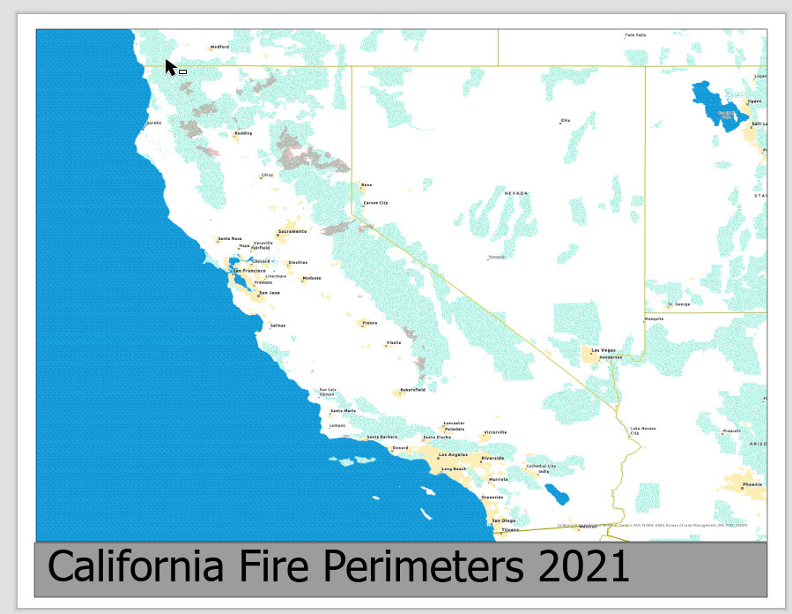
- Double click any of the other items in the Contents pane to see how dynamic text affects the title of the map.
- Save the project.
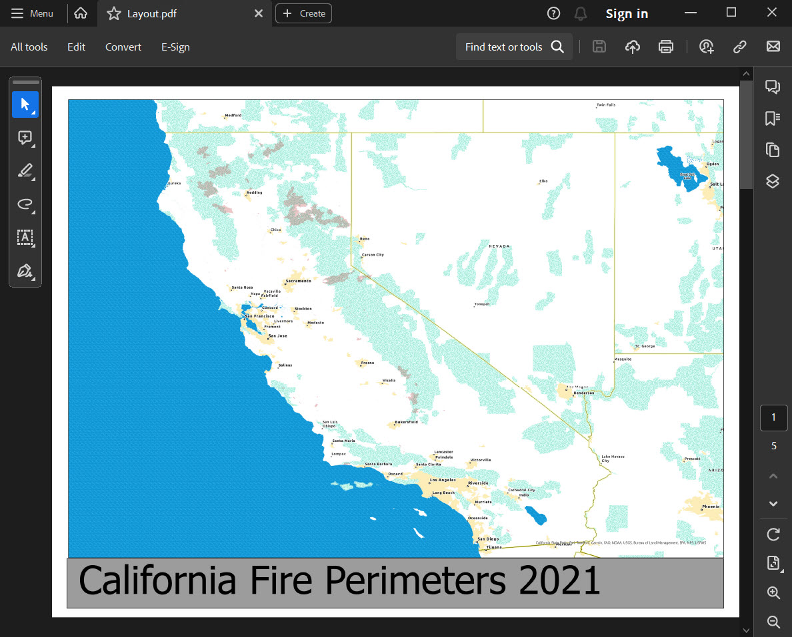
- The last thing you’ll want to do is export the map series to a pdf file. From the Share tab select Export Layout –> Flattened PDF.
- On the Export Layout geoprocessing tool interface define a location and file name for the output and select Export. When the process is complete you can view the exported pdf file.
Conclusion
Creating a thematic map series in ArcGIS Pro doesn’t have to be daunting. By leveraging the platform’s robust symbology, layout tools, and automation capabilities, you can produce a polished collection of maps that tell a powerful story. Whether you’re working on demographic analysis, environmental planning, or market research, thematic maps are an invaluable tool for delivering insights with clarity and impact. So, start mapping your themes today and watch your data come to life!
