
Introduction: The Power of Effective Symbology
Symbology transforms raw spatial data into meaningful visual information. In ArcGIS Pro, the right symbols, colors, and patterns can dramatically improve how your audience interprets and understands your maps. Whether you’re creating simple reference maps or complex analytical visualizations, symbology is the visual language that communicates your spatial story.
While ArcGIS Pro includes an impressive collection of built-in symbols, many GIS professionals need specialized symbology for industry-specific applications, organizational branding, or particular visualization requirements. Fortunately, ArcGIS Pro allows you to easily expand your symbology options by importing external style files.
This guide will walk you through:
- Understanding symbology fundamentals in ArcGIS Pro
- Working with style files (.stylx)
- Adding both Esri-provided and external style files to your projects
- Applying custom symbols to your map layers
Symbology Basics in ArcGIS Pro
ArcGIS Pro offers several symbology methods to represent your spatial data effectively:
- Single Symbol displays all features with identical styling—useful for simple reference layers where feature attributes aren’t the focus.
- Unique Values assigns different symbols based on categorical attributes, perfect for displaying land use types, zoning classifications, or administrative boundaries.
- Graduated Colors and Graduated Symbols visualize quantitative data through color progression or size variation, ideal for population density, income statistics, or environmental measurements.
- Proportional Symbols scale symbol sizes according to numerical values, effectively showing relative magnitudes across locations.
- Heat Maps represent density patterns, transforming point data into continuous surfaces of concentration.
- Charts embed pie, bar, or other charts directly on your map for multivariate visualization.
The right symbology choice depends on your data type, analysis goals, and intended audience. However, your symbology options are limited to the style files available in your project.
Understanding Style Files in ArcGIS Pro
Style files (.stylx) are the repositories for symbols, colors, and other cartographic elements in ArcGIS Pro. They contain collections of predefined symbols organized by categories and tags for easy access. By default, when a new project is created in ArcGIS Pro using one of the built-in templates (Map, Local Scene, Global Scene, or Catalog) a small set of style files is added into the newly created project. You can see the style files by expanding the Styles section of the Catalog pane as seen below.
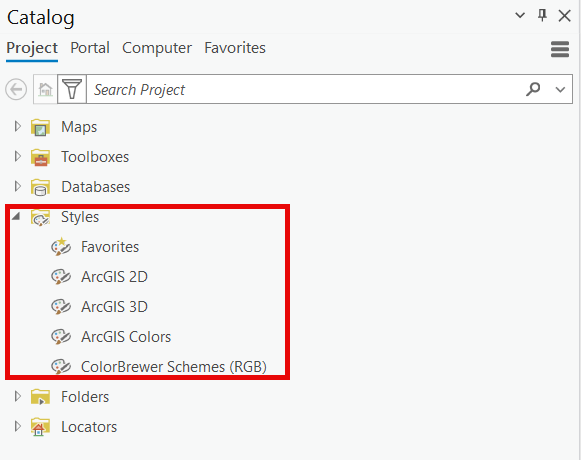
The style files included in newly created ArcGIS Pro projects includes:
- ArcGIS 2D – General-purpose vector symbols
- ArcGIS 3D – Symbols optimized for 3D scenes
- ArcGIS Colors – Contains Esri’s default color collections designed for cartographic use
- ColorBrewer Schemes (RGB) – Contains the famous ColorBrewer palettes developed by Dr. Cynthia Brewer, specifically optimized for cartography and thematic mapping
Importing Internal (System Styles)vs. External Style Files
ArcGIS Pro organizes its symbology resources into two distinct categories: System Styles and External Styles. System Styles are pre-installed with the ArcGIS Pro software and reside in the program’s installation directory. While these styles are included with your installation, they aren’t automatically loaded into new projects to avoid overwhelming users with excessive options; instead, users must deliberately add them through the Catalog pane when needed.
In contrast, External Styles originate from sources outside the ArcGIS Pro installation—whether downloaded from Esri’s Style Gallery, acquired from third-party providers, or custom-created by users or organizations. These external .stylx files are stored in user-defined locations and must be manually imported into projects. The key difference lies in their origin, management, and accessibility: System Styles are curated, quality-assured resources bundled with the software but requiring explicit activation, while External Styles offer unlimited customization possibilities but demand more user management for consistent availability across multiple projects and users.
System Styles (Built-in Esri Styles)
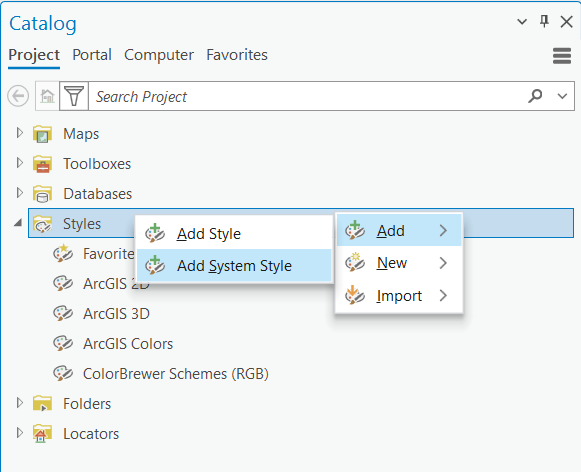
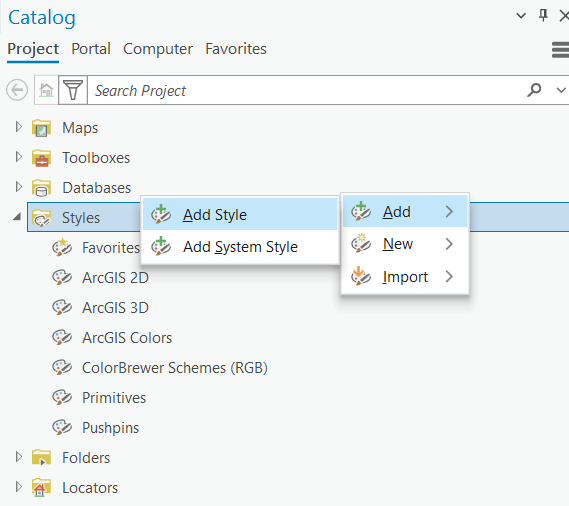
These are styles included with your ArcGIS Pro installation. To access system styles right click the Styles item in the Catalog pane and select Add –> Add System Style.
This will display the System Styles dialog.
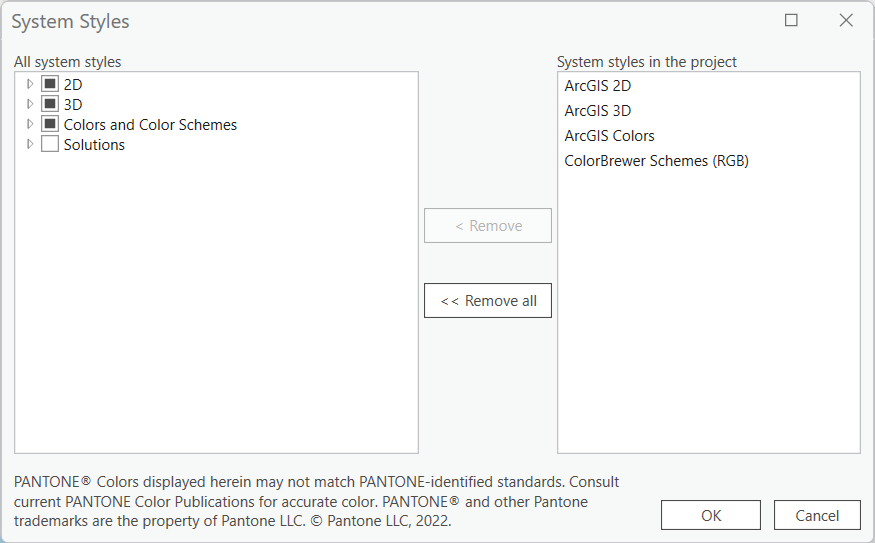
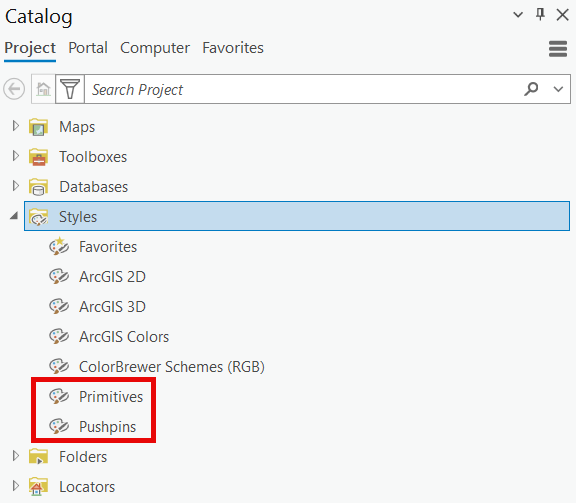
To add a system style to the current project simply expand the related section and use the check boxes to individual style files a seen below where the Primitives and Pushpins styles have been added.
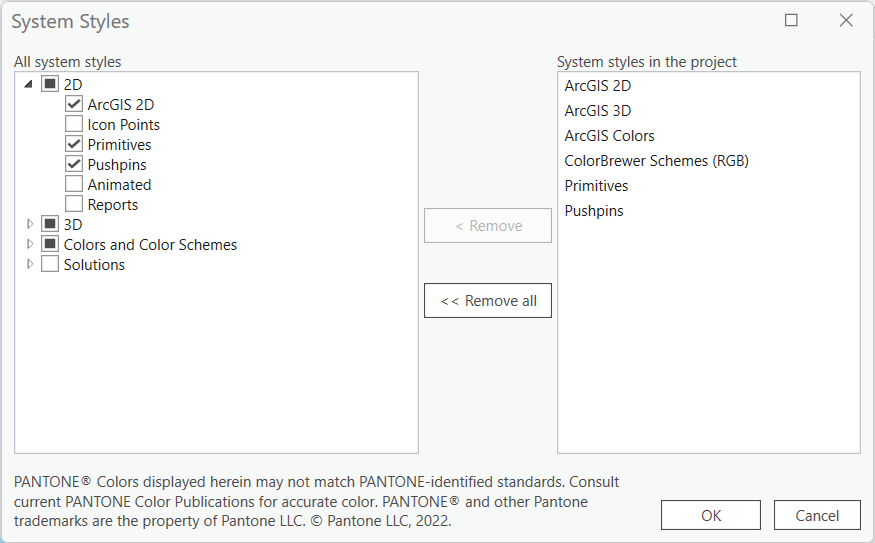
If you return to the Catalog pane you should now see the new styles.
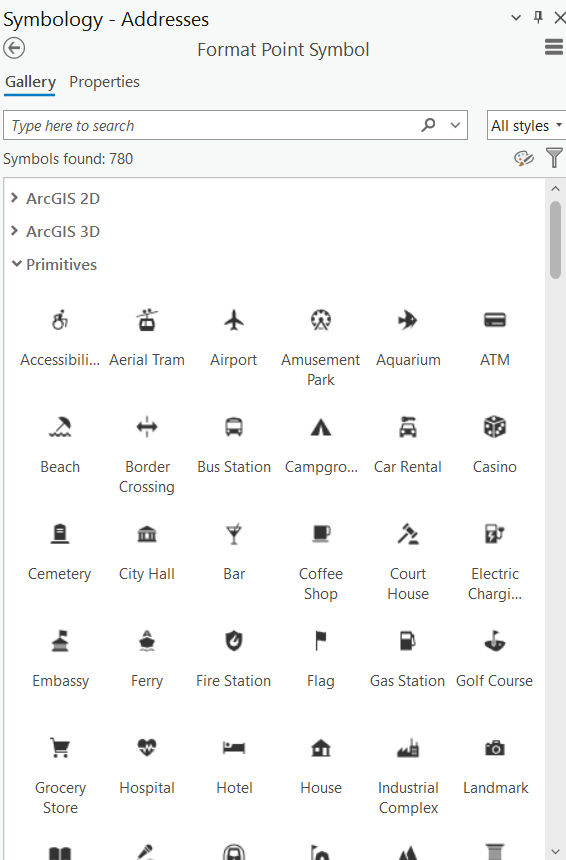
These styles will also be visible in the Style Gallery.
External Styles (Downloaded or Custom)
These are styles you’ve acquired from outside sources. The process for downloading an external files is described below using the Esri Style Gallery.
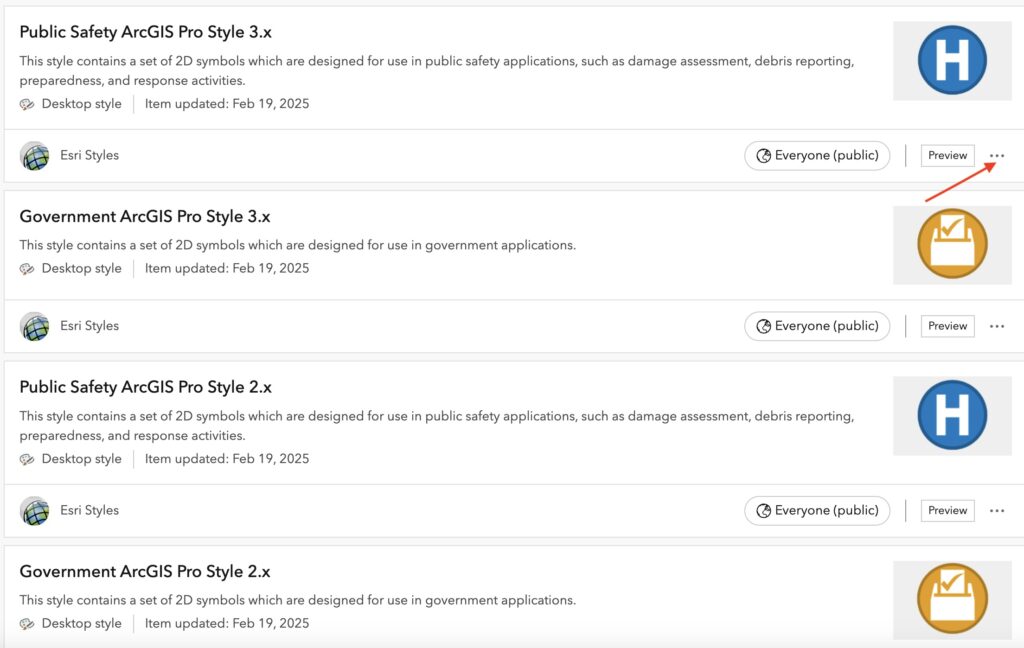
- Find a style you’d like to use from the Esri Style Gallery (or other source). Click the three dots(…) next to the Preview button and select Download. This will download a .stylx file to your Downloads folder.
- In the ArcGIS Pro Catalog pane right click the Styles item and Select Add –> Add Style.
- Navigate to your Downloads folder (or wherever you downloaded the .stylx) file and select the file you downloaded.
- As is the case with system styles, your external style file will be loaded into the Styles section of the Catalog pane and the associated symbols will appear in the Style Gallery.
External styles are particularly valuable for industry-specific mapping needs or when consistent branding is required across multiple maps.
Esri regularly releases additional style files for specific industries and applications. The Esri Style Gallery offers numerous downloadable style files, including those for utilities, military operations, planning, conservation, and more.
Beyond Esri’s offerings, you can find styles created by other organizations, GIS professionals, or even create your own custom styles.
Applying Imported Symbols to Layers
After importing style files, applying the new symbols is easy:
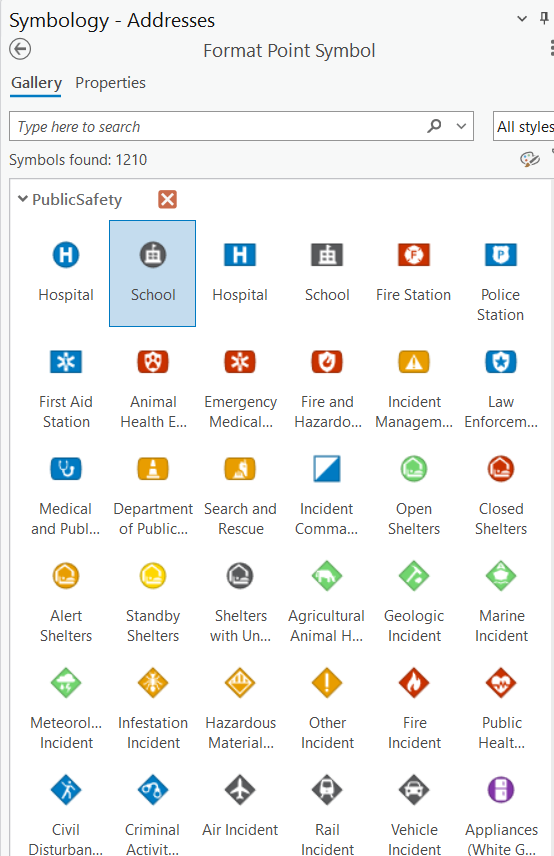
- Left click the symbol (not the layer name) for the layer in the Contents pane to display the Symbol Gallery.
- In the Symbology Gallery, expand the various style sections and locate the symbol you want to use.
- Click on a symbol to apply it to your layer.
For more advanced symbolization, you can modify the imported symbols by adjusting colors, sizes, and other properties through the Symbol Editor.
Conclusion
Importing style files dramatically expands your cartographic capabilities in ArcGIS Pro. Whether you need industry-standard symbols for utilities, custom organization branding, or specialized thematic styles, the ability to import and use external styles ensures your maps communicate effectively with your audience.
By mastering style file management, you’ll create more professional, consistent, and visually appealing maps while saving time on manual symbol creation. As your GIS projects grow in complexity, having an organized library of relevant style files becomes an invaluable asset in your geospatial toolkit.
For additional training on these symbology techniques and other essential ArcGIS Pro skills, explore our comprehensive courses at Geospatial Training Services. Our introductory “Mastering ArcGIS Pro 3: Maps, Layers, Projects, and Layouts” class provides foundational knowledge on working with styles and symbology in the context of creating professional map products. For those ready to advance their skills, our intermediate “Mastering ArcGIS Pro 3: Editing, Analysis, and Automation” course explores how to leverage custom symbology for analytical workflows and create your own style files. Both classes are available in-person and as live-online training sessions, providing flexible options tailored to your specific GIS learning needs and schedule.
