

Check out our upcoming in-person ArcGIS Pro training in Denver, Billings, MT and other locations.
Introduction
For GIS professionals the ability to efficiently select and analyze subsets of data is crucial. ArcGIS Pro offers robust tools for creating and managing selection sets. These sets allow users to focus on specific data within a larger dataset, facilitating detailed analysis and decision-making. This article explores the process of creating selection sets in ArcGIS Pro using interactive selection tools, offering insights and tips to enhance your GIS projects.
Understanding Selection Sets
A selection set in ArcGIS Pro is a collection of features or rows from a dataset that meets certain criteria. These sets can be used for a variety of purposes, including editing, analyzing, or simply isolating parts of your data for focused attention. The interactive nature of these selections in ArcGIS Pro makes the software particularly powerful for spatial data analysis.
We’ve also published a YouTube video on this subject if you’d prefer to watch rather than read. Please be sure to like and subscribe!
Steps to Create Interactive Selection Sets
1. Launch ArcGIS Pro and open the project you wish to work on. Open a map containing one or more layers.
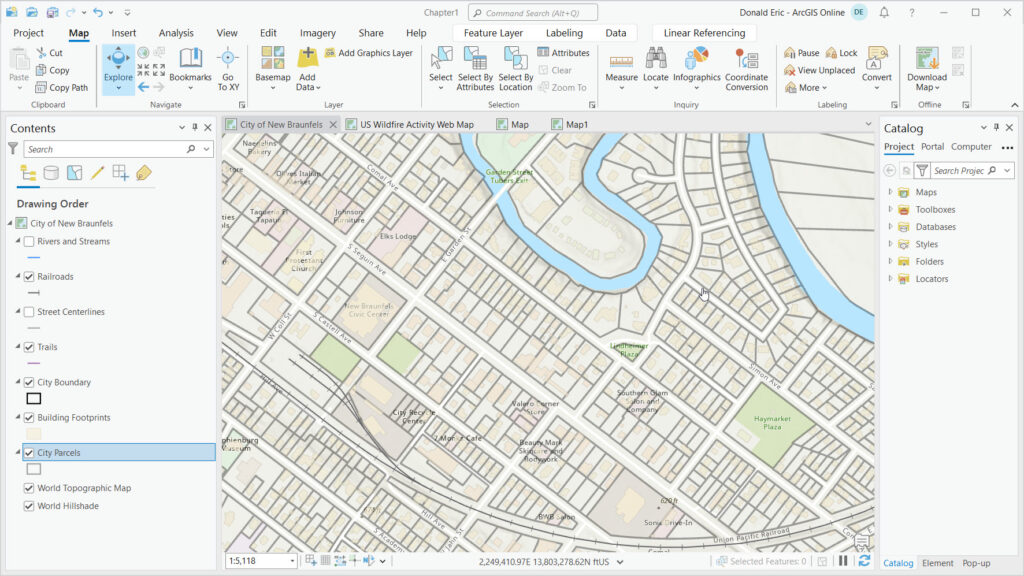
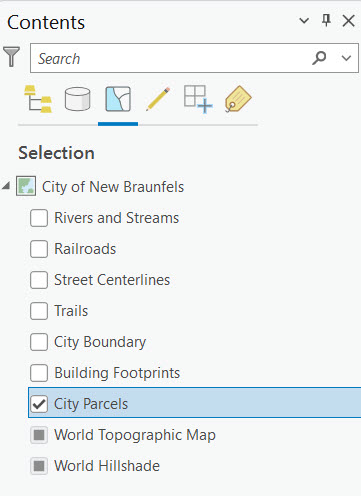
2. Set the selectable layer(s) by clicking the List by Selection button and then selecting one or more layers.
3. On the Map tab, find the Selection group. Here, you’ll see tools like Select By Attributes, Select By Location, and the interactive selection tools which lets you manually select features by clicking on them or drawing a shape around them.
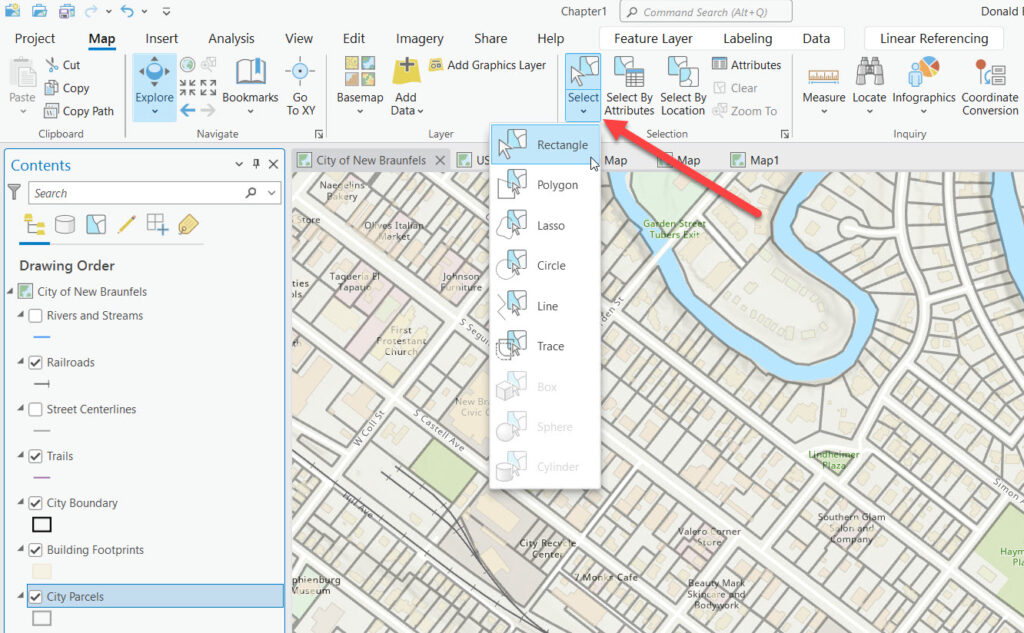
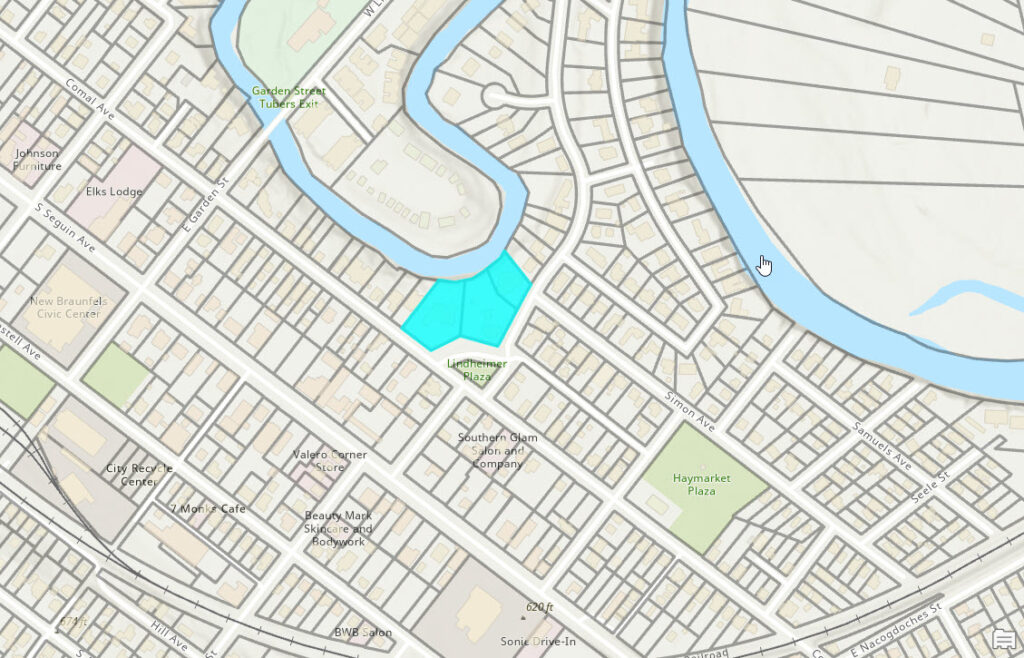
4. The interactive selection tools include Rectangle (default tool), Polygon, Lasso, Circle, Line, Trace, and a set of 3D interactive selection tools that are currently grayed out since this is a 2D map. In addition, you can also click a point to interactively select one feature at a time. Let’s examine the point selection functionality first. With your mouse or track pad, click the Select tool. Clicking a feature using a point allows you to select a single feature at a time as seen below.
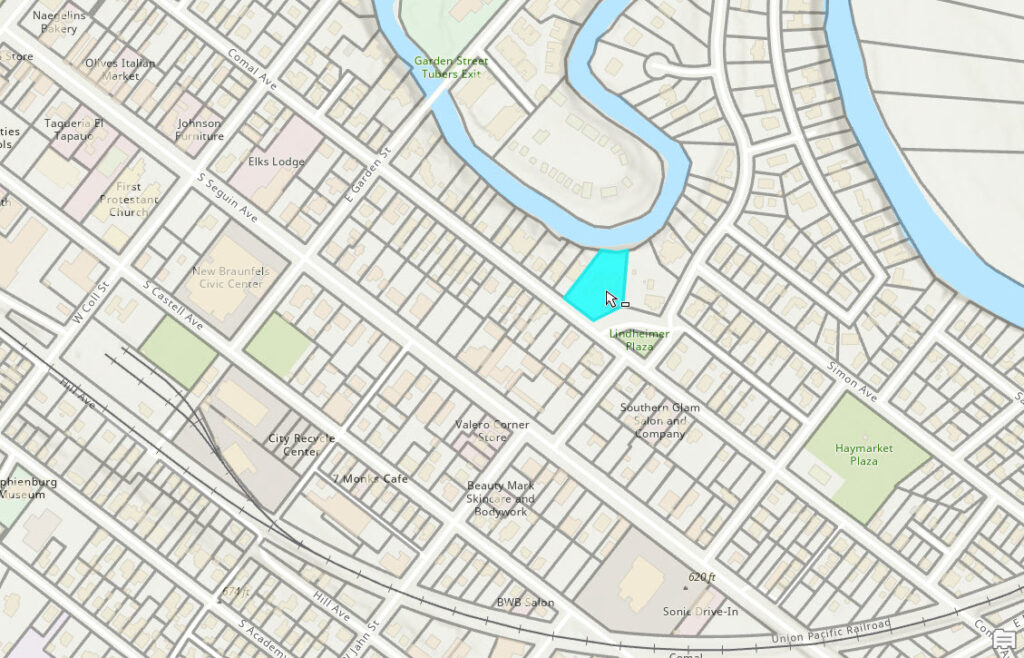
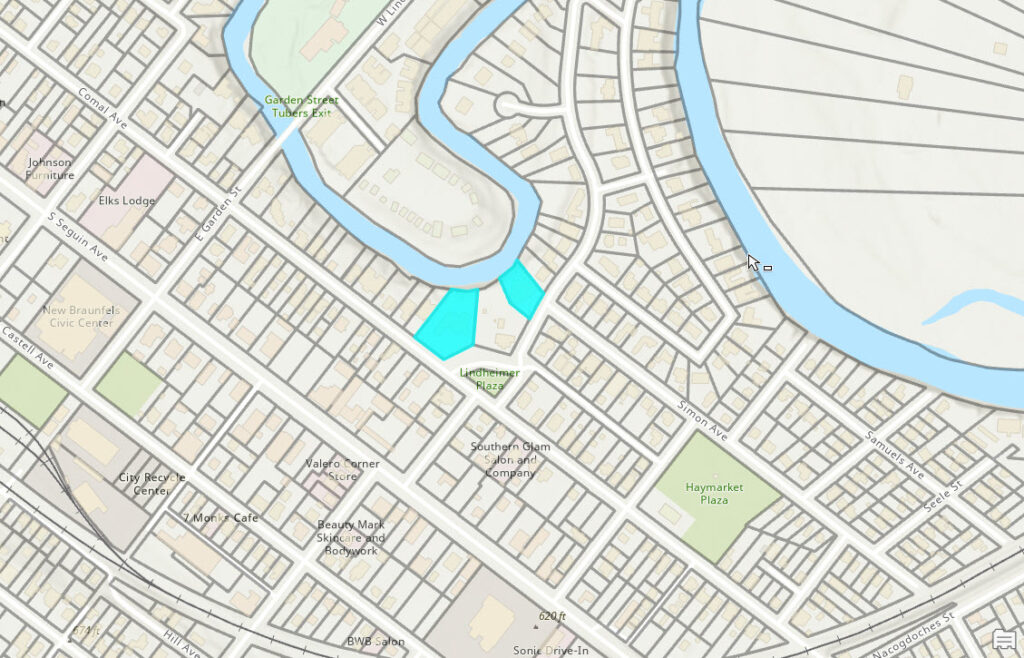
To manually select additional features, hold down the Shift key on your keyboard and click additional features as needed.
To unselect a feature hold down the Ctrl key on your keyboard and click a feature.
For more direct control, use the interactive selection tools (such as Select Features) to manually click or drag over the map to select features. This method is useful for quickly selecting features without needing to define attributes or spatial relationships.
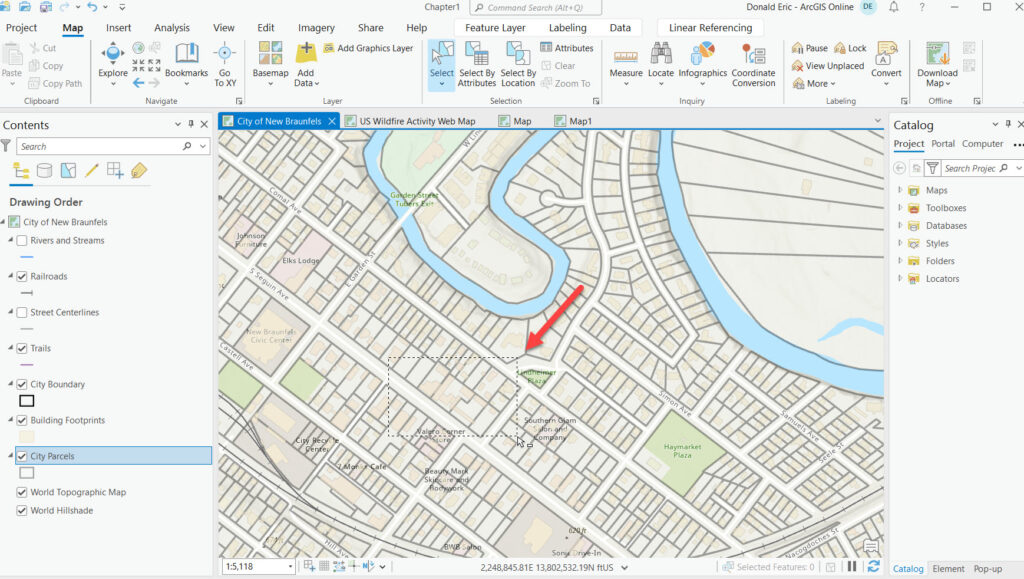
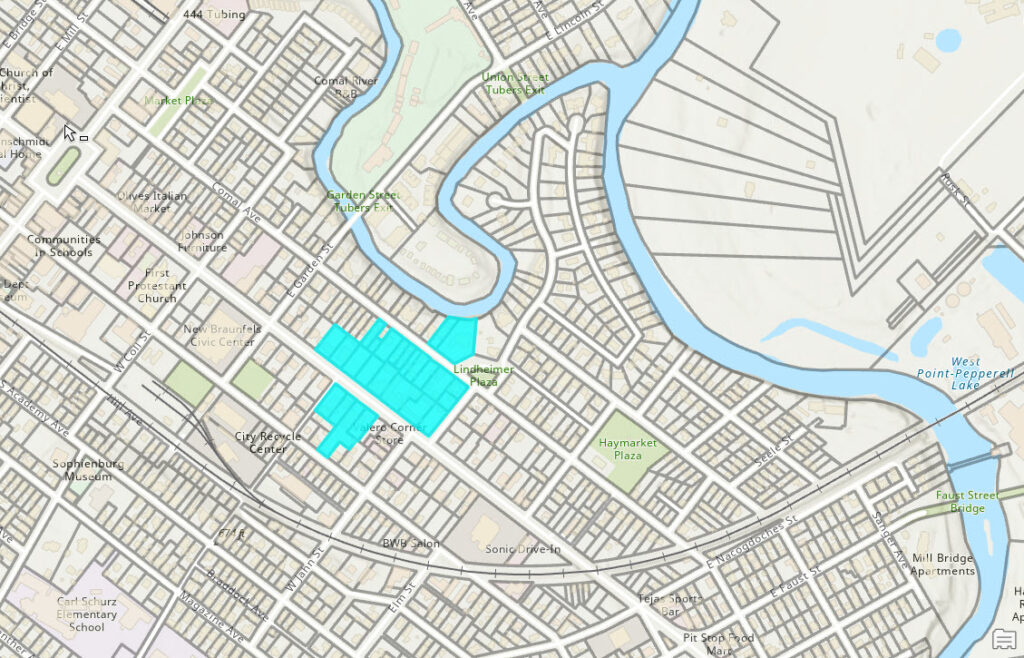
7. You can also drag a rectangle over the map to select features that intersect the rectangle. Any features that are either wholly within the rectangle or touch the boundaries of the rectangle become part of the selection set. You can see this in the series of screenshots below.
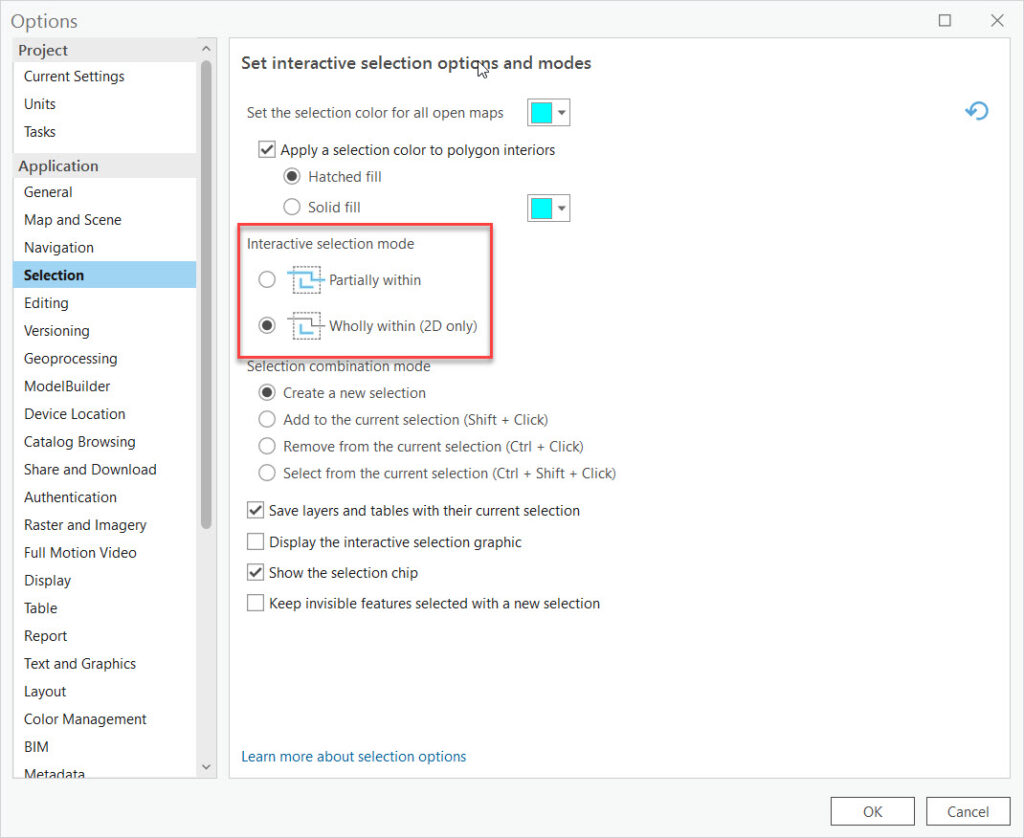
To change the default behavior of selecting features that either intersect or are completely within the rectangle (or other geometry) you can go to the Project tab, select Options | Selection and change the Interactive selection mode to Wholly within (2D only) as seen below.
After making an initial selection, you can refine it by using the selection modification tools (Add To Selection, Remove From Selection, etc.) to adjust your set as needed.
The other interactive selection tools (Polygon, Lasso, Circle, Line, and Trace) work the same way. Draw the geometry on the screen and any features that intersect (or are wholly within) will be selected from any layers marked as selectable.
8. Creating selection sets is rarely the end result of a geoprocessing workflow. Once you have a selection set, you can perform various operations, such as editing attributes, running analyses, or exporting the selected features to a new layer.
Tips for Effective Selection Sets
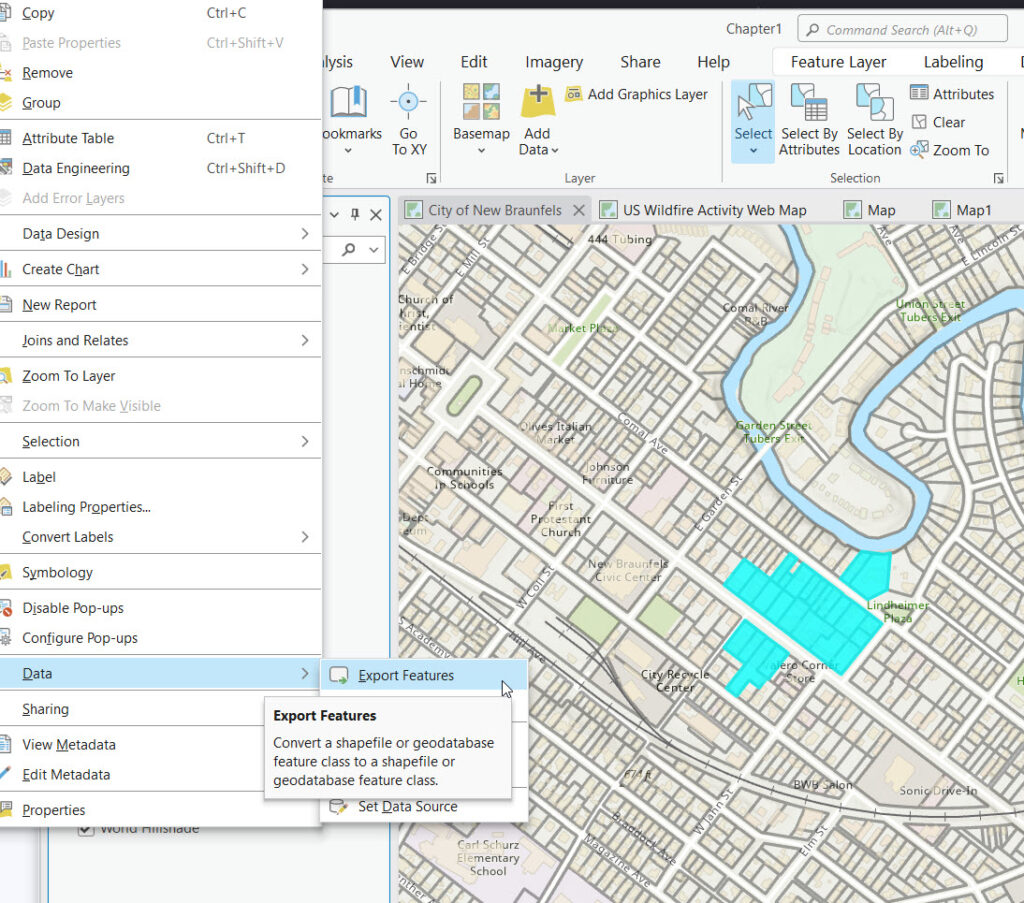
- For complex selections that you might want to revisit, consider saving your selection as a new layer. This can be done by right-clicking the layer with the selection and choosing Data > Export Features or Data > Export Table if you only need the attributes and not the features and attributes.
- Creating selection layers allows you to have dynamic selections that can be easily turned on and off or adjusted without altering the original data.
Conclusion
Interactive selection sets in ArcGIS Pro are a fundamental aspect of GIS analysis, offering the flexibility to dissect and examine your data in granular detail. By mastering these selection tools, you can significantly enhance the efficiency and depth of your spatial analyses. Remember, the key to effective GIS analysis lies in the thoughtful selection and examination of data, making the skills outlined in this guide invaluable for any GIS professional.
