
In this tutorial, we’ll have a look at Pro’s new Package Manager. This package management system lets us install, update and delete Python packages that are grouped into separate, named Python environments.
What is Pro’s Package manager and what is it used for?
ArcGIS Pro 3.0 comes with a new Python package management system named Package Manager. It is the result of Esri integrating the conda package management system inside Pro, which gives the user access to a large collection of external Python packages, that can be installed and added to a Python environment of choice. It also lets you manage different Python environments that can be activated whenever necessary. This has the advantage that you don’t have to install or uninstall Python packages when updating or installing new packages, as many Python packages depend on other packages with a specific version number. The Package Manager takes away the manual effort that is required to manage all different interdependencies between different Python packages.
What is a Python environment?
A Python environment is a named collection of Python packages. Pro comes with a default environment that can be cloned (copied) by the user, after which new packages can be installed, updated or deleted. It is recommended to leave the default Python environment as it is, and not modify it. This guarantees you always have a “clean” safety copy of the default environment available that can be cloned. A single pc running Pro can have many different environments installed, that exist independently of each other.
We’ll now show how to clone the default environment, install new packages and activate the newly created environment.
Step 1: Clone the default environment
Open a new, empty project in Pro using a map template. When you see the ribbon interface, click the “Project” menu in the upper left of the screen and select “Package Manager”. The Package Manager is opened and you will see a list of Python packages that are contained in the active environment that is listed on the right, named “arcgispro-py3”. This is the default environment that comes with a clean install of Pro and should be left unmodified. We will now clone this environment.
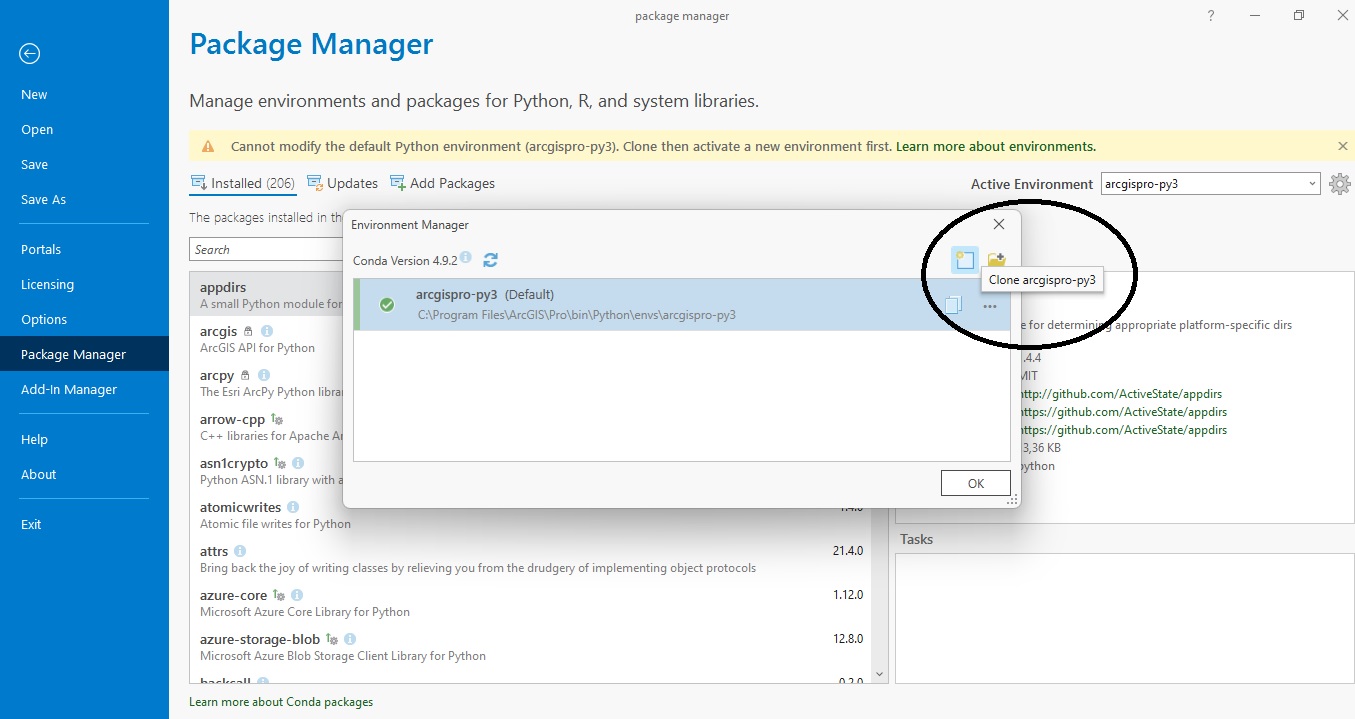
Click the “screw” icon next to the “arcgispro-py3” active environment drop-down menu on the right of the screen. If you hover over the icon, a pop-up appears with the text “Environment Manager”. The Environment Manager window opens. Click the “clone arcgispro-py3” icon, which is encircled in the image below (there are two icons, click the left one):
Next, a new windows is opened with a source and destination folder for the source and cloned environments. You can change both the destination and name for the cloned environment if necessary. Next, click “OK”. The default environment is now being cloned, which takes a couple of minutes. When the process finishes, the newly created environment is listed in the same environment manager window displayed in the image above.
Step 2: Activate the new environment
Our newly created environment is now ready for use. To activate it, select it by clicking the drop-down menu under “Active Environment”, as displayed below:
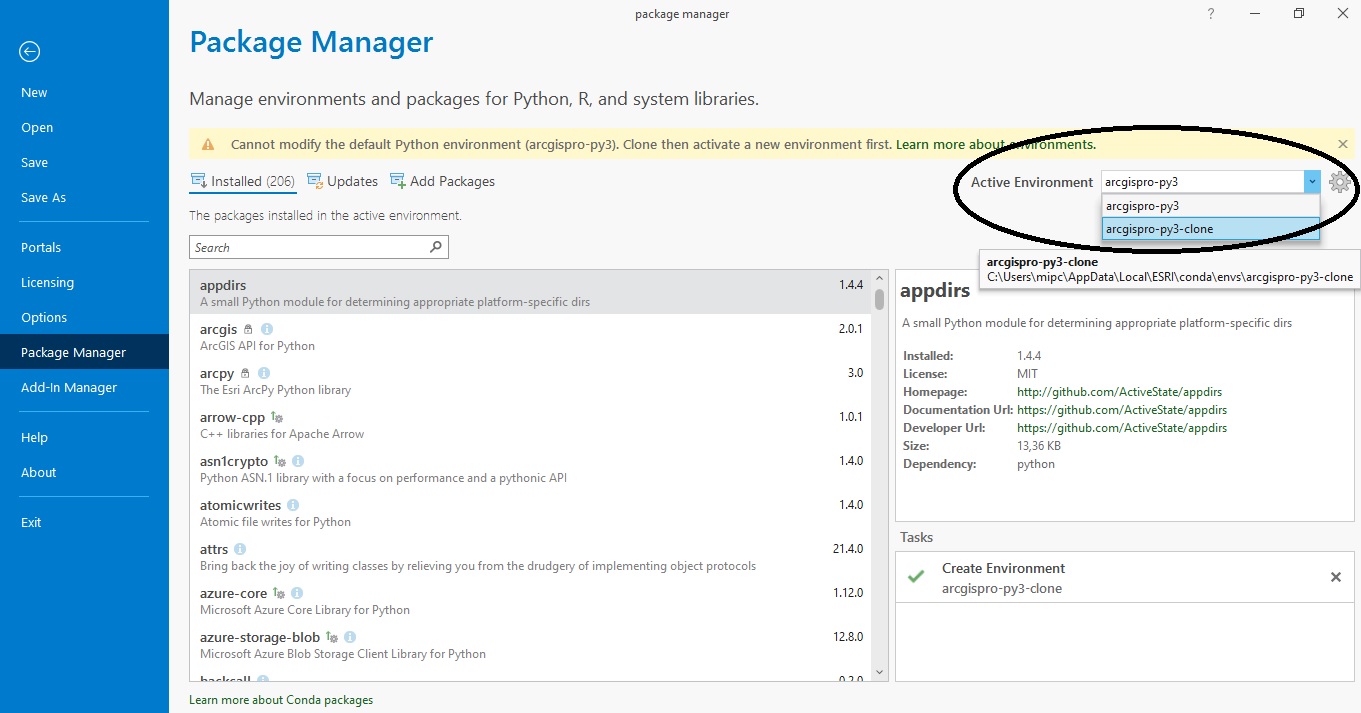
Next, a message is displayed that the new environment is being activated. We’ll now modify the newly activated environment by installing some external Python packages.
Step 3: Install new Python packages
The default Python environment contains 206 Python packages. It includes all Python packages used by Pro as well as several others, including scipi and pandas. Let’s suppose we’re interested in adding some external plotting and graph libraries to our environment, such as Bokeh, Seaborn and Plotly. Before installing these, it might be a good idea to use the search option provided by the Package Manager to see if these are already installed or not. If you type in each of the three package names in the search box, you will notice there is no match meaning none of the three packages are yet installed, which we’ll do next. (If you want to see a match, for example type “matplotlib” and notice there are two matches).
Next, click “Add packages” in the Package Manager window to add the three packages. The installation process is very straight forwarded: you type in the package name in the search box, and when there is a match from the package repository, you will see these listed below the search form. Notice that you can choose which version to download before installing the package. All three graph and plotting libraries can be installed using the Package Manager.
As a quick demonstration, let’s go through the installation process of the Plotly package: after searching the package, click “install”, using the latest version which is automatically selected by Pro. Next, a new window opens up showing the dependencies, which are other Python packages (and corresponding versions) that are required for this version of Plotly to function. Accept the terms and conditions and click “Install”. The installation process is started:

After the installation finishes, you will see that you will now have 208 installed packages, instead of 206 before installing Plotly. Click the “Installed (208)” button to select the Python package list for our active environment, search for “Plotly” and verify that the package has been added to the active environment.
Learn more about using Python in ArcGIS Pro in our Introduction to Programming ArcGIS Pro with Python and Intermediate ArcGIS Pro Programming with Python classes.
