
This is a short tutorial for ArcGIS Pro users that shows how to use the arcpy module for creating a shapefile with a number of attribute field values and pass on a list of values using an insert cursor.
In this tutorial you will learn the following:
- Create a shapefile and feature class using arcpy
- Add fields to the feature class using arcpy
- Use an insert cursor to populate the fields of the newly created feature class using arcpy
STEP 1: Generate lat/lon data for a new point feature class in ArcGIS Pro
With this website, you can generate latitude longitude coordinates on a world map by simply clicking on a location of choice on the map and copy the lat/lon coordinates to an empty file on disk. For this tutorial, we select four random points near London, Amsterdam, New York and Buenos Aires so we can clearly identify them on a map later. The website linked here lists latitude first and then longitude, but for the examples below we need to switch this order for ArcGIS Pro to map them correctly. We use the following coordinate pairs:
-0.189787, 51.835778 (near London, UK)
4.899091, 52.385658 (near Amsterdam, The Netherlands)
-74.820460, 40.580585 (near New York, USA)
-59.955628, -35.029996 (near Buenos Aires, Argentina)
STEP 2: Create a new feature class using arcpy
Next, open up ArcGIS Pro and create a new project with an empty map. Open up a new notebook inside Pro, type in the following code in an empty cell and run it next:
# 1. import the module
import arcpy
# 2. create new feature class
arcpy.env.workspace = r”C:\Users\[username]\Documents\ArcGIS\Projects\Insert Cursor”
new_shapefile = arcpy.CreateFeatureclass_management(r”C:\Users\[username]\Documents\ArcGIS\Projects\Insert Cursor”, “points_with_cursor.shp”, “POINT”, spatial_reference=4326)
# 3. reference lat/lon, city and country data
rows = [(‘UK’, ‘London’, (-0.189787, 51.835778)),
(‘The Netherlands’, ‘Amsterdam’, (4.899091, 52.385658)),
(‘USA’, ‘New York’, (-74.820460, 40.580585)),
(‘Argentina’, ‘Buenos Aires’, (-59.955628, -35.029996))]
Here’s what’s going on: first, we import the arcpy module which we’ll use to create a new shapefile, we reference the current workspace using the env class from arcpy. Second, we call the CreateFeatureclass_management method from arcpy and pass in the required parameters: a project location on disk for storing the new shapefile, a name for the shapefile, a geometry type and a spatial reference so that the points will be georeferenced automatically when added to the map later on (the number 4326 is a spatial reference that refers to WGS84). For this example, we only create four points so we use “points” as the parameter for the geometry type.
Next, we create a “rows” variable for the rows we want to pass on to the insert cursor. This is a list with tuples, where each tuple contains the column values for each point value. Each row for our new attribute table contains a country name, the name of the capital city and the lon/lat values for each point. These coordinate pairs are placed inside a tuple and separated by a comma from the country and capital values.
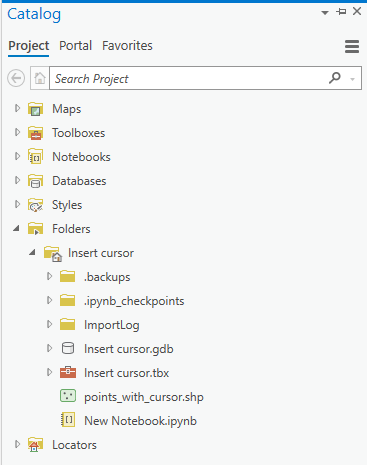
After running this code, a new shapefile is added to the map, but it is empty. Subsequent code will add fields and populate those fields with values, but this will not affect the shapefile listed in the Table of Contents. The data added to the shapefile in the next steps is added to the file on disk, that can be accessed through the Catalog window:
STEP 3: Add fields to the new feature class
We’ll now define the new Country and Capital fields for the new attribute table using the following code:
# set fieldname variables
fields = [
(“Country”,”Text”),
(“Capital”, “Text”)
]
for field in fields:
arcpy.AddField_management(*(new_shapefile,) + field)
Here’s what’s going on: the AddField_management method is used to add two fields to the shapefile’s attribute class. To add multiple fields at once, a for loop is used where the arguments for the AddField_management method are stored as tuples in a list called “fields”. These tuples are unpacked into function arguments using the “*” operator. This is called tuple unpacking and is explained in more detail here. The comma after the “new_shapefile” variable tells Python you are creating a tuple with only one element, so that the rest of the tuple is made up of the different function arguments specified in the “fields” list using tuple concatenation. Running the AddField tool with a for loop will not display any messages that tell you where the output was created and how long it took: check the specified output location using the Catalog window and look in the project folder if the shapefile was created. Wait with adding it to the map before finishing the last step.
STEP 4: Use an insert cursor to populate fields
With an insert cursor, we’ll now populate the newly created Country field:
# use insert cursor to insert all fields for each row
with arcpy.da.InsertCursor(new_shapefile, [‘Country’, ‘Capital’, ‘SHAPE@XY’]) as insert_cursor:
for row in rows:
insert_cursor.insertRow(row)
The “with” syntax automatically deletes the cursor after finishing, so there’s no need to hardcode this action. Note that we pass on a list with three arguments inside a list to the InsertCursor method along with the variable that references the newly created shapefile. This is somewhat counterintuitive as we defined only two fields, but the “SHAPE@XY” argument functions as a token for reading the coordinate value pairs for each feature.
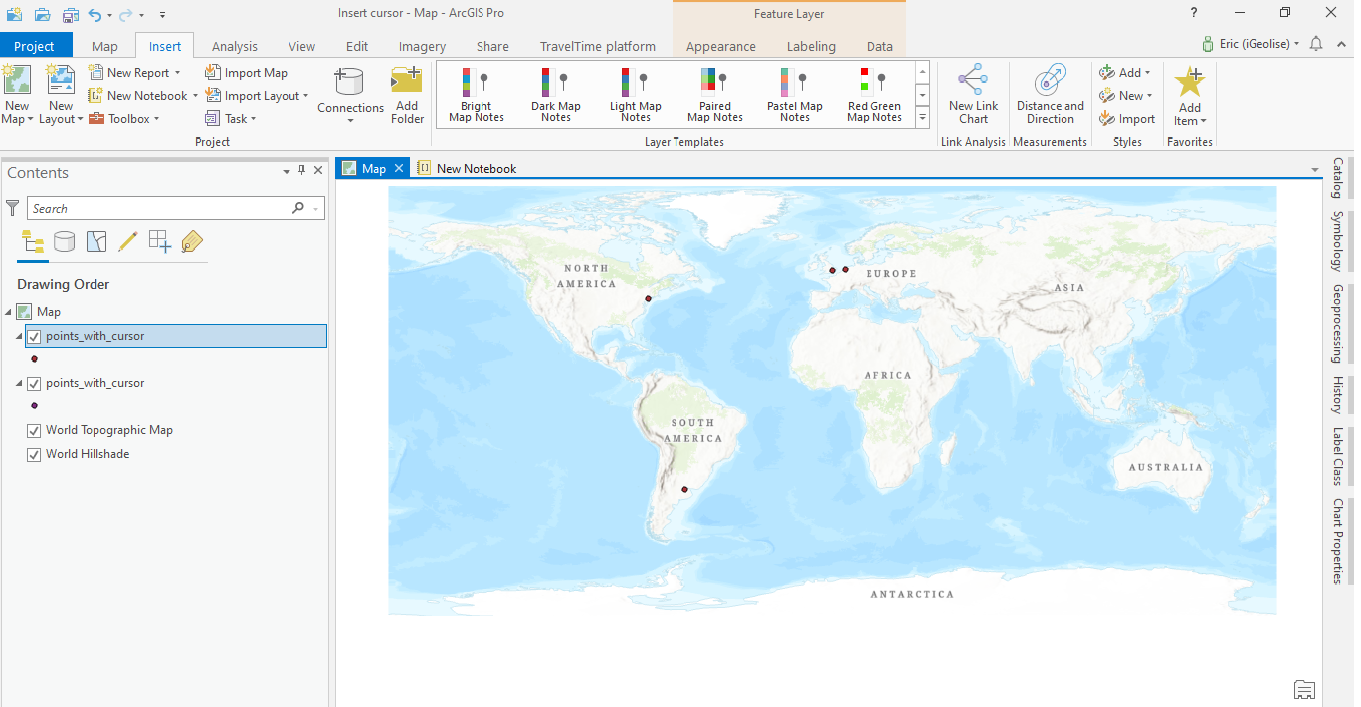
When you run this code in a notebook inside Pro, there are no tool messages and you won’t be able to see the points on the map. This is because you will first have to add the shapefile again from the content folder using the Catalog and drag it into the map window, and delete the shapefile with the same name that was added to the table of contents under Step 2. You should now see a map with four points on it:
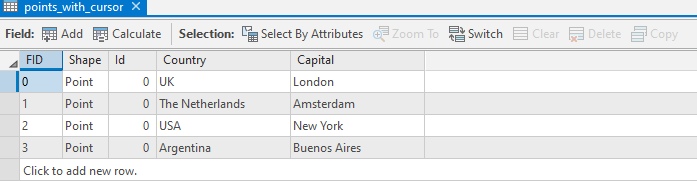
The attribute table now lists the values passed onto the insert cursor for the country and capital fields:
Learn more about how to use Arcpy and Insert Cursors in our Introduction to Programming ArcGIS Pro with Python and Intermediate ArcGIS Pro Programming with Python classes.
