

There are many reasons you might want to divide an already-existing polygon into equal parts. One example is that a parcel of land needs to be subdivided for development. Another example involves research scientists and their need to create adjacent quadrants of a standard size to collect comparable data from. Regardless of the reason, ArcGIS Pro provides you with quick and easy tools to accomplish this goal. In this tutorial, we will focus on using the Subdivide Polygon geoprocessing tool, the Modify Features Divide tool, and the Modify Feature Split tool to help us subdivide a property for development.
Subdivide Polygon
Subdivide Polygon is the easiest way to achieve your goal of subdividing a polygon into equal parts if the spatial orientation needed is not complex. It is a geoprocessing tool, so you can find it in the geoprocessing pane by searching for “subdivide polygon” or navigating to Toolboxes > Data Management Tools > Features toolset > Subdivide Polygon tool.
You will first select your Input Features and define your Output Feature Class name and location. You will then need to decide on the Subdivision Method, of which you have two options:
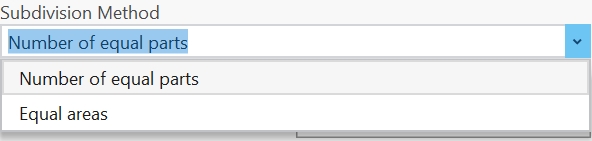
- Number of equal parts
- Equal areas
Number of Equal Parts
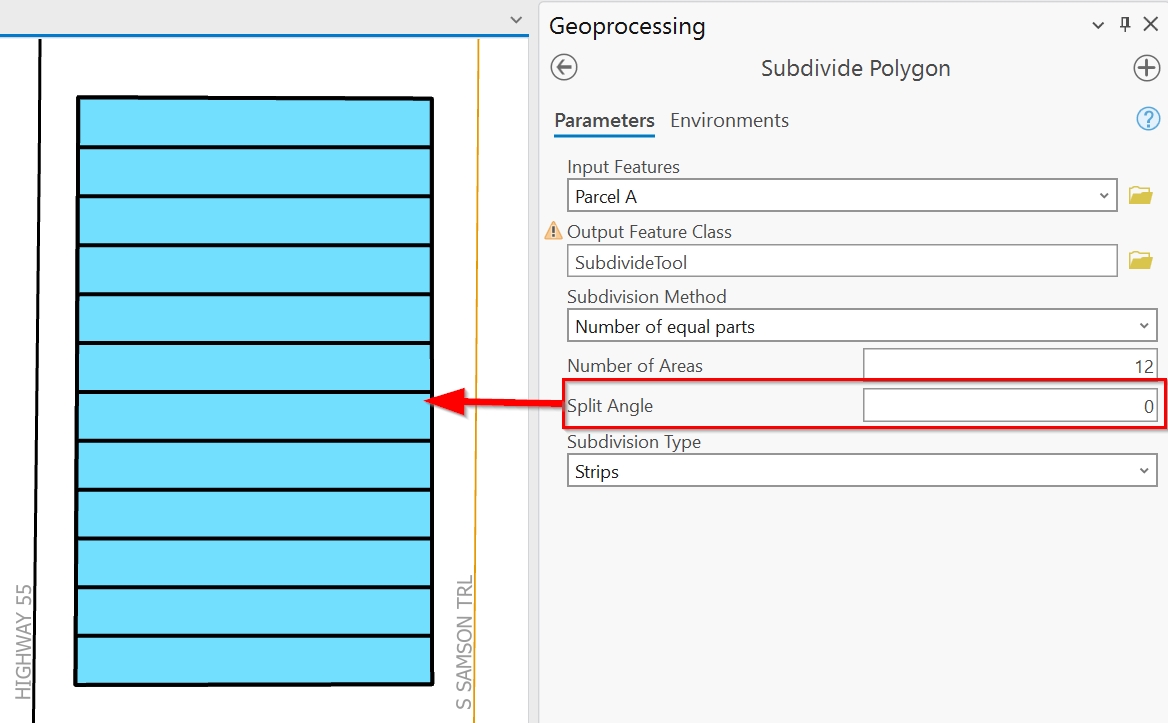
‘Number of equal parts’ is the most common option and the default for this tool. When using this method, polygons will be divided evenly into a number of parts that you define. This is the method we are going to choose.
One the method is chosen, the next parameter you will need is the Split Angle. The default is ‘0’ which will create horizontal division lines, as seen in the example below.
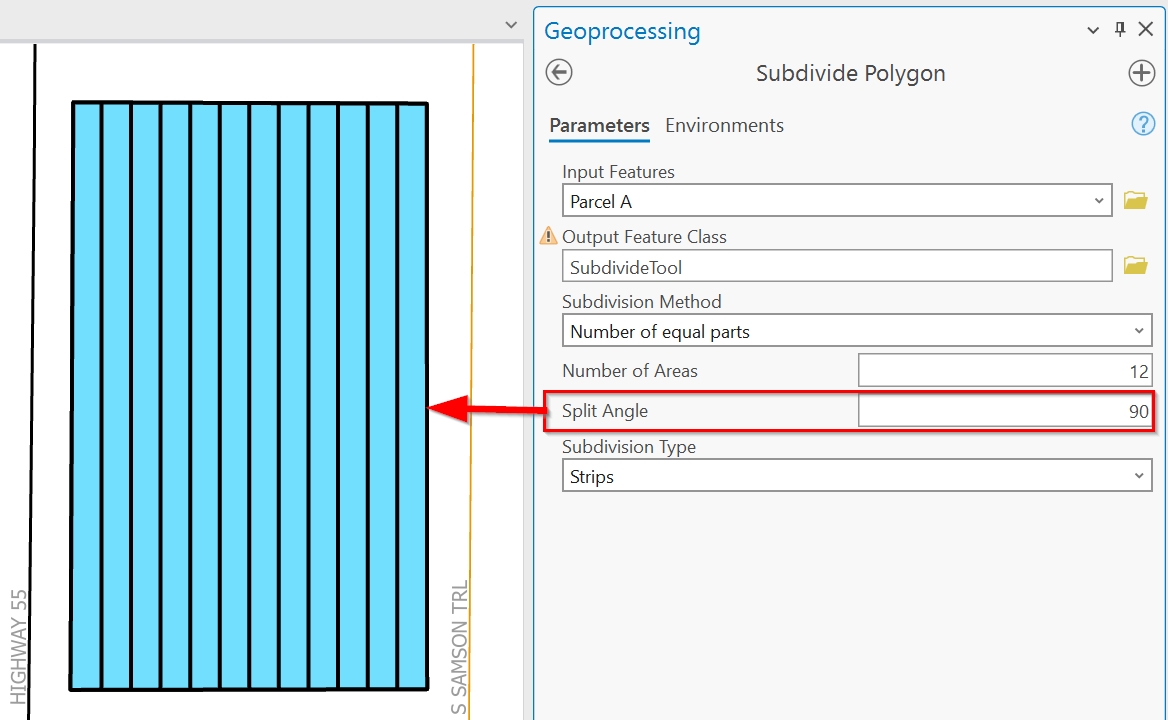
If you need your polygon to be divided by vertical lines, then you change the Split angle from ‘0’ to ’90’, as seen in the below image. You can split your polygon at any angle necessary.
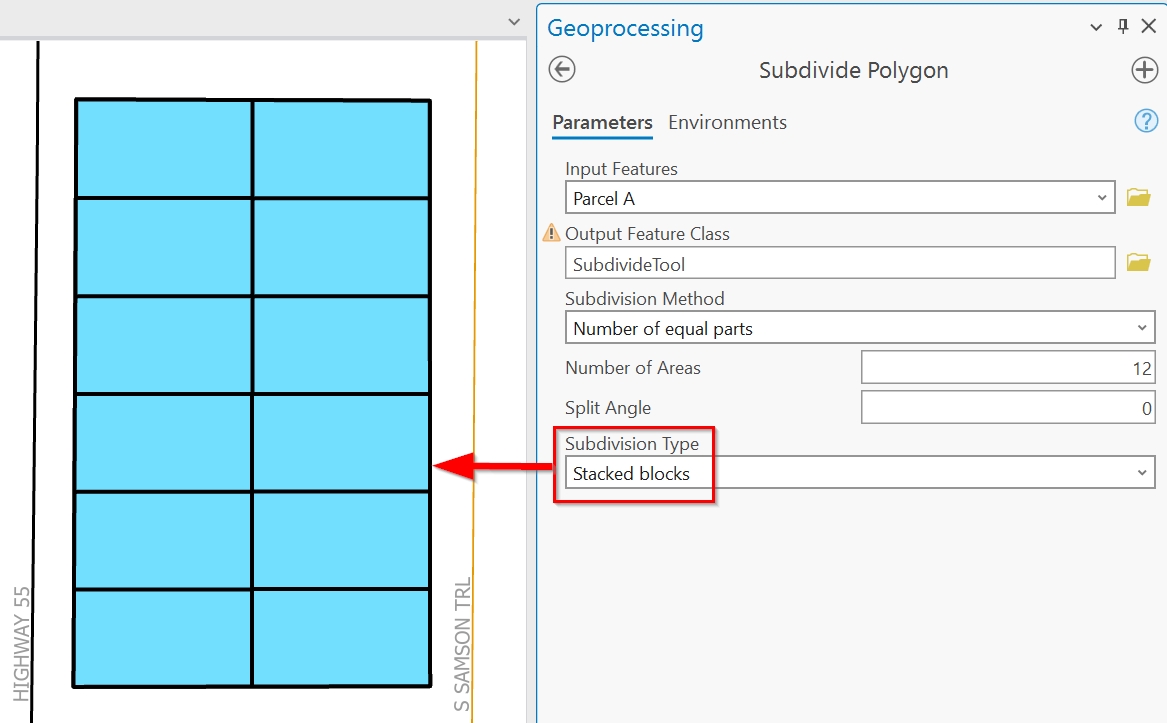
You will notice in the examples so far that we have left the Subdivision Type set to ‘Strips’. In our scenario, we are creating equal areas for a subdivision that will require driveway entry-points coming from Highway 55 to the west and S Samson Trl to the east. Because of this, we want to have half of our areas on one side and the other half of our areas on the other. To do this, you can change the Subdivision Type from ‘Strips’ to ‘Stacked blocks’, as shown in the below image. You can see that we now have 12 equal-area blocks, 6 that will be accessed from the east and 6 that will be accessed from the west.
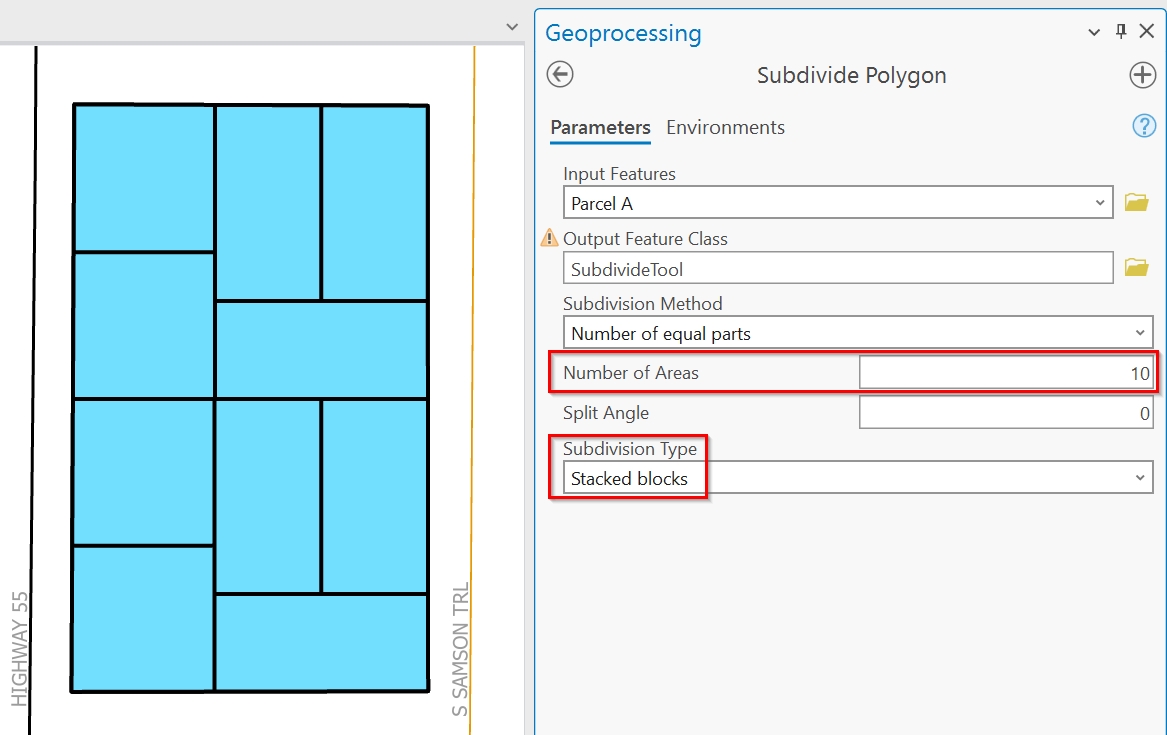
You might now be thinking, “Hooray! It’s so easy…”. Well, it is, and it isn’t. If you were to change the Number of Areas to 10 instead of 12, you will start to see some wonky behavior. As you can see in the image below, the stacked equal-area blocks are now irregular in shape and placement. This placement will not work for our subdivision, so we need to figure out another way to ensure we get 10 equal area lots with only 2 columns (like we did when we chose 12 areas above). To do this, we are going to use the Modify Features Divide and Split tools.
Modify Features: Divide
To access the Modify Features Divide tool, click on the Edit tab and then expand the gallery of options in the Tools group. If you scroll down in the gallery of tools, you will find the Divide tool under the Divide tool group.
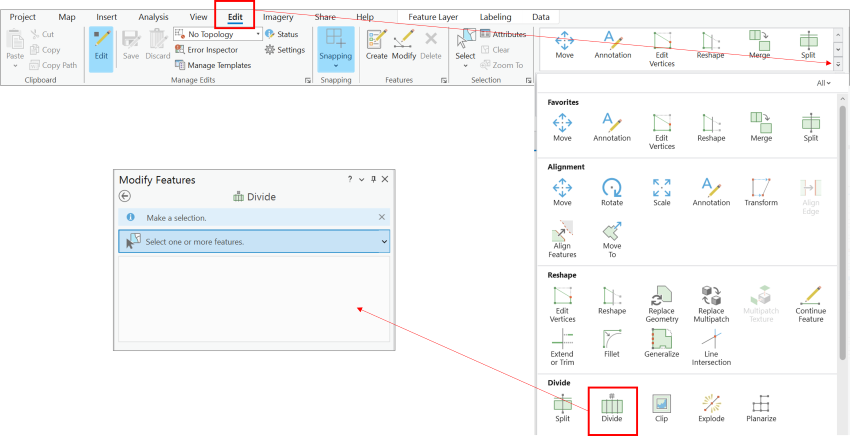

Because this tool is not considered a geoprocessing function, you will not be able to find it by searching for “Divide” in the geoprocessing pane. If you do, you will find a geoprocessing tool with the same name, used for a different purpose. Do not get these two tools confused.
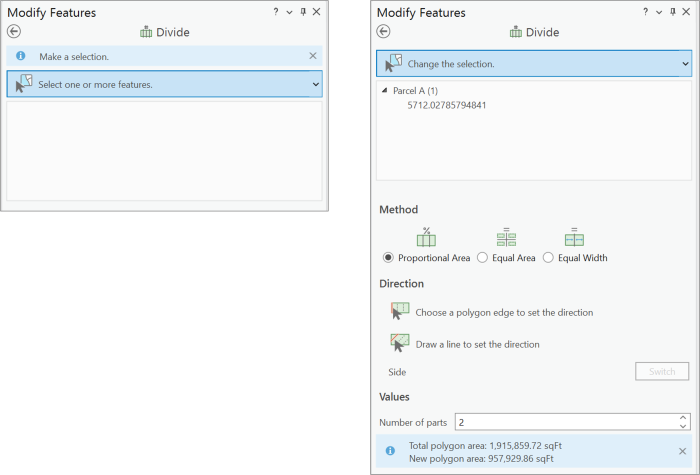
With the Modify Features pane open to the Divide tool, you will see either of the below dialogs. The one on the left is what you will see if you have not yet selected the feature to be subdivided and the one on the right is what you will see once that feature is selected.
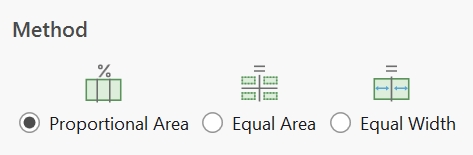
Method
With your feature selected, you now need to decide on your Method. The Method allows you to choose between Proportional Area, Equal Areas, or Equal Widths.
Proportional Area divides the polygon into a specified number of polygons with the area for each polygon being calculated by the tool. Equal Area divides the polygon into a specified number of parts of a specific size that you input into the tool parameters. Equal Width divides the polygon into a specified number of parts of a specific width that you input into the tool parameters. Equal Area and Equal Width could result in a remainder area, which can be distributed equally or merged with another area.
For our purposes, we are going to choose Proportional Area.
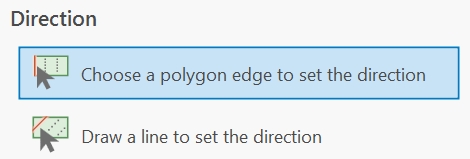
Direction
For the Direction parameter, we can either choose to set the direction by clicking on a polygon edge, or by drawing a line. We are going to Choose a polygon edge to set the direction.
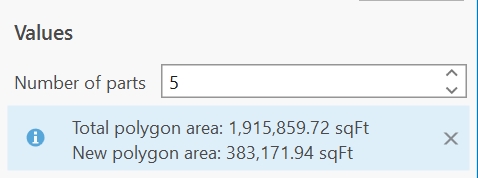
Values
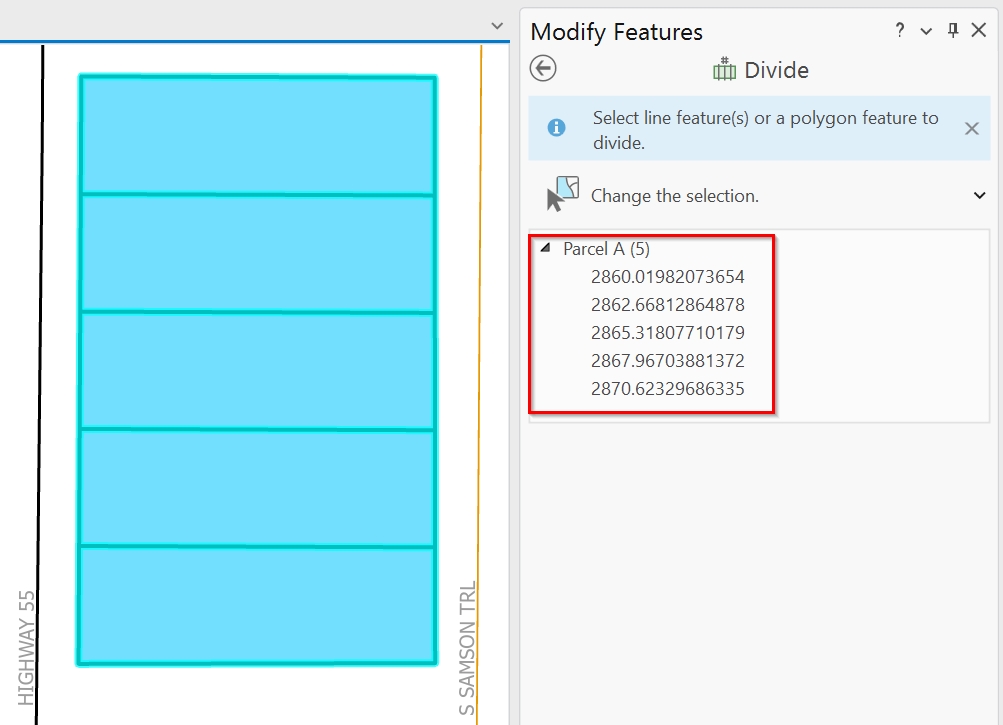
The last parameter is to set the Number of parts. To get to the result we need, we are going to end up running the Divide process and then using the Split tool. The divide process will involve dividing the polygon into 5 equal parts. When we enter the value, the new polygon area values will automatically calculate, shown in blue below.
Make sure Show Preview is enabled at the bottom of the pane and then mouse over to the feature in the map. You will see the crosshairs of your mouse which signifies the tool is ready for you to select a polygon edge.
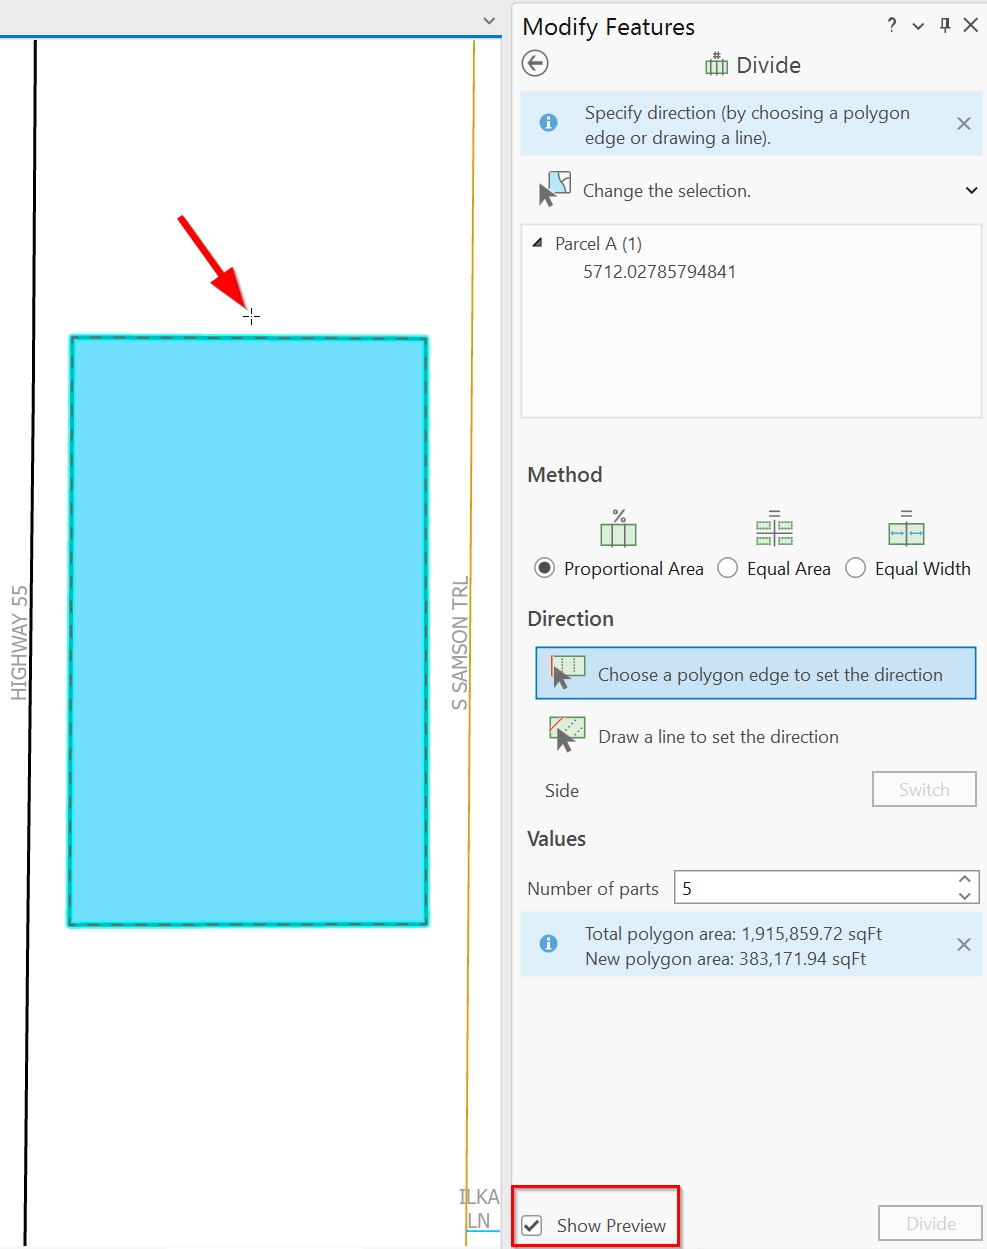
When you click on a polygon edge, you will see a preview of how the division of polygons will look, starting from the edge you selected. In the example below, I have clicked on the northernmost edge of the polygon. If your preview shows the result you are looking for, then you can run the tool by clicking on “Divide” in the lower right.

After the tool runs you will see the new parcel boundaries in the map view, as well as a list of the new parcels in the Divide pane.
Remember to save your work.
Modify Features: Split
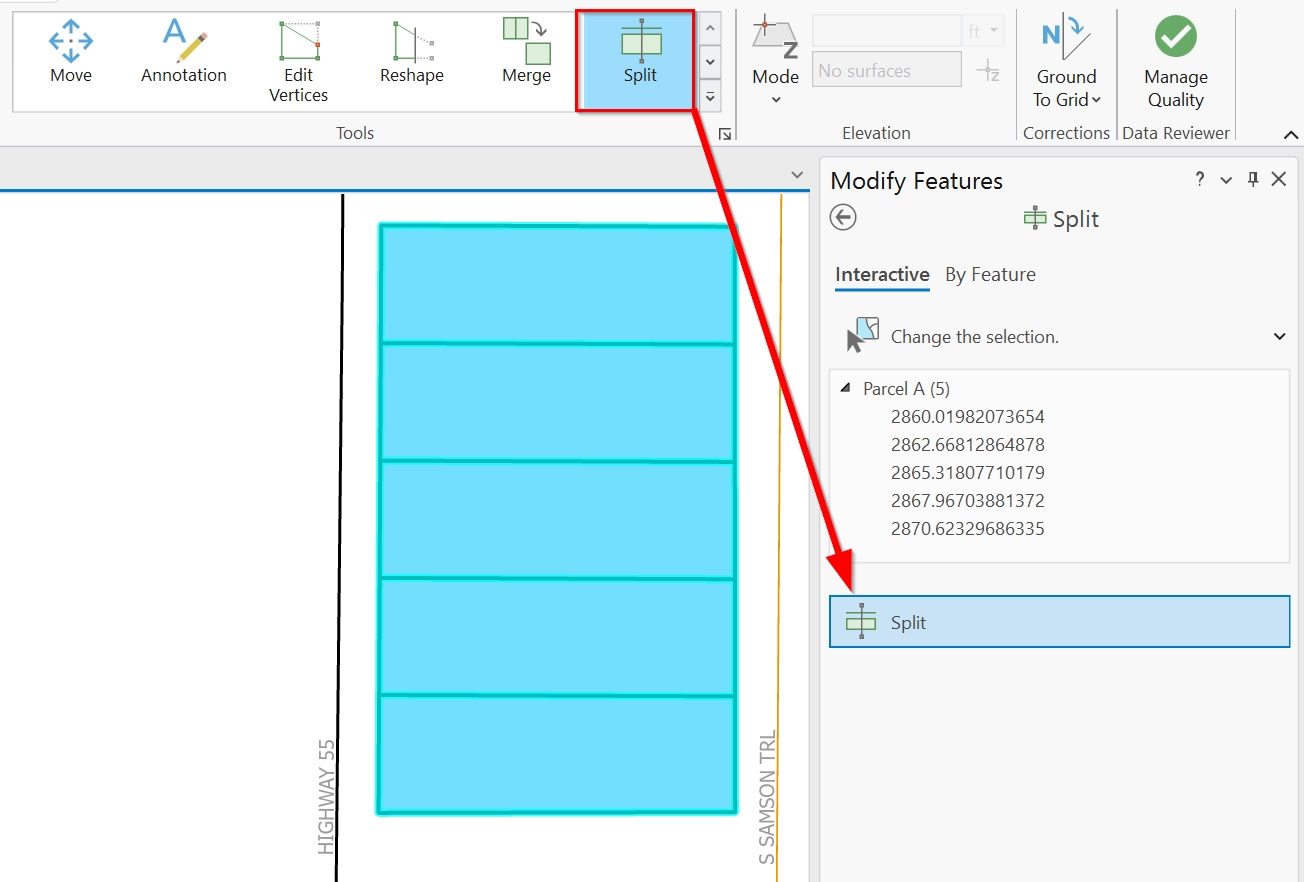
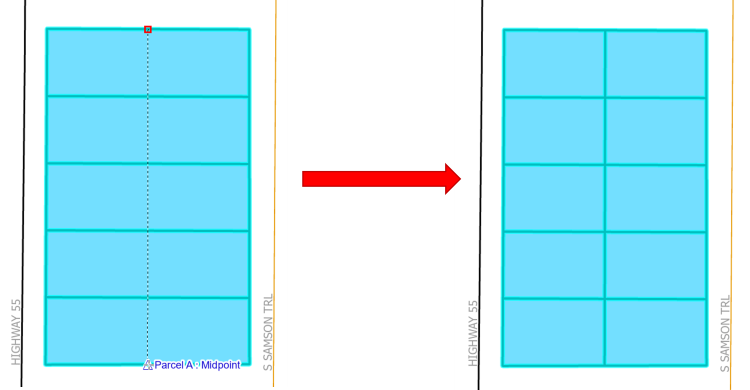
Now that we have 5 equal parts, we need to divide them down the middle to ensure that we have 5 equal-sized blocks on the west side and 5 equal-sized blocks on the east side. The easiest way to do this is to select all the newly created polygon blocks and then use the Split tool.
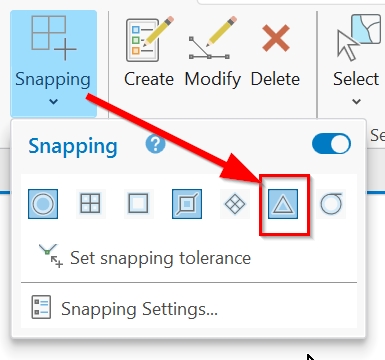
First ensure that midpoint snapping is enabled for the parcel layer you are working with. This will allow an accurate splitting of the parcels directly down their midpoints.
From the Edit tab, click on Split from the tools group to open the Split tool in the Modify Features pane. Make sure all of your polygons are selected in the map and then click on Split (about half-way down the pane) to enable it.
Once enabled, you should see your mouse has again become crosshairs when you mouse over the feature in the map view. Hover around the northernmost edge until you see the Midpoint snapping message appear.
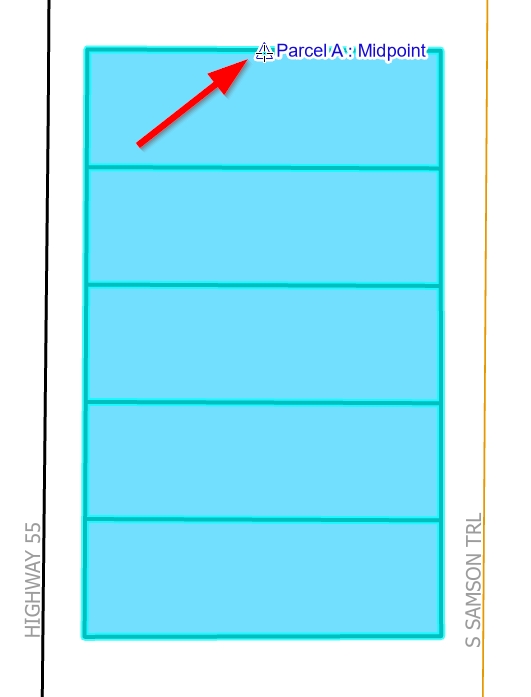
Click once to add a vertex at the midpoint of the northernmost edge and then drag your mouse all the way down to the southernmost edge. Move your mouse around on the southernmost edge until you see the Midpoint snapping message and then double-click to end the split-line drawing. Your new polygons will be created with 5 equal-area blocks on either side of the midline.
In this tutorial you learned some of the various methods for splitting polygons into equal parts. Not every tool is perfect for every situation, but a combination of multiple tools that exist can likely get you to where you need to be.
