

Check out our upcoming in-person ArcGIS Pro training in Denver, Billings, MT and other locations.
ArcGIS Pro offers a plethora of tools designed to manipulate, analyze, and visualize geographic information efficiently. Among its many features, the concept of selection layers stands out as a powerful mechanism for enhancing geospatial analysis. This article delves into the functionality, applications, and benefits of using selection layers within ArcGIS Pro.
Understanding Selection Layers
Selection layers in ArcGIS Pro are temporary layers created from a selection of features within an existing layer. These layers enable users to isolate and work with subsets of data without altering the original dataset. Selection layers are dynamic; they can be updated, edited, or removed according to the needs of the analysis, providing flexibility and precision in GIS operations.
You can also watch our companion YouTube video on this topic. Please be sure to like and subscribe!
Creating Selection Layers
Creating a selection layer in ArcGIS Pro involves selecting features from an existing layer using any of the selection tools available, such as the “Select by Attributes” or “Select by Location” tools. Once a selection is made, the user can right-click the layer with selected features in the Contents pane and choose the option to create a selection layer. This action generates a new layer that references only the selected features, allowing for targeted analysis or manipulation. The steps below illustrate the process of creating a selection layer.
- Define the selectable layer
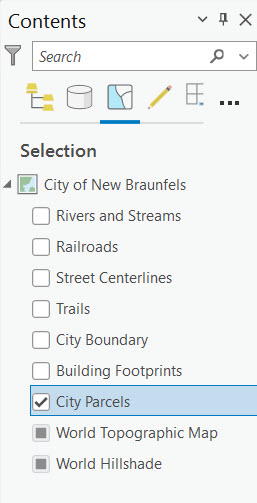
- Create the selection set

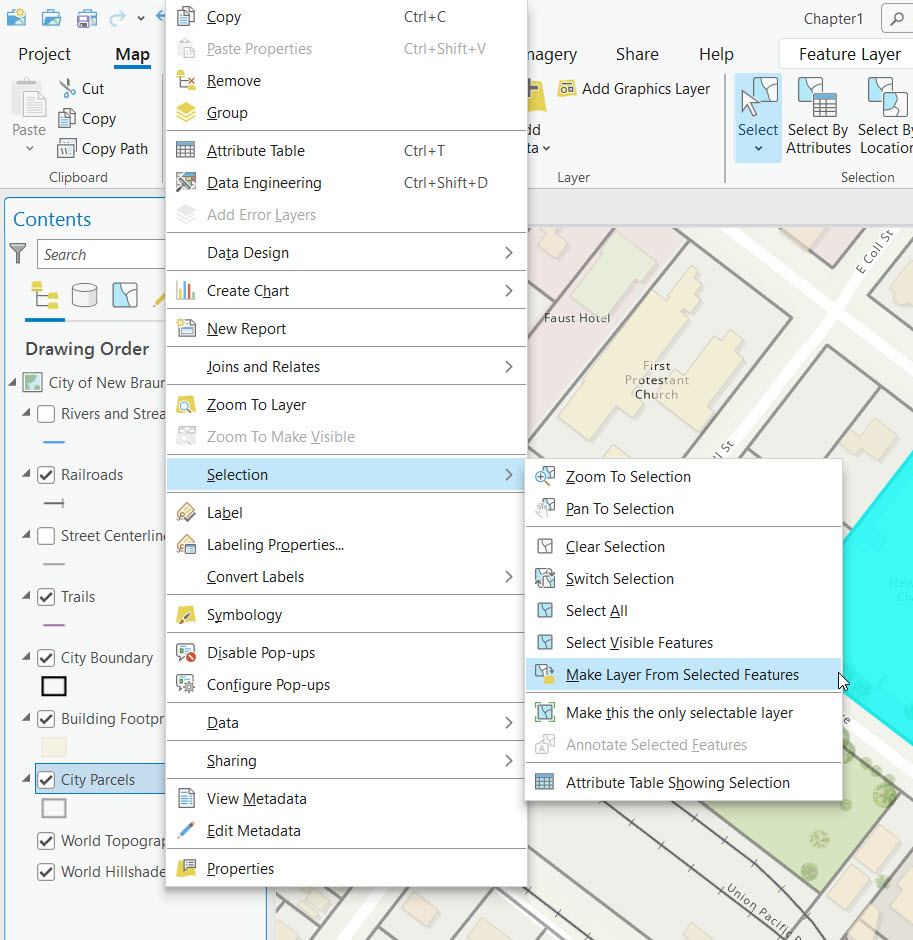
- Right click the layer containing a selection set and click Selection | Make Layer From Selected Features.
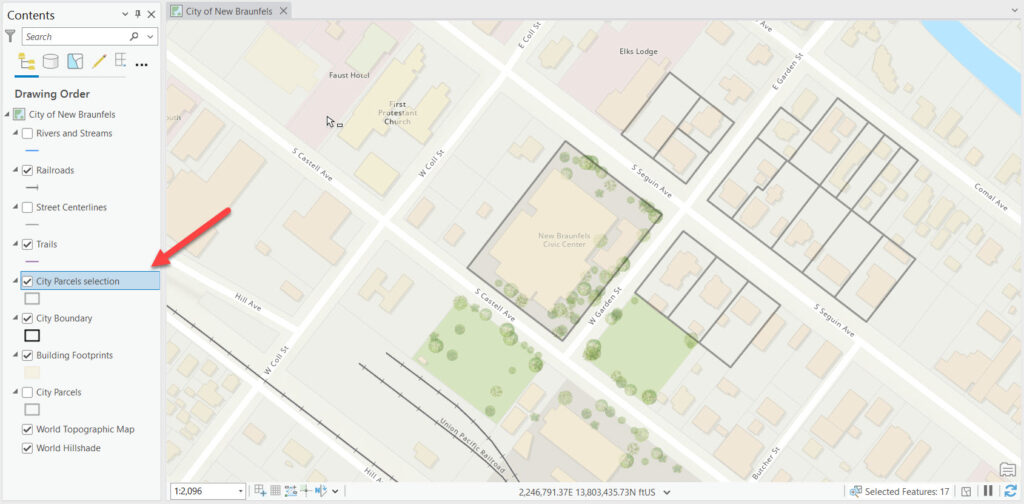
- This creates a new layer. The layer name will be the same as the layer where the selected features originated with the text “selection” added to the layer name. This layer will contain only the selected features.
 A selection layer is essentially a virtual layer that references a subset of features from an original layer based on a specific selection criteria. While the primary purpose of a selection layer is to isolate and work with these selected features, adding new features directly to a selection layer is not the standard workflow or directly supported in the way one might add features to a regular, editable feature layer.
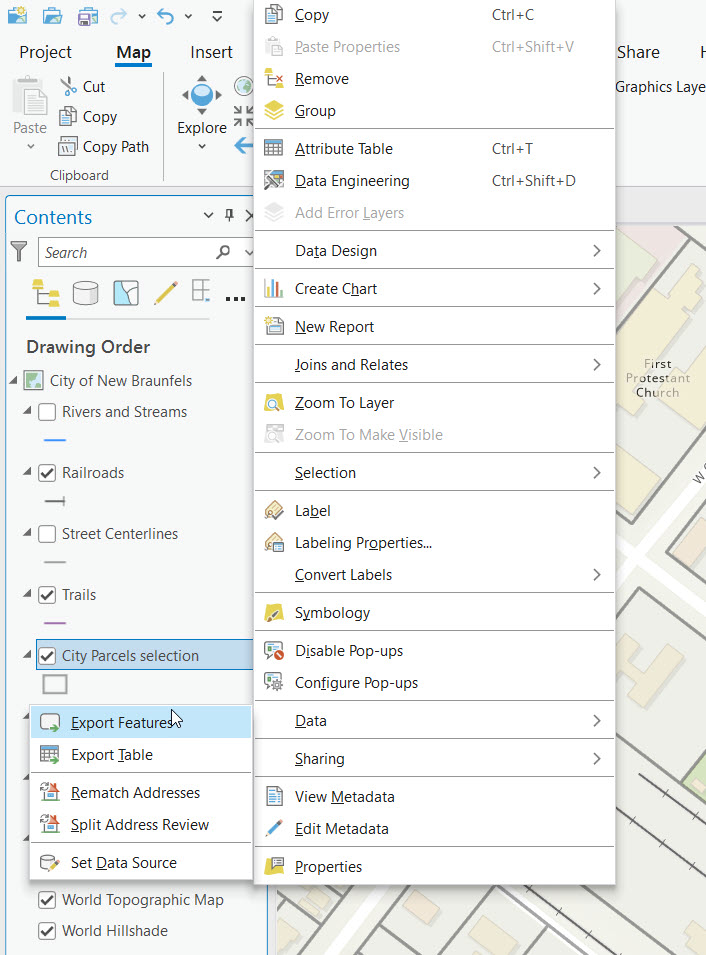
 - While selection layers are designed as virtual layers you can make them permanent but right clicking the selection layer and selecting Data | Export Features and specifying a new feature class name or shapefile.
Applications of Selection Layers
Selection layers are versatile and can be applied in various scenarios, including but not limited to:
- Data Analysis: Analysts can focus on specific subsets of data that meet certain criteria, enhancing the efficiency and relevance of their analyses.
- Map Production: Selection layers can be used to create maps that highlight particular areas of interest, improving the clarity and impact of map presentations.
- Data Management: They facilitate the management of large datasets by allowing users to isolate and work with relevant data segments, reducing processing time and improving system performance.
Benefits of Using Selection Layers
- Efficiency: By enabling users to work with subsets of data, selection layers significantly reduce processing time and resource consumption, especially when dealing with large datasets.
- Flexibility: Users can easily create, modify, or discard selection layers to suit their evolving analysis needs, offering tremendous flexibility in GIS operations.
- Accuracy: Focusing on specific data subsets can improve the accuracy of geospatial analyses by eliminating irrelevant data and reducing the likelihood of errors.
Best Practices for Using Selection Layers
To maximize the benefits of selection layers, consider the following best practices:
- Clear Definition of Selection Criteria: Ensure that the criteria used for selecting features are well-defined and aligned with the objectives of your analysis.
- Regular Updates: Keep selection layers updated to reflect any changes in the underlying data or analysis requirements.
- Organized Layer Management: Maintain an organized structure in the Contents pane by naming selection layers clearly and grouping related layers, which facilitates easier navigation and management.
Conclusion
Selection layers in ArcGIS Pro offer a dynamic and efficient way to enhance geospatial analysis and data management. By allowing users to isolate and focus on specific subsets of data, these layers not only streamline GIS operations but also improve the accuracy and impact of analyses and map products. Whether you are managing vast datasets, conducting detailed geospatial analyses, or producing targeted map visualizations, integrating selection layers into your ArcGIS Pro workflows can significantly enhance your GIS projects’ effectiveness and efficiency.
Learn More
Learn more about selection sets and selection layers in our Mastering ArcGIS Pro 3: Maps, Layers, Projects, and Layouts class.
