Introduction: Why Security in ArcGIS Online Matters
ArcGIS Online (AGO) is a powerful cloud-based platform for managing and sharing GIS data, maps, and applications. While its ease of use and collaborative features make it popular among organizations, it also comes with security risks if not properly configured. Many organizations unknowingly leave their ArcGIS Online environments vulnerable, either by using weak security settings or overlooking critical security options. This guide will help you optimize security in ArcGIS Online by covering essential but often overlooked settings.
Section 1: User Authentication and Access Control
User authentication and access control are the foundation of a secure ArcGIS Online environment. By enforcing strong authentication measures and carefully controlling user permissions, you can significantly reduce the risk of unauthorized access and data breaches.
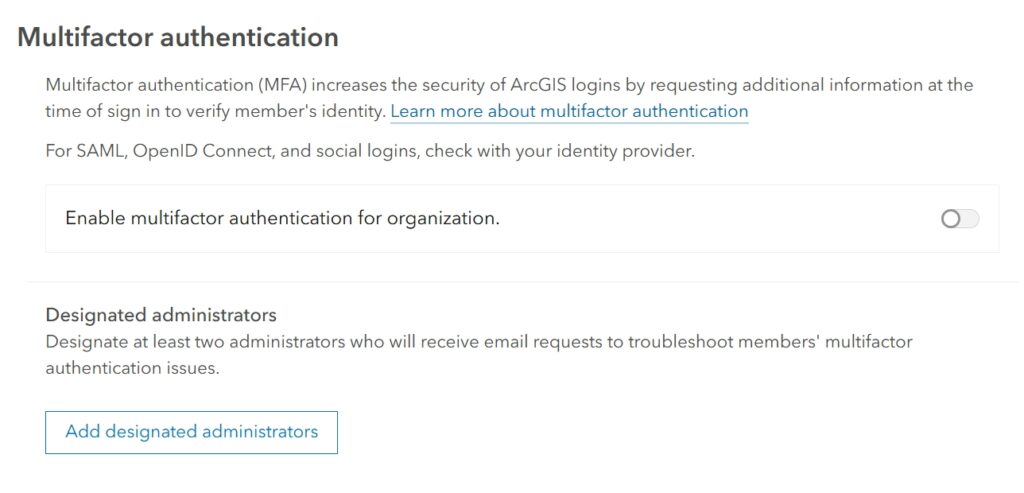
Two-Factor Authentication (2FA)
Two-Factor Authentication adds an extra layer of security by requiring users to provide a second form of verification beyond their password. This is essential to protect accounts from unauthorized access, especially for administrators.
- Where to Enable 2FA:
- Go to your ArcGIS Online organization settings.
- Under ‘Security’, enable ‘Multi-Factor Authentication’ for all users or specific groups.
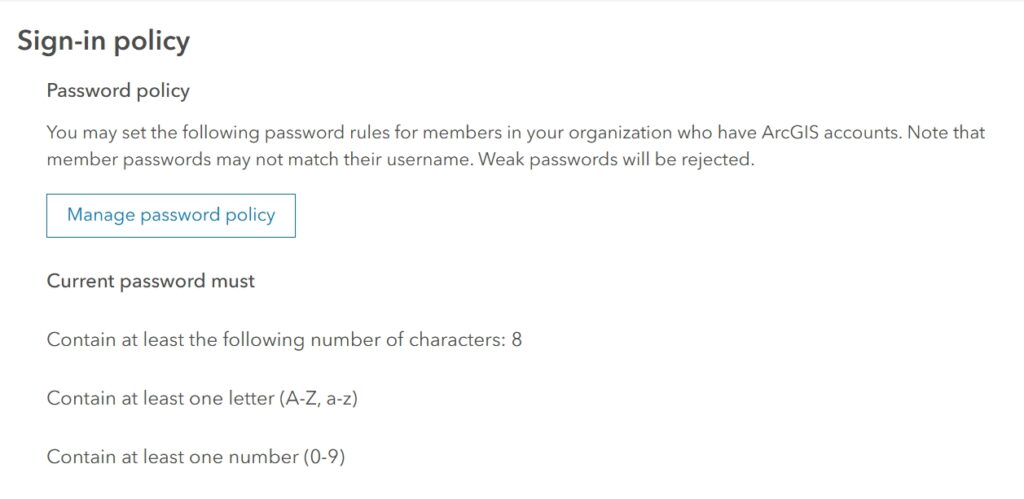
Strong Password Policies
Passwords are your first line of defense. Ensure that users have strong, complex passwords that are regularly updated.
- Where to Set Password Policies:
- In Organization settings, go to ‘Security’.
- Set password complexity requirements (length, character types).
Role-Based Access Control
Default roles (User, Publisher, Administrator) may not suit every organization. Custom roles provide better access management.
- Where to Create Custom Roles:
- Go to ‘Organization > Roles’.
- Click ‘Create Role’, and configure permissions based on user responsibilities.
Section 2: Content Sharing Restrictions
Managing how your content is shared is critical for maintaining control over your data. ArcGIS Online offers various sharing options, but improper configurations can lead to unintended exposure of sensitive information.
Understanding Sharing Levels
ArcGIS Online offers multiple sharing levels:
- Private (Owner Only): Only the owner can view and edit.
- Group: Shared with specific groups of users.
- Organization: Visible to all members of your organization.
- Public: Visible to anyone, even without a login.
- Best Practice: Default to ‘Organization’ sharing instead of ‘Public’ for sensitive data.
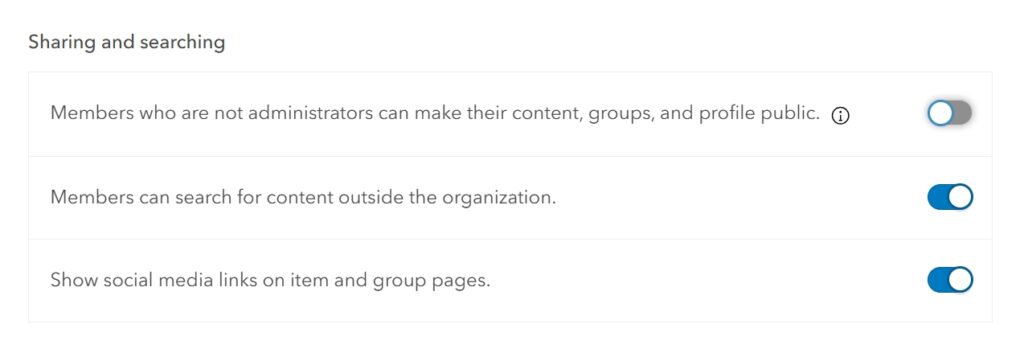
Restricting Public Sharing
Public sharing can expose sensitive information if not managed carefully.
- Where to Restrict Public Sharing:
- In ‘Organization > Security’, restrict who can share content publicly.
Secure Collaboration with Groups
Groups are a secure way to manage who has access to specific content.
- Where to Create Secure Groups:
- Use ‘Invitation Only’ or ‘Organization Only’ group settings.
Section 3: Configuring Secure Service Settings
Ensuring that your services are securely configured can prevent unauthorized access, data loss, or data manipulation. This section focuses on managing permissions for your hosted services to maintain data integrity.
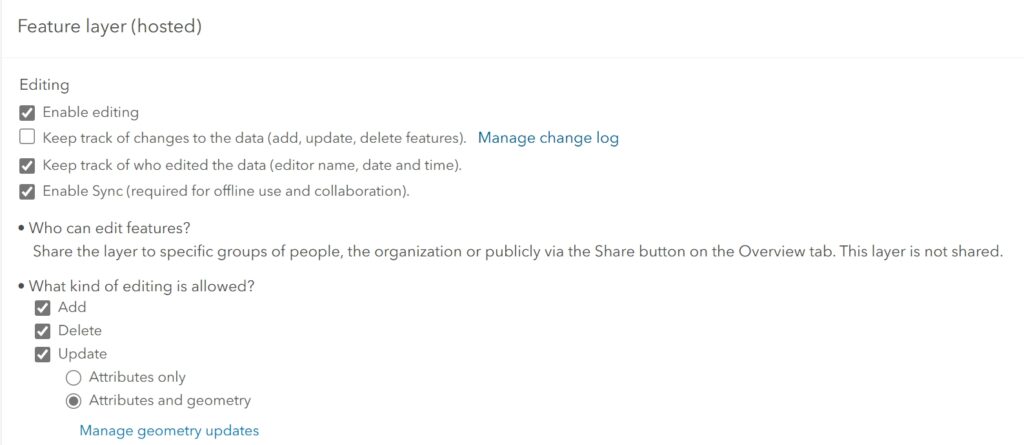
Controlling Feature Service Editing
Not all users should have editing rights on feature services.
- Where to Restrict Editing:
- Go to the item’s ‘Settings’ tab.
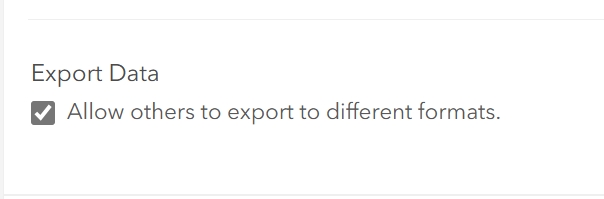
Limiting Export Options
Exporting data can pose a security risk.
- Where to Control Exporting:
- Under ‘Settings’ for a hosted layer, disable ‘Allow others to export to different formats’.
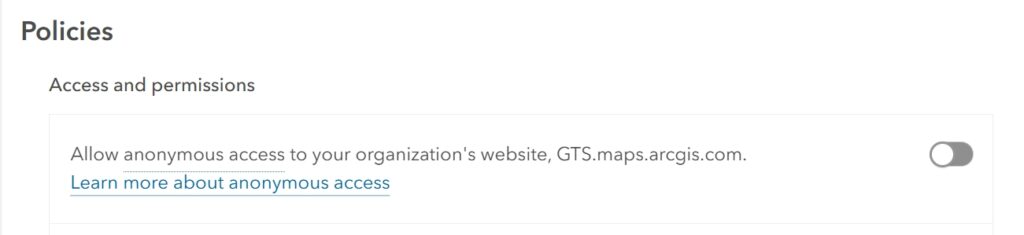
Disabling Anonymous Access
Anonymous access can expose your content to the public without authentication.
- Where to Disable Anonymous Access:
- Go to ‘Organization > Security’.
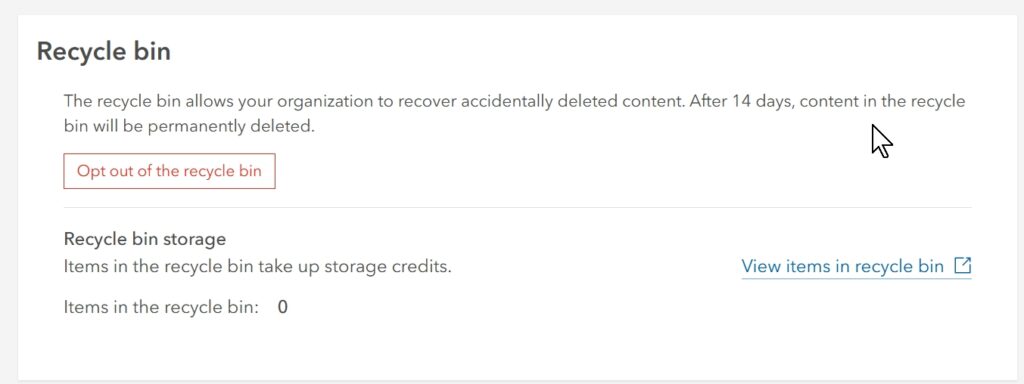
Enabling the Recycle Bin
Accidental deletions can happen, but the Recycle Bin allows you to recover deleted items for a limited time.
- Where to Enable the Recycle Bin:
- Go to ‘Organization > Settings > General’.
- Ensure that ‘Enable Recycle Bin’ is turned on.
- Best Practices: Regularly review the Recycle Bin to ensure that no sensitive content is retained longer than necessary.