
Label classes are used to restrict labels based on certain features or to specify field, symbols, sale ranges, and other options for groups of labels. They can be used to specify different label properties for features in the same layer. For example, for a street layer you might label interstates with a larger font size and different symbol than you would for surface streets.
Creating Label Classes
In this article you’ll learn how to create new label classes using the ArcGIS Pro interface. You’ll use the existing label class to label parcels with a market value of greater than $1,000,000, and we’ll also create a second label class for labeling parcels with market values less than $100,000.
You can follow along with this article but downloading the Parcel dataset used in this article and then adding it to a Map in an ArcGIS Pro project.
In the screenshot below you see an ArcGIS Pro map with a layer called Parcels and a basemap.
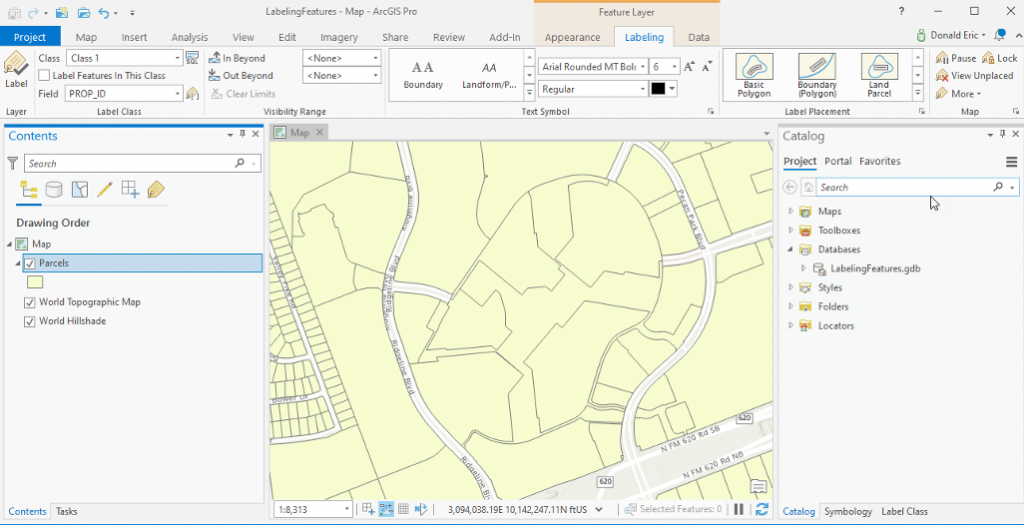
Select the Parcels layer by clicking it in the Contents pane. This will enable the Feature Layer context menu.
Click the Labeling tab.
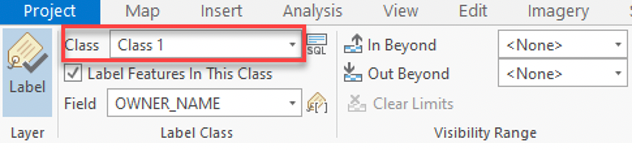
Each layer has a default label class called Class 1. You can see this in the screenshot below.
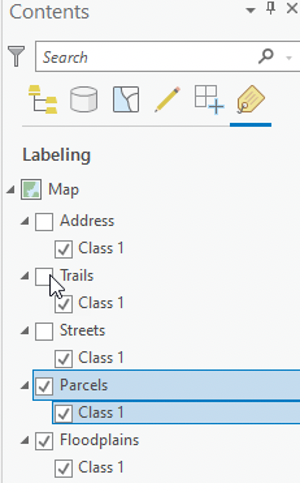
The Label Class can also be seen in the Contents pane under List by Labeling. The check boxes associated with the label classes are used to turn labels on and off. Labeling also needs to be enabled for the layer by clicking the Label toggle button on the far-left hand side of the Labeling tab.
Right click the Parcels layer in the Contents pane and select Labeling Properties to display the Label Class pane.
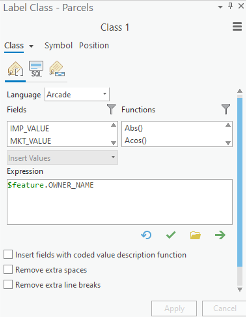
Add the ArcGIS Arcade expression you see in the screenshot below. By the way, you can get a good overview of the Arcade programming language and why you should learn how to use it by reading a previous article of mine.
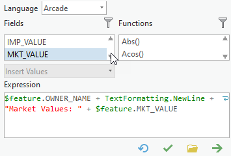
Validate the expression (green check mark), and if everything is looks fine, click the Apply button.
On the Label Class pane click the SQL button.
Click Create a New Expression and define the same expression as in the previous chapter: MKT_VALUE greater than or equal to $1,000,000.
Click the Apply button. This will ensure that only parcels with a market value greater than or equal to $1,000,000 will be labeled.
On the Position tab, click the Conflict resolution button and set the Minimum feature size to Area – 100,000 Map units.
Click the Fitting strategy button and open the Stack section. Set Horizontal alignment to Constrain center.
Scroll down and find Maximum number of lines and set it to 2.
On the Labeling tab set the font style to Bold.
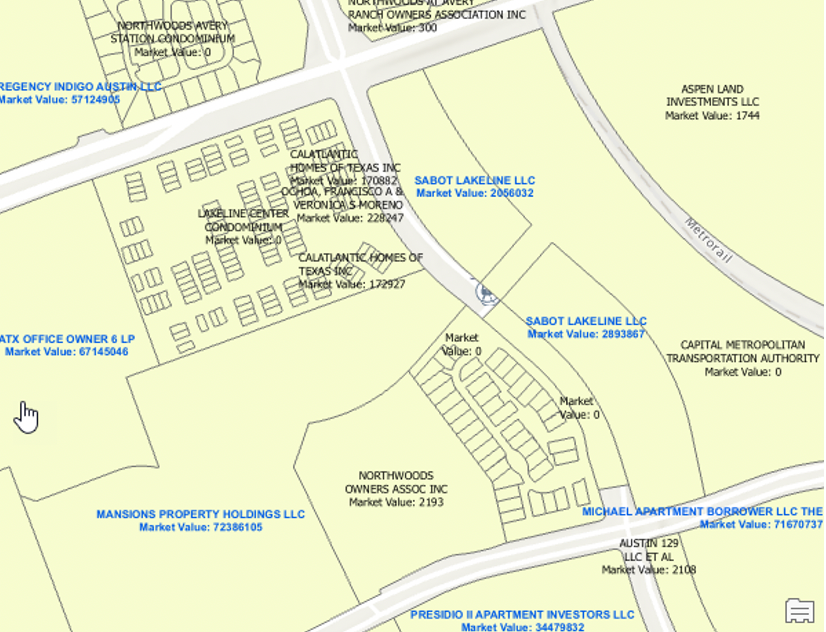
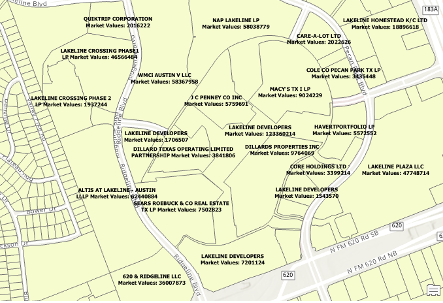
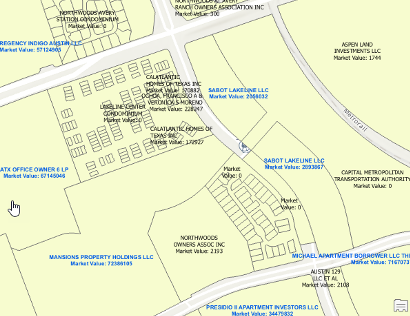
Your map and labels should now appear as seen below.
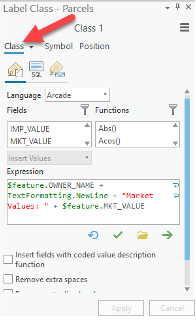
On the Label Class pane click Class (see below).
Click the menu (three horizontal bars) and then select Rename label class.
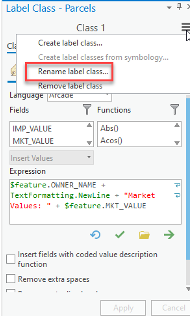
Name the Label Class: High Property Values.
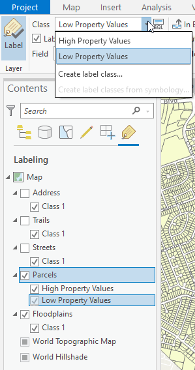
The new name should show up in the Label Class group on the Labeling tab as well as the Contents pane.
Next, we’ll create a new Label Class and define labels for lower value parcels. In the Label Class group pull down the dropdown menu for Class and select Create label class.
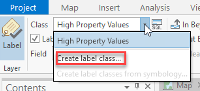
Give it a name of Low Property Values.
If necessary, open the Label Class pane for this new class.
With the skills you’ve learned in this class, define the new label class as follows:
Use the same Arcade label expression as the High Property Values class
Limit the labels for this class to only properties that have a market value of less than or equal to $100,000.
Set a visibility scale range of Out Beyond: 1:15,000
On the Position tab, click the Conflict resolution button and set the Minimum feature size to Area – 100,000 Map units.
Use the same stacking settings as High Property Values
Use a different color for the font
You should now have two Label Classes that can be turned on/off as needed. Both can be on at the same time if you’d like or you can turn them on and off to suit your needs.
Below is an example:
Want to learn more about Labeling in ArcGIS Pro? Check out our new class, ArcGIS Pro Shorts Series – Labeling Features in ArcGIS Pro. This class is also part of our Annual GIS Training License and ArcGIS Pro Training Bundle.
