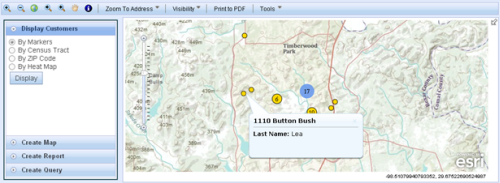
In this post I will describe how you can use a third party clustering tool in your AGIS JavaScript API applications. Clustering is an excellent technique for visualizing lots of point data. We’ve all seen applications where there were so many points that they simply appear as one big blob. Clustering takes the individual points and groups them into clusters and then renders the cluster as one graphic.
Those of you using either the AGIS API for Flex or Silverlight have easy access to clustering functionality built into the APIs. However, this hasn’t yet been done for the JavaScript API. Fortunately, globoserve was provided with the clustering algorithm from ESRI and created a sub-classed GraphicsLayer to provide a third party adding clustering to your applications. You can get additional information, see a demonstration, and download the Javascript files here.
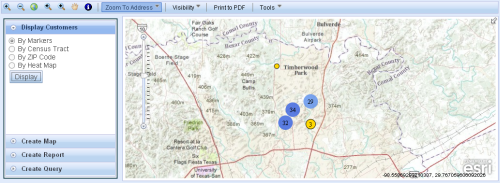
I downloaded the JavaScript files and incorporated them into a simple application that displays retail customer data as points on the map. In the first figure I have displayed all the customer locations as points on a map. This results in a somewhat cluttered display of markers.
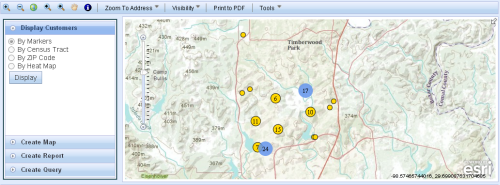
Next I applied clustering to the customer points which resulted in a much more appealing display.
The clustering algorithm automatically creates the clusters and then re-creates the clusters as you zoom in.
Let’s spend a little time discussing how you can easily integrate clustering in your application. Here are the basic steps.
The first thing you’ll want to do is download the JavaScript files that you’ll need. You can get them here. There are three files in the download. The first, Ext.util.DelayedTask-nsRemoved.js is a copy of ExtJsDelayedTask class with its namespace removed. There is not a whole lot to say about this file so I won’t. Globoserve discusses this file in a bit more detail. The second file, esri.ux.layers.ClusterLayer-debug.js does the work of creating the clusters. In this file, the esri.layers.GraphicsLayer class is extended to create a new class called esri.ux.layers.ClusterLayer. In your code you basically just create a new instance of ClusterLayer, pass in some parameters, and it does work of creating the clusters. There is also a “-min” version of this file which cuts down the size of the file for performance reasons.
Now that you’ve downloaded the files you can code your application to take advantage of the clustering. There are a couple requirements. First, the clustering algorithm uses the basemap’s tiling scheme for its “grid” which means you will need a tiled basemap. The WKID of the features being clustered should also be one of the following:
- Projected: 102100, 102113
- Geographic: 4326, 4269, 4267
- Or matching the WKID of the basemap
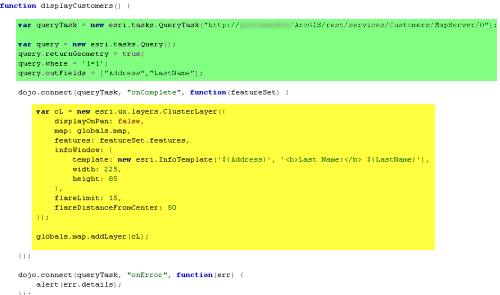
On to the code. I’ve created a displayCustomers() function which executes when the user clicks the Display button. Inside this function I first create a QueryTask object that points to my customer layer. This is a tiled map service. I also create a Query object and set several parameters. This Query object acts as input to the QueryTask object. Here we have defined parameters to return the geometry of the features, return all records (1=1) and specified that we’d like to return the Address and LastName fields. This is highlighted in green in the figure below.
Once the QueryTask has finished executing a featureSet is returned to the callback function which creates a new ClusterLayer object. Several parameters are supplied for the creation of this object.
- map – refers to an esri.Map objects from the AGIS API
- features – this is just a reference to the featureSet that was returned from the QueryTask execution
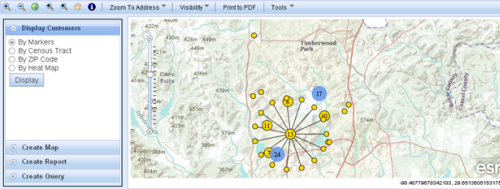
- infoWindow – configuration options for the infoWindow that will appear when you hover over each individual graphic point. You can see an example of this below.
- flareLimit – the number of “flare graphics” that can appear around a cluster (default is 20)
- flareDistanceFromCenter – the distance in pixels that the flare graphics appear from the center of their cluster.
From there we simply call Map.addLayer passing in our new instance of the ClusterLayer object. That’s pretty much all there is to it. I’ve included some screenshots below to show the flaring and infoWindows. Once again, thanks to Adam at globoserve for creating this really useful functionality that many of you will no doubt use in your applications.


