

In this tutorial, you’ll learn how to combine multiple datasets into a new one using the Merge tool.
In an earlier tutorial, you learned how to use the Append tool to add new data to an existing dataset. This would change the existing dataset, as new records would be added to the attribute table. If you don’t want to change the original dataset, but combine various, existing datasets a new dataset, you can use the Merge tool, which is found in the Data Management toolset subfolder named “General”. The Append tool is also found here. We’ll now use the same two shapefiles as used earlier for the Append tool, but now merge them to a new feature class.
STEP 1: Download the dataset
Open Pro and create a new project using a map template. We’ll be using the Natural Earth quick start kit dataset again, that can be downloaded here. Make sure you start with a clean, unused dataset that has not been edited or changed before. Add a folder connection by clicking on the folder icon in the Catalog pane and choose the data folder with the downloaded dataset. You are now able to add data directly from this dataset to the map window, which is what we’ll do next.
STEP 2: Load and inspect the data
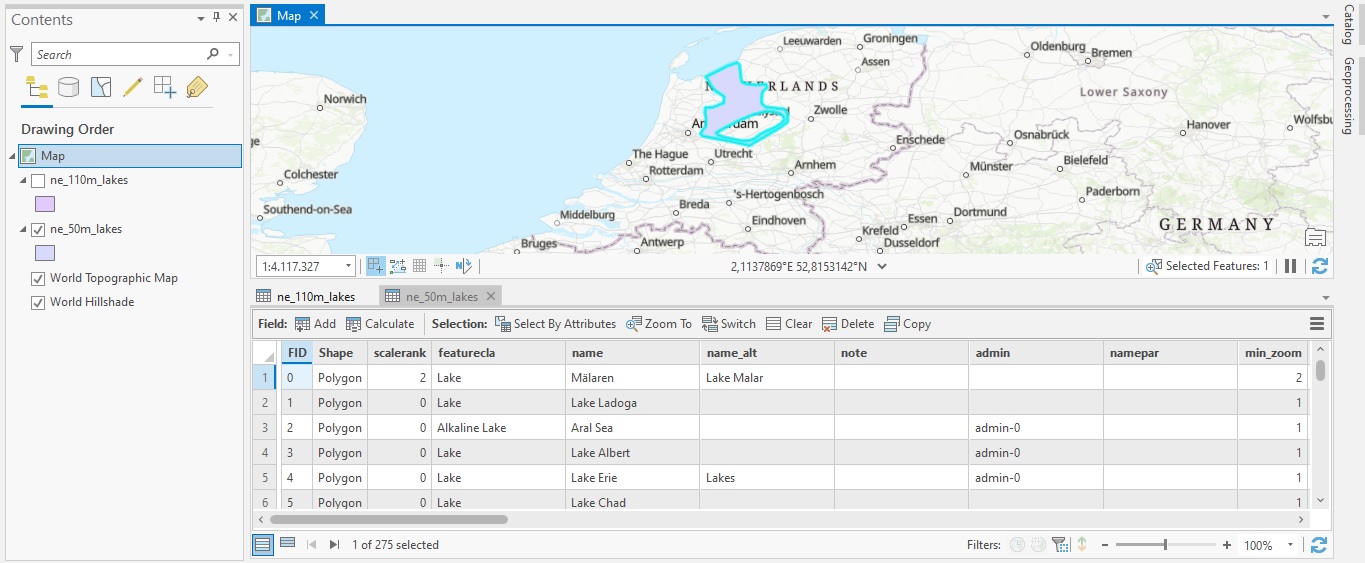
We’ll be again using two different shapefiles that both contain lake polygon features. Add the following two shapefiles to the table of contents by dragging each file from the Catalog pane to the map window: ne_50m_lakes.shp (found in the 50m_physical subfolder) and ne_110m_lakes.shp (found in the 110m_physical subfolder). Next, open up both associated attribute tables and notice the total amount of features (rows) for each shapefile: ne_50m_lakes.shp has a total of 275 features, while ne_110m_lakes.shp has only 25 features.
We will again select a single feature from the larger dataset and merge it with the smaller dataset, which will result in a new feature class with 26 features. The two input shapefiles will be unchanged: neither the geometries of the individual features nor the attribute table will be changed. The new feature class is added to the map automatically and placed on top of the input feature classes.
STEP 3: Select a single feature from the ne_50m_lakes.shp file to be merged with the other file For convenience sake, we’ll select the lake feature in The Netherlands, that was also used in the tutorial that covered the Append tool. Make sure you have the ne_50m_lakes.shp file active in the table of contents, and select the lake feature in The Netherlands by drawing a rectangle or any other shape of your choice on the map. This is done by selecting “Map” in the ribbon interface and clicking the drop-down menu under “Select” in the Selection menu. You should see the following image:
STEP 4: Use the Merge tool to merge the selected feature with an existing feature class
With the single lake feature selected, we can now merge it with the ne_110m_lakes.shp file using the Merge tool. Find the Merge tool by clicking “Analysis” on the ribbon interface, then click “Tools” and search for the Merge tool using the search toolbar. The first search result should be the Merge (Data Management) tool, which is the one we’re looking for. Double-click the tool name and the tool parameters menu opens.
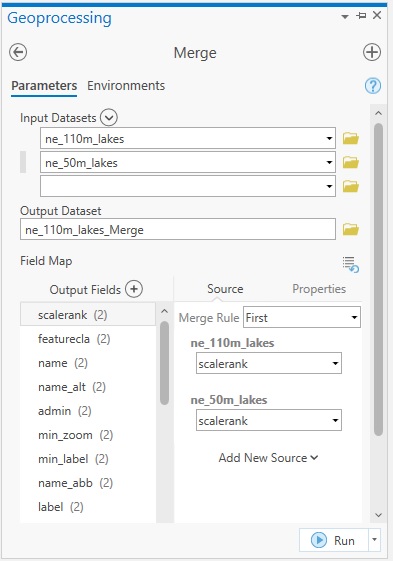
You should enter the two feature classes as input datasets. The order of both files does not matter for this example, but it’s good to know that the output type is determined by the first input in case you are using two different input datasets, such as a table and a feature class. Here, we are using two feature classes (or shapefiles), so the order is not relevant for the output data type.
However, remember from the Append tutorial that the field map schemas (the different column names and order) were different for both files, with the ne_50m_lakes.shp containing extra fields that are not present in the ne_110m_lakes.shp file. If we first select the ne_110m_lakes.shp file in the Input Datasets tool parameter, the Merge tool output should be using this field map schema as a guide. We’ll verify that next. Make sure the tool parameters match the following image and click “Run”:
STEP 5: Inspect the attribute table of the Merge tool output feature class
A new feature class is added to the map and table of contents named “ne_110m_lakes_Merge”. Open the attribute table and notice that the total amount of features is 26, which is what we expected. Also check that the original two shapefiles are unmodified and still have 25 and 275 features, respectively. The field map schema of the newly created feature class is similar to that of the ne_110m_lakes.shp file, which is the file we entered first in the Merge input dataset tool parameter. Notice that in this tutorial we did the exact same thing as in the Append tool tutorial, but instead of modifying the source data, the Merge tool creates a new output dataset and leaves the original data intact.
